- Resetting the CMOS removes the password and returns the BIOS to factory settings.
- Clear CMOS button or jumper simplify the process depending on the board.
- Flashing can help, but it doesn't always allow you to bypass the key.
- Consider whether you need that password and keep your keys safe.
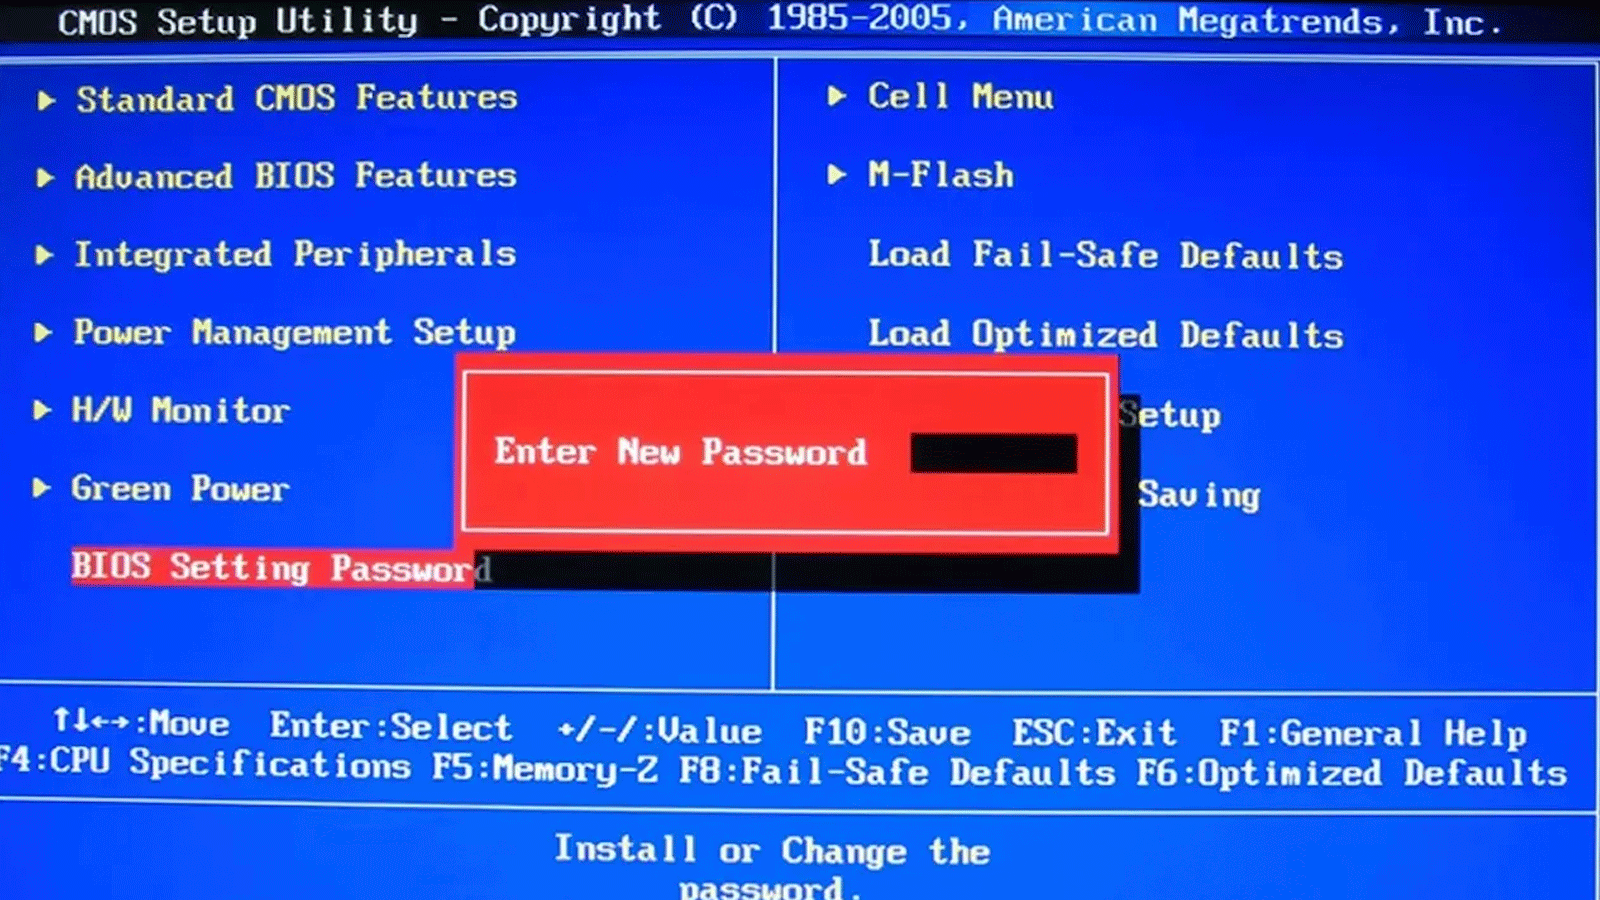
If you've forgotten your access key and your computer won't let you touch anything, you're not alone: restoring or removing the BIOS password is a more common problem than it seems, and luckily, there are effective methods to regain control without going crazy.
In this guide, we review in detail all the options that appear in the analyzed sources: from removing the CMOS battery to using the Clear CMOS button or jumper , including flashing the firmware and some special cases depending on the brand and model. We also explain when it makes sense to use a BIOS password and what best practices to follow to avoid getting locked out again.
Why put a password on the BIOS?
Most users never bother to protect the BIOS, partly because they hardly ever access it and think the PC is for their exclusive use; even so, blocking access to the boot and configuration menus adds a layer of security to prevent unauthorized changes.
In shared or work environments, it makes particular sense; if several people use the same equipment or there is a risk of tampering, a password prevents touching critical parameters such as the boot order, secure boot, or the deactivation of security controls.
In laptops, this becomes even more important: as these devices are moved around, the risk of loss or theft is real, and therefore, protecting the BIOS makes unauthorized booting more difficult and limits attempts to disable protection mechanisms.
However, since the BIOS is rarely accessed, it's easy to forget the password over time. The good news is that there are procedures to restore the BIOS to factory settings and, therefore, remove the password when you've forgotten it.
Before you start: precautions and scope
Opening the computer and handling the motherboard is not a game: disconnect the power, discharge any residual electricity, and proceed calmly . Some methods reset the entire configuration, meaning you'll lose boot settings, XMP/EXPO profiles, device priorities, and more.
According to the manufacturer, some parts of the process may vary. Some motherboards have a physical Clear CMOS button accessible from the rear panel, others require an internal jumper with specific positions , and in certain models, flashing the firmware may require you to enter your current password.
If your laptop is under warranty or you're not comfortable opening it, it's best to contact official technical support. In any case, proceed at your own risk , and if you have any doubts, consult your motherboard manual or your manufacturer's support website.
How to enter the BIOS if you forgot your password
The methods described are those found in the consulted sources. They begin with the classic "clearing the CMOS" and continue with alternatives such as flashing the BIOS . The goal is to force a factory reset so that the password disappears.
Remove the CMOS battery
The motherboard's coin cell battery maintains the system time and BIOS settings when the computer is turned off; removing it erases the stored configuration and, with it, usually the password.
The steps that are repeatedly emphasized are: turn off the device, unplug it from the power outlet, and wait a few minutes for any residual electricity to discharge; then, locate the CMOS battery (coin-type) and carefully remove it using your fingernail or a non-conductive tool; the guides suggest different waiting times after removal: from 30–40 seconds to 20–30 minutes with the device unplugged and without the battery. This extra time ensures that the circuit completely loses its configuration.
Once the time has elapsed, replace the battery in its socket, connect the computer, and start it up. If everything goes well, the BIOS will have returned to its default settings and will no longer request the password. Keep in mind that any other manual settings you had saved will also be lost.
Physical Clear CMOS button
Many modern motherboards include a Clear CMOS button accessible from the rear panel or inside the case. Its function is the same as removing the battery, but in a more controlled manner and, in some models, without opening the case.
The typical procedure: with the PC turned off and connected to the power supply (following the instructions in the manual), hold down the button for the time indicated by the manufacturer, for example, about 10 seconds; when you turn it on again, the BIOS starts with the factory values and the key is removed.
This system simplifies the process, but it has one obvious drawback: if the button is visible and someone with malicious intent presses it, it can reset your settings . It's not common, but it's good to be aware of.
Clear CMOS via jumper
If your motherboard doesn't have a button, you'll see a two- or three-pin jumper labeled "CLR_CMOS," "CLRMOS," or similar. Changing its position forces the CMOS to be cleared: turn off and unplug the PC, move the jumper , and turn it on to erase the configuration.
On three-pin motherboards, you'll often find a diagram printed next to the connector with something like "1-2 Normal" and "2-3 Clear CMOS." This tells you which pins to leave the jumper on to clear the CMOS and where to put it back afterward. If you're unsure, consult the manufacturer's manual before making any changes.
This method is also useful if the CMOS battery is dead and not saving the time or settings. In that case, in addition to replacing the battery, it's advisable to force a CMOS Clear and check that the settings are saved again.
Flash the BIOS (update the firmware)
In some models, updating the BIOS to a newer version resets the configuration and therefore removes the password . However, some manufacturers require you to enter the current password to authorize the flashing process, so the method won't work if you don't remember it.
If your motherboard allows updating without entering the key (via utilities like USB BIOS Flashback or built-in update tools), the operation may restore control; however, flashing carries more risk than a simple Clear CMOS, so proceed with caution and follow the manufacturer's instructions to the letter.
Cases, brands and particularities
In practice, each brand has its own specific steps. The sources analyzed include real-world cases and lists of affected products, along with guides and advisories. For example, some users report being locked out after setting both user and administrator passwords on gaming PCs, such as an Asus ROG Strix G15 , where the BIOS stopped allowing access despite knowing both passwords.
In these cases, the advice found in independent support answers is to start with the basics: remove the CMOS battery and wait before reinstalling it. Some recommend 30–40 seconds, while other guides extend that wait to 20–30 minutes to ensure a complete erase; whichever timeframe you choose, remember that the result is the same: the BIOS resets to factory settings and all previous configurations are lost.
Extensive lists of families and ranges from manufacturers with specific documentation are also mentioned. In the case of Dell, for example, references to desktops, laptops and workstations appear: Alienware, Dell All-in-One, Dell Pro All-in-One, Dell Pro Max Micro, Dell Pro Max Slim, Dell Pro Max Tower, Dell Pro Micro, Dell Pro Slim, Dell Pro Tower, Dell Slim, Dell Tower, Inspiron, Legacy Desktop Models, OptiPlex, Vostro, XPS, G Series, G Series, Alienware, Dell Laptops, Dell Plus, Dell Pro, Dell Pro Max, Dell Pro Plus, Dell Pro Premium, Inspiron, Latitude, Dell Pro Rugged, Vostro, XPS, Legacy Laptop Models, XPS Tablets, Fixed Workstations, Mobile Workstations, Dell Pro Max Micro MA16250, Dell Pro Max 16 Plus MB16250, Dell Pro Max 18 Plus MB18250, Dell Pro Max 16 XE MC16250, Dell Pro Micro Plus XE QBM1250, Dell Pro Slim Plus XE5 QBS1250, Dell Pro Tower Plus XE5 QBT1250 , among others. This type of listing indicates that the unlocking procedures or support documentation cover a huge range of products.
Another striking point highlighted by the sources is a laboratory technique applied to older laptops: in models such as the Lenovo ThinkPad L440 and X230 , researchers have managed to bypass the password by short-circuiting pins of the EEPROM chip (SCL and SDA lines) with a screwdriver, at a specific moment during startup.
This method is not a recommended tutorial for users, but it demonstrates that, on older hardware, there are ways to regain firmware access to disable the password and reuse the device . If you delve deeper into this, extreme caution is advised, and as always, each model uses different chips and requires identifying specific pins and part numbers.
Should you keep the password in the BIOS?
Having seen that it's possible to delete the password, it's worth considering whether it's truly worth keeping it. On devices susceptible to loss or theft, especially laptops, a BIOS password hinders malicious changes and adds friction for anyone attempting to boot from external media.
That said, consider equally effective alternatives that may be more convenient and modern: strengthen the operating system's security, use accounts with strong authentication and encryption , and rely on password managers and cloud services to safeguard your keys.
The BIOS password was introduced decades ago and isn't always the most effective measure for the comprehensive protection we need today. If you decide to enable it, avoid relying on your memory: store the password in a secure location (digital and/or physical) so you don't have to lose all your settings if you forget it.
Frequently asked questions and situations
Will I lose all my settings if I clear the CMOS? Yes: that's the purpose of the process. Therefore, if you had fan settings, memory profiles, or boot priorities configured, you'll need to reconfigure them on the first boot after the reset.
How long should I leave the battery out? Recommendations vary: some say 30–40 seconds is enough, while others prefer to wait 20–30 minutes to ensure it's erased. If your board takes a while to lose its charge, a longer interval usually works better.
Does the Clear CMOS button work the same as removing the battery? Essentially, yes. The advantage is that you don't have to open the case on motherboards that have it on the back panel. Even so, always follow the manual: not all motherboards reset using the same procedure.
Can I flash the BIOS without the password? It depends on the manufacturer and model. In some cases, the process will require the password ; in others, you can use specific methods (such as USB BIOS Flashback) that don't require it and also restore default values.
Is the EEPROM trick with a screwdriver a good idea? Not for the average user. It's a lab technique used on specific, older laptops; if done incorrectly, you can irreversibly damage the motherboard . If you're interested, consult specialized technical sources and be prepared to take the risk.
Detailed procedure guide
Before touching anything: turn off the device, unplug the power cord, wait a few minutes, and press the power button for a few seconds to discharge any residual electricity . If it's a laptop, also remove the removable battery if your model allows it (this isn't possible on many current models).
Remove the CMOS battery: Locate it on the motherboard (it's usually in a visible coin-shaped socket). Carefully press the metal tab and remove the battery without forcing it; wait as long as you like (from 30–40 seconds to 20–30 minutes ), reinsert it respecting the polarity, and, when starting up, enter the BIOS to load default values if prompted and adjust the basic settings (time, boot, etc.).
Clear CMOS button: Locate the button on the back panel or motherboard. With the device powered off and connected, press and hold the button for the time specified in the manual (e.g., 10 seconds ). When powered on, verify that it no longer prompts for a password and reset the settings as desired.
Clear CMOS Jumper: Locate the "CLR_CMOS/CLRMOS" connector. If it has two pins, remove the jumper for a few seconds and replace it; if it has three pins, move the jumper from the normal position (1-2) to the clear position (2-3), wait the indicated time, and return it to 1-2. Power on to complete the reset.
BIOS Flashing: Download the correct BIOS version for your motherboard from the manufacturer's website, prepare it on a USB drive if required by the tool (check your PC's port types ), and follow the official procedure. If it asks for the password and you don't have it, check if your model supports unauthenticated flashing methods (such as BIOS Flashback) and read the specific guide before starting.
Typical mistakes to avoid
Not documenting your settings: Before clearing the CMOS, take photos or write down the key options (boot mode, RAID/AHCI, disk order). This will save you hours when rebuilding the configuration later.
Forcing components: The battery sockets and jumpers are not designed to be pulled roughly. Use appropriate tools and avoid accidentally short-circuiting anything.
Ignoring the manual: every motherboard and laptop has its own specific requirements. A five-minute glance at the official guide will save you from incorrect procedures that accomplish nothing or, worse, cause damage.
Neglecting physical security: If you leave a Clear CMOS button or the inside of the tower easily accessible, anyone can erase your settings. Secure physical access if the integrity of your equipment matters in your environment.
When to seek professional help
If the equipment is critical to your work, is under warranty, or you simply can't afford any failures, the sensible thing to do is contact official support. For cases involving disk encryption, corporate policies, or firmware with additional restrictions , an authorized service center will prevent headaches and compliance issues.
Similarly, if you're drawn to low-level research (EEPROM, I2C buses, etc.), consider practicing on test hardware. The techniques shown on older models are useful for learning, but there are no guarantees of success and the risk is high.
Unlocking the BIOS involves resetting it to factory settings: removing the CMOS battery , using the Clear CMOS button or jumper, and, in certain models, flashing the firmware are the most common methods; it's advisable to first decide if the password really provides any value to you today, write down your settings, and safeguard your keys so you don't find yourself in the same predicament again.
