- Centralizing ROMs and data on a NAS allows convenient access from multiple devices and improves security compared to loose external drives.
- Separating the disk by topic, importance, and use helps decide what goes on each volume or disk, reducing wear and tear and facilitating backups.
- Configuring RAID and mapping NAS folders as network drives makes emulators and ROM managers work as if everything were local.
- A well-configured NAS can also act as a private teamwork cloud, automatically synchronizing projects and collections.
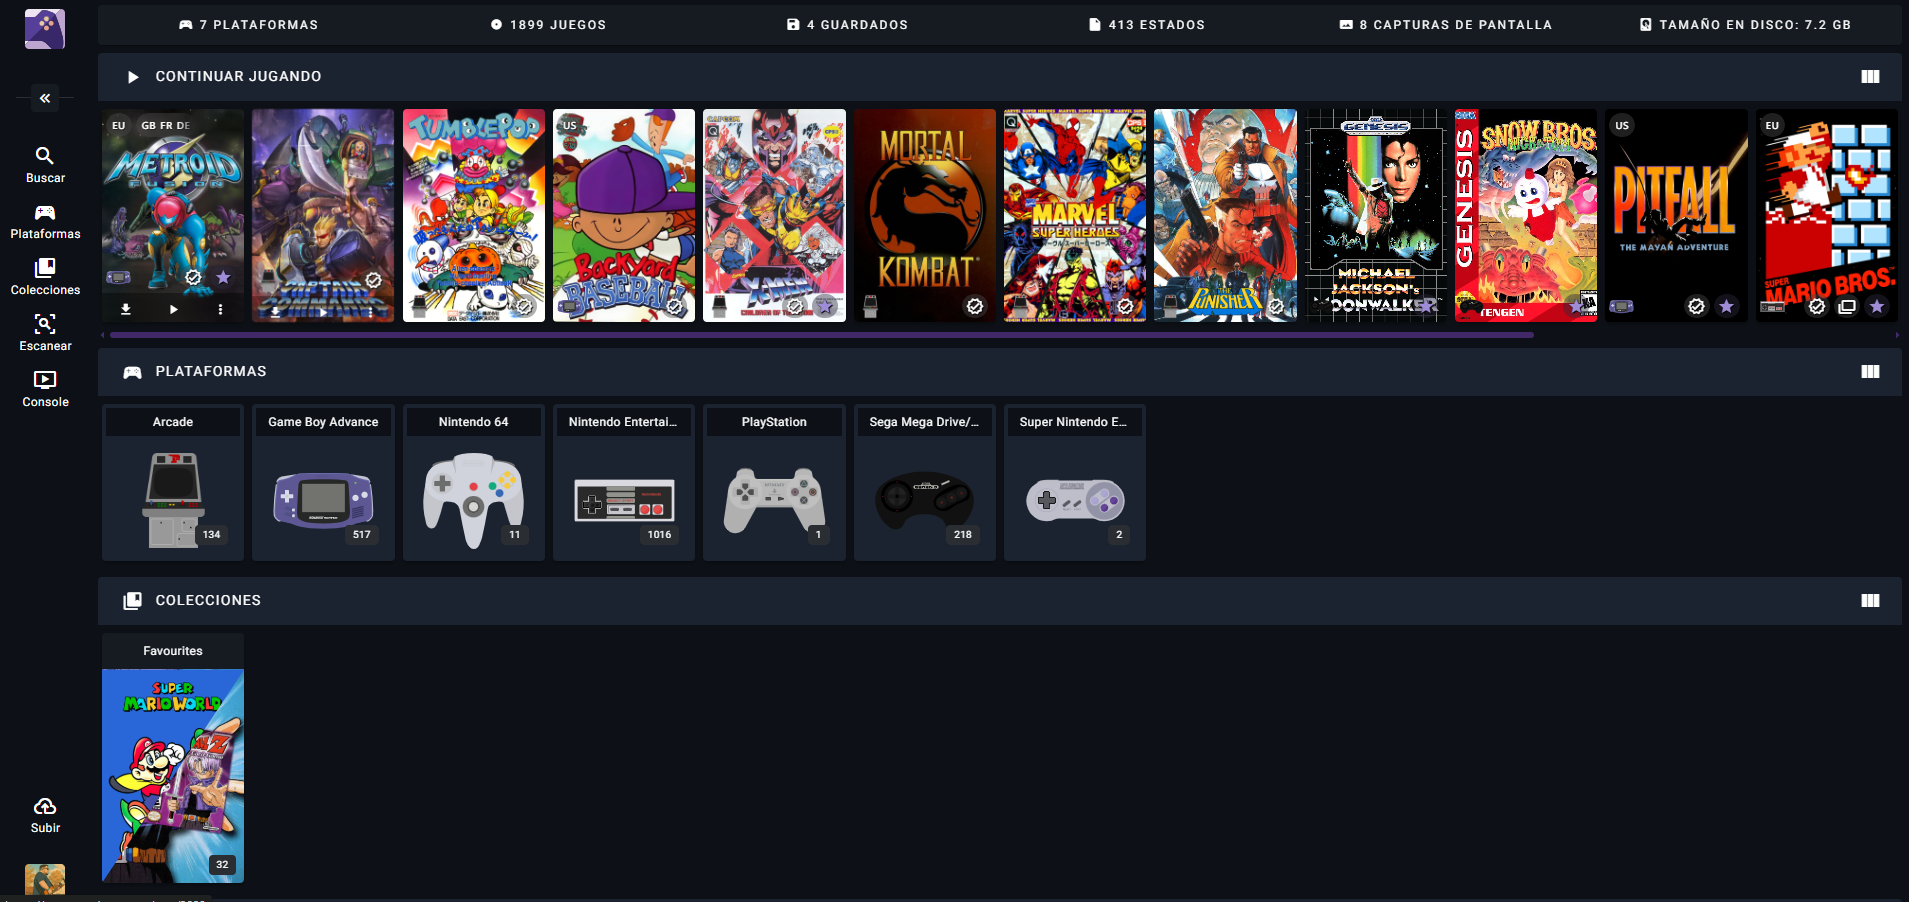
If you've set out to build the ultimate retro ROM collection on a NAS to play from your living room or any other device at home, it's normal to feel a little lost at first. Between EmuDeck, Steam ROM Manager, SMB, RAID, backups, and terminology like "No-Intro," it seems like you need a degree to understand it all.
The good news is that, with minimal planning, you can have a very convenient system where all your ROMs are organized, secure, and accessible from your mini PC, your Steam Deck, or any other device on the network. In this article, we'll put several pieces together: how to use a NAS, how to organize folders, what type of RAID (or lack thereof) is right for you, how to map drives in Windows, and how all of this fits into managing ROMs and retro collections.
What is a NAS and why is it such a good idea for your ROMs?
A NAS (Network Attached Storage) is essentially a mini-computer designed almost exclusively for storage . It's not just an external hard drive: it runs its own operating system, connects to your local network via cable, and lets you create your own "private cloud" at home to access your files from any device.
For a large collection of ROMs, a NAS is perfect because it centralizes all the content in one place : your mini PC, your Steam Deck (via network), your laptop, or even other devices can read the ROMs from the same place, without having to duplicate them on each SD card.
Furthermore, many NAS devices allow you to configure RAID and fast read/write volumes , which is very useful if you want to work with large files (for example, entire collections of ISOs for systems like PS2 or GameCube, or even photo and video projects). And if you're also a content creator, it's useful for both your ROMs and your professional projects.
Another strong point is that a modern NAS offers options like automation, media servers, and remote access . That means you could, for example, use it as a movie/TV show server and, at the same time, as a ROM library for your living room emulator.
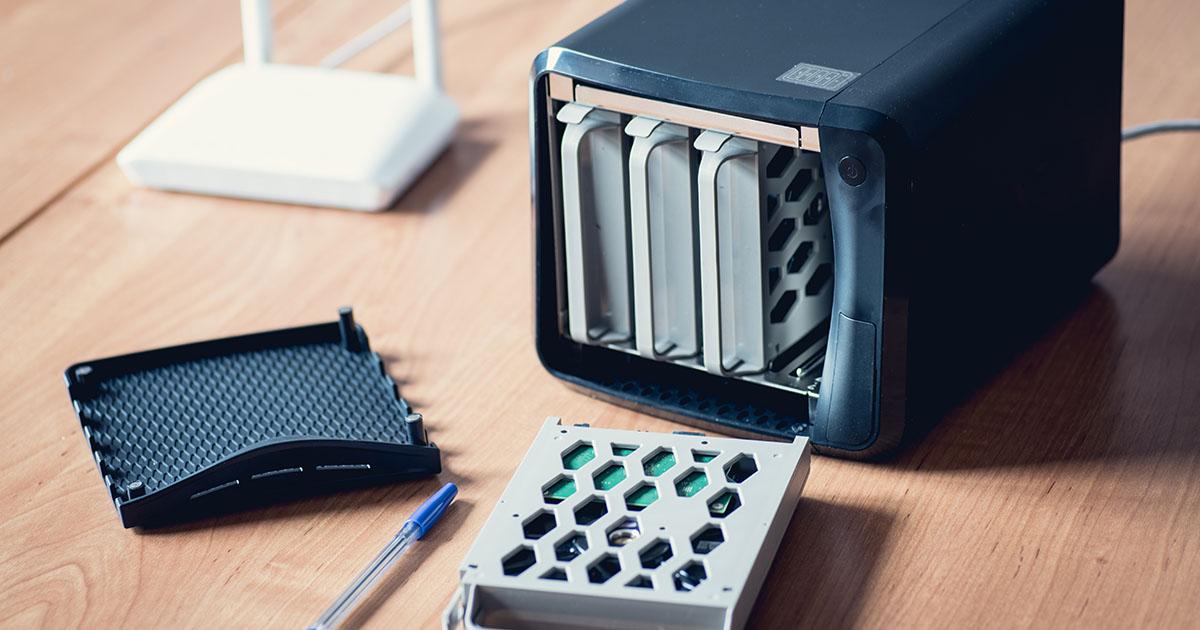
Choosing a NAS and drives: power, bays, and reliability
When buying a NAS for your ROMs, there's no single right answer, because it depends on your budget, the storage space you need, and the performance you're looking for . There are very simple two-bay models and much more powerful ones with 6, 8, or more bays, 10GbE ports, Thunderbolt, M.2 slots, and so on.
Brands like QNAP and Synology are common because they offer very complete ecosystems with user-friendly software . For example, some creators work with models like the QNAP TVS-672XT (6 bays) or the QNAP TS-832X (8 bays), combined with a 10Gb network to be able to edit directly on the NAS with virtually no noticeable difference compared to a local SSD.
Beyond the specific model, consider aspects such as the number of drive bays, 10GbE capability, RAID compatibility , and, if you're interested, future expansion. If your goal is to have a massive ROM collection (several terabytes), a NAS with 4 or more bays might be suitable, allowing for future growth without running out of storage in the first year.
Regarding hard drives, it's ideal to use HDDs specifically designed for NAS , as they are built to operate continuously for many hours over years. Typical examples include Seagate IronWolf and Western Digital Red, series geared towards 24/7 use and offering better reliability than standard desktop drives.
Keep in mind that the total capacity you'll need depends on your ROMs and other data : if in addition to games you're going to store photos, home videos or professional video projects, you'll probably want to go for larger drives (for example, 4 TB, 6 TB or more per bay).
Connecting the NAS to your network and your PC: speed and options
For playing ROMs stored on your NAS to be comfortable, it's crucial that the network connection isn't the bottleneck . If you're only going to use it for ROMs and regular files, a gigabit (1Gb) wired connection is usually sufficient, but if you also plan to edit large video files or work with huge files, you might want to upgrade to 10Gb.
The best way to get the most out of a modern NAS is to connect it via a high-quality Ethernet cable (such as Cat7) to your router, switch, or directly to your computer's 10Gb network card. Some NAS devices also allow direct Thunderbolt connection to a computer for extremely high speeds, but before you do, make sure your computer supports that type of connection.
If your PC doesn't have a built-in 10GbE port, you can add a 10Gb PCIe card (like the QXG-10G1T in the QNAP ecosystem) and connect it to the NAS via a compatible 10GbE switch. When configured correctly, you can achieve real-world speeds of 900-1000 MB/s, which is incredibly fast for real-time work.
With one or more NAS devices on your network, a 10GbE switch that allows you to connect multiple devices without speed limitations will be very useful . Models like the QNAP QSW-1208-8C are a good example: you can connect your NAS, your work PC, your living room mini PC, etc., and they can all see each other at high speed.
Another option is to use the router exclusively as a switch, which is possible but usually limits performance considerably because ISP-provided routers rarely offer 10GbE ports or even good sustained performance at 1Gb with many connections. If your usage is light and you don't need high speeds, this might work, but if you want something more robust, a dedicated switch is the serious option.
You also have the option of connecting the NAS directly to your computer via cable , without going through a router or switch, although in that scenario you lose the ability to create a private cloud accessible from outside the home, or to share the NAS with more devices simultaneously.
First steps in setting up the NAS
The initial setup of a NAS usually follows a fairly similar pattern, although each brand has its own wizard and utilities . Generally speaking, the basic setup involves installing at least one disk, turning on the NAS, and accessing its management interface through a web browser.
The first step is to insert one or more HDDs (or SSD/NVMe drives if your NAS supports it) into the bays, fitting them into the trays and sliding them into the chassis according to the manufacturer's instructions. Then connect the power cable, the network cable(s) to the router or switch, and turn on the NAS.
Once the device has finished booting, there are several ways to find its IP address within your local network . On some models (such as certain QNAP devices), you can press a button on the front panel to display the IP address on the screen. On others, you can use dedicated applications like QFinder (QNAP) or generic network scanning tools.
On macOS, apps like Discovery can help you detect the NAS. On Windows, it often appears directly in File Explorer under "Network." Once you locate the IP address (something like 192.168.1.13), enter it into your browser and follow the installation wizard provided by the manufacturer.
During the setup wizard, you can define things like the NAS name, administrator username and password, time zone , and, very importantly, the type of IP address it will use. To avoid future problems, it's recommended to configure a static IP address instead of an automatic one, so the NAS doesn't change its address every time you restart the network.
In this initial setup, the system typically prepares and formats the disks, installs the firmware (e.g., QTS on QNAP) , and gets it ready for you to start creating shared volumes and folders. From there, you can log in with your username and password to fine-tune the remaining settings.
RAID, volumes, and how it affects your ROMs
One of the key aspects of setting up a NAS is deciding whether to use RAID and what level you require . RAID (Redundant Array of Independent Disks) is simply the way the system combines multiple disks to form one or more logical volumes, with varying priorities between speed and security.
There are many RAID levels, but in typical home and creative scenarios, RAID 0, RAID 5, and RAID 6 are usually the most relevant . RAID 0 combines multiple disks, adding their capacity and significantly increasing speed, but without any redundancy: if one disk fails, you lose everything. RAID 5 distributes data and parity across multiple disks, allowing one to fail without data loss. RAID 6 can withstand the failure of two disks at the cost of using more parity space.
In the context of video, photos, or large ROM libraries, RAID 5 is a classic because it offers a good balance between security and performance : if you have 6 disks in RAID 5, the read is distributed among 5 of them (one stores the parity information), so you can achieve very high speeds, enough even to edit 8K RAW video if your network connection is up to it.
However, for content that puts constant strain on the disk, such as torrent or eMule download folders that spend all day reading and writing , using RAID can have an undesirable effect: instead of wearing out just one disk, you wear out all the disks that are part of the RAID.
Therefore, for those folders subjected to intensive use and whose content is not "irreplaceable" (for example, movies, music, downloadable ROMs, etc.) , many users prefer to place them on non-RAID disks, or at least separate them from the disks that hold truly critical data such as family photos or important documents.
When creating volumes, systems like QNAP let you choose between static volumes and "thick" volumes (or "thick volume") associated with a RAID array . If you're looking for maximum speed and simplicity on a single disk, a static volume is usually a good option; if you want RAID, you'll typically create a "thick volume" on the chosen set of disks and then define the shared folders from there.
How to organize folders and disks: ROMs, multimedia, and data
Before you start copying your collections, it's worth taking a moment to plan how you're going to organize your folders . Doing it right from the start will save you a lot of headaches later when searching for things, managing backups, and deciding what goes in a RAID array and what doesn't.
A good way to think about the structure is to create a three-tiered classification: by topic, by data importance, and by frequent use/access . From there, you assign each type of information to the disk or volume that best suits it.
In the classification by theme, you could separate it into large blocks such as:
- Multimedia: Video (movies and series), music, photos and home videos.
- Data and applications: documents (Word, Excel, PDF…), installers and portable apps.
- Downloads: torrents, eMule, generic downloads, temporary ROM packs.
Then, in the importance ranking, you divide what you really want to protect with intensive backup (family photos, home videos, personal documents, work projects) from what, although it hurts to lose, you could download or rebuild again with some effort (ROMs, movies, music, installers, etc.).
The third factor is the constant use or access of the disk. This includes torrent folders, eMule, and other downloads that are active and seeding almost all day . This type of usage puts a lot of strain on the disk compared to photos or documents that are only read occasionally.
If you have a NAS with two disks , a very sensible strategy is to allocate:
- Disco 1: everything that is used intensively and is not critical (video, music, downloads, general ROMs).
- Disco 2: everything that's really important (home photos and videos, documents, personal data), which you'll also back up on an external drive.
Following that logic , you could distribute it like this:
Disc 1: “Replaceable” multimedia, downloads and ROMs
This drive will be the one that's practically always awake because it contains torrents, movies, ROMs, and other frequently used content . It would make sense to place the following here:
- /volume1/video: movies, series, downloaded videos.
- /volume1/music: music collection.
- /volume1/Applications: downloaded apps, portables or installers that you want to keep.
- /volume1/Downloads: general folder for browser downloads, etc.
- /volume1/Downloads/Torrent and /volume1/Downloads/Emule: specific folders for download clients.
- /volume1/ROMs: Main ROM structure by system, if you decide that the general ROMs are not critical information.
Note that we've left out photos and home videos, as well as personal documents , which will go on the second hard drive for peace of mind and external backup.
Disc 2: Important data, personal photos and videos
The second drive is reserved for anything whose loss would be a tragedy: photographs, family videos, documents, work or study projects . You'll also plan to back up this drive to an external drive regularly.
The structure could look something like this:
- /volume2/photo: Home photos and videos (if you want, you can separate them into /photo and /video, but many apps like Photo Station or Plex already filter by file type).
- /volume2/Data: all your documents. Inside you could have a subfolder for each user (for example, /volume2/Data/Juan, /volume2/Data/Ana, etc.).
From a visual standpoint, in your file explorer you'll see the shared folders grouped by topic , even though physically some reside on one volume and others on another. The important thing is that this separation by disk allows the disk storing sensitive data to remain in hibernation most of the time, because it isn't subjected to the constant strain of torrents and downloads.
Map the NAS as a drive in Windows for your ROMs
To allow EmuDeck, Steam ROM Manager, or other launchers to see your ROMs on the NAS as if they were local folders within Windows , the easiest way is to map a folder on the NAS as a network drive (for example, the letter Z:).
In Windows 10 (and current versions) the process is quite simple. First, open File Explorer and go to "This PC" . In the top bar, you'll find an option that says "Map network drive" (or something similar depending on the version).
Clicking this opens a window where you can choose the drive letter you want to assign (for example, R: for ROMs ) and the network folder on the NAS you want to map, something like \\NAS-IP\ROMs or \\NAS\ROMs. If the folder doesn't appear directly in the list, you can click "Browse" and search the network until you find it.
When you select the folder, check the "Reconnect at login" option so that the drive is automatically mounted every time you start Windows, as long as the NAS is powered on. Finally, enter your NAS login credentials (username and password) and confirm.
From that moment on, the NAS folder appears as if it were just another internal drive (for example, R:\) . All the software on your PC—including emulators, launchers, ROM managers, and renaming tools—will be able to work with that path without worrying about whether it's actually on the network.
EmuDeck, Steam ROM Manager and network ROMs: what to keep in mind
If you use EmuDeck on devices like Steam Deck or SteamOS mini PCs, you might wonder if you can keep your ROMs on a NAS without copying them to the SD card . Technically, you can mount remote folders via SMB or NFS, but there are several practical nuances to consider.
On the one hand, Steam ROM Manager (the one used with EmuDeck to create shortcuts to games on Steam) usually works best with paths that the system sees as local . If in desktop mode you only see the network folder temporarily "mounted," Steam ROM Manager might not detect it the same way it would a folder in /home or on the SD card.
The typical solution involves mounting your NAS's SMB folder as if it were a local path in the file system (for example, in /run/media/user/ROMs or similar), either by editing the fstab file or using graphical tools to persistently mount network resources. Each distribution has its own nuances, but the idea is always the same: to make the NAS path appear as just another folder, without needing to navigate to it manually at every boot.
Another aspect to consider is the latency and performance of the connection . For ROMs of classic consoles (NES, SNES, Mega Drive, PSX, etc.), playing over a gigabit network from a NAS is usually more than enough, but for systems that use large ISOs or more intensive data streaming, an unstable network can make a difference. The more robust your cabling and your switch/router, the fewer problems you'll have.
Regarding whether ROMs "have to be stored locally" or not, the realistic answer is that it's not mandatory, but many configurations are designed assuming local storage . If you're new to Linux and SteamOS, you might find it easier to start with ROMs on an SD card and, once you get the hang of mounting network drives, migrate to a central library on the NAS.
Advanced ROM Organization: No-Intro, Regions, and Automation
Besides where you store your ROMs, how you organize and rename them is also important . If you want complete control over which games you have, which versions (regions), and which ones you're missing, many people rely on the No-Intro data structure.
No-Intro is a project that maintains highly accurate lists of "clean" and well-named ROMs by system and region . Using its DATs with ROM management tools (such as clrmamepro, Romulus, or similar), you can rename your collections, verify their integrity, and know exactly what you're missing or what you don't need.
Organizing your folders with the No-Intro naming convention allows you, for example, to have subfolders by system and region within your NAS's /ROMs folder: NES (EU), NES (USA), SNES (JAP), etc. This way, when an emulator or front-end generates metadata or cover art, everything will be clearer and more consistent.
Regarding automating storage management, the idea of a tool that migrates infrequently played ROMs to the cloud or NAS , and only brings frequently used ROMs back to the SD card, makes a lot of sense. While there isn't a "definitive app" that does everything imaginable (detecting what you don't play, uploading to the cloud, simulating storage usage, etc.), there are partial solutions:
- Scripts and synchronization tools that They copy or move ROMs between the NAS and the device.
- Cloud services combined with rclone-type clients, which They allow you to mount remote storage as if it were local. (with the exception of performance).
- Managers that read data from saved games to detect which titles have been untouched for a long timeHowever, this is usually very platform-specific.
If you don't want to complicate things too much, a practical solution is to use the NAS as the master repository for your entire collection and keep only a selection of active games on the device's SD card, which you rotate manually or with small scripts depending on the available space.
Create a private team cloud with the NAS
If you share your ROM collection or content projects with other people, a modern NAS allows you to set up a private cloud for your team , similar to services like Google Drive or Dropbox, but hosted in your own home or studio.
Applications like QSync (within the QNAP ecosystem) allow you to define shared folders among multiple NAS users that automatically synchronize , and you can further enhance this workflow by learning how to securely share passwords . For example, you could have a "Retro Editing" folder where you store ROM hacks, overlays, video projects about games, etc., and keep it updated on your editors' computers without them having to manually upload/download.
The workflow would be as simple as this: you record content, copy the files to the mapped folder on the NAS , and within minutes they appear on the editor's machine, ready to use. This can all be combined with any existing folders you have for ROMs and multimedia.
For this private cloud to work from outside your local network, you need to open certain ports on your router and forward them to the NAS. This is done by accessing your router's interface (usually by navigating to an IP address like 192.168.0.1), logging in with your credentials, enabling advanced mode, and configuring UPnP or specific port forwarding (443, 8080, 80, and any others required by the NAS system).
Every router is different, so it's important to review the specific documentation for your NAS and your internet service provider to avoid any security vulnerabilities. Even so, once you have it properly set up, being able to access your folders and collections from anywhere is fantastic.
Keep in mind that your fiber optic upload speed is often the limiting factor. For large transfers, commercial cloud services are sometimes faster, but the control and convenience of your own NAS is worth it for many users, especially if you don't want to rely on third parties or monthly fees.
With this combination—a well-configured NAS, suitable disks, folders organized by importance and theme, ROMs mapped as a network drive, and, if you want, a private cloud for your computer—you end up with a system where your retro collection and your important data coexist in an orderly, secure, and accessible way , significantly reducing the risk of losing everything due to the failure of any external disk.
