- Time Machine performs automatic and incremental backups of the entire system to external disks.
- It allows you to recover individual files accidentally deleted by navigating through a timeline.
- It offers the possibility of restoring the entire system using the Migration Wizard or recovery mode.

If you've just bought an Apple computer or simply want to sleep more soundly knowing your photos and documents are safe, you've probably come across Time Machine . This tool is essentially macOS's official lifeline, designed to prevent you from experiencing the drama of losing everything due to a disk failure or accidental deletion.
The best part is that you don't need to be a computer expert to master it. Although it doesn't appear as a conventional application in the launcher, it's integrated into the core of the system. In this article, we'll break down how to get the most out of this feature so your Mac is always protected, complementing your Mac's antivirus software.

What exactly is Time Machine and what is it used for?
To begin, Time Machine is Apple's native solution for cloning your Mac's data to an external drive. Unlike iCloud, which focuses on the cloud, Time Machine makes a physical copy of almost everything: applications, settings, emails, and personal files. The only thing it leaves out is the system partition, since reinstalling macOS is a separate and straightforward process.
Its magic lies in its incremental nature . This means that the first time you run it, it makes a complete copy (which can take a while), but from then on, it only saves the files that have been modified. This makes the process much faster and more efficient in subsequent sessions.
The system organizes data intelligently: it saves hourly backups of the last 24 hours, daily backups of the last month, and weekly backups of previous months. When the external hard drive is full, the program automatically deletes the oldest files to make room for the new ones.

Preparing the external hard drive
For everything to run smoothly, you need an external hard drive. Ideally, it should be an external SSD for its speed and reliability, although a traditional HDD works perfectly well. A golden rule is to choose a drive with a larger capacity than your Mac ; for example, if your Mac has 512 GB, look for a drive of at least 1 TB to give yourself plenty of room for older files.
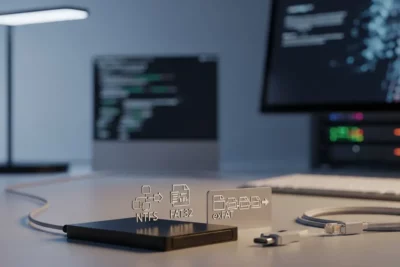
If the disk isn't empty or has an incompatible format, it's best to clean it up beforehand. To do this, open Disk Utility , select your external drive, click Erase , and choose the APFS format , which is the most optimized APFS file system for modern versions of macOS.
Step-by-step configuration of backups
Setting it up is a breeze. You have two quick routes: go to the Apple menu, then to System Settings (or System Preferences in older versions), select General, and then Time Machine. You can also simply press Command + Space and type "Time Machine" in Spotlight.
Once inside the settings window, follow these steps:
- Click on the Add backup disk.
- Select your external drive from the list and click on Configure disk.
- It is highly recommended to activate the option encrypt backup using a password so that no one else can access your privacy.
- Balance Ready and let your Mac do the rest of the work in the background.
If you want to adjust the frequency, in the Options menu you can choose whether you prefer it to be done hourly, daily, weekly, or even manually . If at any point you need to free up CPU for a resource-intensive process, you can go to the menu bar icon and select Skip this backup.
How to recover files and restore the system
This is where Time Machine lives up to its name and allows us to travel back in time . If you accidentally deleted a file, don't despair. Open the tool (via Spotlight or the menu bar icon) and you'll enter a visual interface where you'll see the Finder and a timeline on the right.
Simply navigate back in time to find the date when the file still existed, select it, and click Restore . The document will magically return to its original folder. If you prefer to go directly, you can open the folder where the file was located and then launch Time Machine to jump directly to that location in the past, similar to how you can recover deleted photos.

In more serious cases, such as a total system failure, you can restore your Mac completely. To do this, restart your computer while holding down the Command + R keys to enter Recovery Mode, or use Migration Assistant by connecting your backup drive and choosing the option to transfer your data from Time Machine.
Advanced tricks for pro users
For those who want to maximize performance, there is a trick using the Bus Terminal To speed up backups by disabling CPU throttling, the command is: sudo sysctl debug.lowpri_throttle_enabled=0Just remember to reactivate it with the value 1 when finished so that your Mac doesn't overheat.
Another key point is folder exclusion . There are things that don't make sense to back up, such as temporary folders or very large files that you already have in the cloud. In the Time Machine Options menu, use the (+) button to select which folders you want to ignore, making backups lighter and faster.
For instant access, we recommend enabling the option in Control Center so that the Time Machine icon always appears in the top menu bar. From there, you can launch manual backups or enter scan mode without navigating through menus.
Maintaining a routine of automatic backups with the help of a suitable external drive and knowing how to navigate the macOS timeline ensures that any technical mishap is just a passing scare and not a data loss tragedy.
