- A bootable USB drive allows you to try or install Linux without relying on Windows, even on very old PCs.
- Choosing the right distribution (Mint, Ubuntu, Lubuntu, Debian, etc.) is key depending on the hardware and the user's experience.
- Tools like Rufus or BalenaEtcher make it easy to create Live USB drives with or without persistence in just a few steps.
- Installing as the only system can erase Windows and take advantage of multiple internal disks without the need for dual booting.
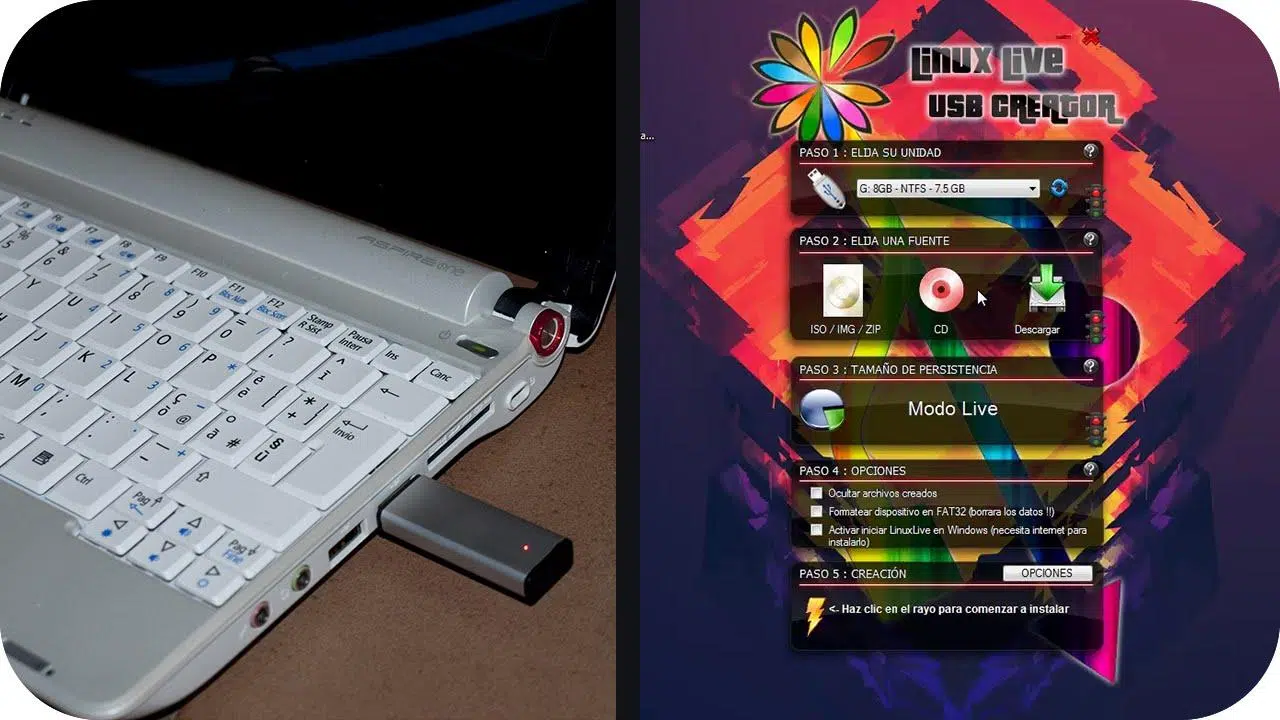
If you're tired of your Windows computer running slowly and want to give it a second life, converting your PC to Linux by booting from a USB drive is one of the best decisions you can make. You can use it temporarily without touching the hard drive, or completely erase Windows and keep only Linux, on both modern and very old machines.
Furthermore, if you're curious about free software, installing a distribution like Linux Mint, Ubuntu, or Lubuntu is a great way to start learning. You don't need to be a computer guru : with a USB drive, the appropriate ISO image, and tools like Rufus, BalenaEtcher, or the Linux Boot Disk Creator, you can have your system ready in just a few minutes and boot it on almost any PC.
What does it mean to convert your PC to Linux from a USB drive?
When we talk about "turning your PC into Linux from a USB drive," we're actually referring to two different but related scenarios: booting Linux directly from the USB drive without touching the hard drive, or using that USB drive to install Linux on the hard drive and replace Windows.
In the first case, you're using what's known as a USB Live or portable system , which allows you to have a working Linux installation on your hard drive, complete with your settings and programs, bootable on almost any computer. When you shut down and remove the USB drive, the computer reverts to its original operating system, usually Windows 10 or another version.
In the second case, the same USB drive is used as the installation medium to perform a clean installation of a GNU/Linux distribution on the internal hard drive. This method erases the previous system, leaving Linux as the sole operating system, without dual booting—ideal if you want to completely remove Windows from the computer.
The great thing about this approach is that you can start by trying Linux in Live mode without touching anything, see if you can manage with it and check that all the hardware works (WiFi, sound, graphics…), and then, when you are convinced, go ahead with the final installation on the disk.
Advantages of running Linux on a USB drive versus sticking with Windows

One of the great advantages of having Linux on a USB drive is that you can take your working environment with you to any computer . If you frequently use computers belonging to friends, family, or public PCs, booting your own distro with your programs and settings is very convenient and saves you time configuring everything each time.
There's also an important security factor: if you want to work on public computers or open networks , using your own USB system provides added peace of mind. You're not dependent on a Windows installation full of unknown software, strange browser toolbars, or suspicious configurations; you use your own clean system, with your own tools.
Another common situation is that of the family's "computer expert." When a friend asks for help with a PC that won't boot or is acting strangely, booting a Linux Live from a USB drive to diagnose the hardware or recover files is much easier than wrestling with a broken Windows system.
And finally, there's a purely practical advantage: modern USB drives have more than acceptable speeds . Gone are the days when booting from a flash drive was torture. With good quality drives today, you can get very decent performance for office tasks, browsing, and even some multimedia.
Choosing the right Linux distribution for your PC
When converting your PC to Linux from a USB drive, one of the key decisions is choosing the right distribution. Not all distributions have the same requirements or target the same type of user , so you should choose wisely based on your hardware and what you want to do with the computer. For guidance, see how to choose a distribution based on your needs.
If your computer is less than ten or twelve years old and has relatively decent specifications (several GB of RAM, a reasonable CPU), you can afford popular and user-friendly distributions like Ubuntu, Linux Mint, or Manjaro. They offer attractive desktop environments, extensive documentation, and forums full of solutions for almost any problem.
When dealing with really old PCs, with limited memory and outdated processors, it's best to opt for lightweight Linux distributions. For example, Lubuntu, Puppy Linux, and Bodhi Linux are designed to run on very limited resources, even with as little as 256-384 MB of RAM in the case of some older versions of Lubuntu, or with 500 MHz CPUs.
It's essential to check the minimum and recommended system requirements , as well as the available desktop environments , on each distribution's website . Desktops like LXQt, Xfce, or MATE are usually lighter than KDE Plasma or some GNOME variants, and this difference is quite noticeable on older computers.
Another important criterion is the distribution's underlying foundation. For example, Lubuntu and Linux Mint are derived from Ubuntu, which in turn is based on Debian . This means they inherit a huge package ecosystem, good hardware compatibility, and extensive online support—very useful when you're starting out.
Distributions for beginners, for playing and for tinkering
If you're coming from Windows 10 and want Linux as your sole operating system without too much hassle, Linux Mint and Ubuntu are usually the top recommendations . The learning curve is gentle, the interfaces are quite intuitive, and the installation process is very guided.
For more modest computers where you still want a reasonably modern experience, Lubuntu and Xubuntu are good options . They follow the Ubuntu philosophy but with lightweight desktops that consume less RAM and CPU, resulting in a more responsive computer.
If you're interested in the gaming world, you might be tempted to use a general-purpose distribution like Ubuntu, Linux Mint, or even Manjaro and combine it with tools like Steam (with Proton), Lutris, or Heroic Games Launcher. For this, a decent graphics card and well-supported drivers are recommended, but you don't need anything exotic in terms of the distribution itself.
On the other hand, if you want to learn in depth how Linux works, tinker with the system, and experiment with low-level configurations, you can look at distributions like Arch Linux or Debian in its purest form . However, in these cases, it's assumed that you'll invest time in reading documentation and that you're not intimidated by the command line.
It's also important to consider your current skill level: for a complete beginner, it's best to start with something simple (Mint, Ubuntu, Lubuntu), and once you're comfortable with it, there will be time to move on to more complex distributions. Trying to use Arch for Linux on your first day is like trying to learn to drive a rally car.
What is a portable, persistent USB Live?
What you saw in the library or in class when someone plugs in a USB drive, boots up Linux, works for a while, and then the PC reverts to its usual Windows operating system is most likely a Live USB with a bootable Linux distribution . In this case, the system isn't installed on the computer's hard drive, but rather runs directly from the USB drive.
This Live mode is usually intended for testing the distribution, performing maintenance tasks, or using it occasionally. But there's a very interesting variant: Live installations with persistence . In these, the USB drive reserves a portion of its capacity to save changes, configurations, programs, and files, just like a "normal" installation, but on the USB drive itself.
Thanks to this persistence, you can always carry your user account, desktop preferences, and browser bookmarks with you… without needing to reinstall or reconfigure every time you start up . For those who frequently tinker with different PCs, this is a real lifesaver.
No special hardware is needed for this: almost any PC that can boot from USB will work , as long as the BIOS/UEFI allows you to select the USB drive as the boot device. You just need to consider whether your motherboard uses UEFI with GPT partitions or an older BIOS with MBR, because when creating the USB drive, you'll have to choose the appropriate partition scheme.
In short, that "magic trick" that seems to transform a computer into Linux without touching the hard drive is simply booting a complete operating system from a USB drive . When you remove the drive and restart, the PC reloads its original system as if nothing had happened.
Hardware and materials requirements
To convert your PC to Linux from a USB drive, whether in Live mode or by installing to the hard drive, you'll need at least a USB drive with a capacity of 4 GB . These days, it's more advisable to go for 16, 32, or even 64 GB if you want a persistent Live system or to install multiple Linux distributions.
It is also essential to have another computer with internet access from which to download the ISO image of your chosen Linux distribution and the tool that will be used to burn that ISO to the USB drive (Rufus on Windows, BalenaEtcher on macOS, Boot Disk Creator on many Linux distros).
The PC you'll be using or installing Linux on can be a desktop or an older laptop running Windows. The important thing is that it supports booting from USB , something virtually any computer from the last 15-20 years can do. In the worst-case scenario, you'll have to change the boot order in the BIOS/UEFI or use a hotkey to select the boot device at startup.
Before proceeding with the final installation, especially if you're going to completely erase Windows, it's vital to back up your important data . Installing a Linux distribution on your hard drive usually involves formatting the partitions, so anything not backed up to another drive, cloud storage, or USB drive will be lost.
Finally, if your setup has multiple internal drives (for example, two SSDs and one HDD ), you should decide in advance where you want to install the system and how you will reuse or format the rest, so you don't get any surprises during the installation wizard.
Download the ISO image of the Linux distribution
The heart of the whole process is the ISO image of the Linux distribution you're going to use. An ISO is a file that contains a faithful copy of the contents of an optical disc (or what would be the complete installer of a system), and it's what you'll burn to the USB drive to make it bootable.
To get it, simply go to the distro's official website, locate the downloads section, and choose the appropriate edition. There are usually 64-bit (amd64) versions and, in some cases, 32-bit versions . If your computer is relatively modern, you'll almost certainly need the 64-bit version; if it's very old, check the project's instructions.
In the case of Debian, it's often recommended to download the image with the desktop environment and proprietary firmware if your hardware requires non-free drivers (WiFi cards, graphics cards, etc.). Installation on standard Debian can be somewhat more complicated, so if you're a beginner, it's best to keep it simple.
For distributions like Ubuntu or Linux Mint, there are usually several editions depending on the desktop environment (GNOME, Cinnamon, MATE, Xfce, etc.). Choose the one that best suits your needs in terms of appearance and lightweight performance . And in Lubuntu, for example, you'll typically see a clearly visible lightweight version designed for low-resource computers.
You should verify that the ISO has downloaded correctly (projects usually publish checksums), although for normal home use, if the download completes without errors, that's often sufficient . Once you have it, you'll be ready to create the bootable USB drive.
Create a bootable USB drive using Rufus, BalenaEtcher, or other tools
With the ISO image prepared and the USB drive connected, the next step is to use a tool that correctly writes that image to the drive and makes it bootable . On Windows, the go-to program for years has been Rufus, while on macOS BalenaEtcher is very popular, and many Linux distributions have a bootable disk creator.
If you use Windows, you can download Rufus from its official website. Once you open it, you'll see a field to select the USB device, another to choose the ISO image, and several optional parameters. First, make sure your USB drive appears under "Device" (to avoid damaging another drive), and then click "Select" to load the ISO of the Linux distribution you downloaded.
In the partition scheme and target system section, choose GPT and UEFI if the PC is modern . If the computer is older or you're unsure of its boot mode, MBR usually works well as a fallback option. For the file system, FAT32 is generally the best choice for most ISOs and to ensure UEFI compatibility, although some very large images may require NTFS.
An interesting feature of Rufus is that, with some distributions, it offers a "persistence" slider . This allows you to reserve space on your USB drive where your changes will be saved. For light use (some Wi-Fi configuration, basic tweaks), you can allocate 2-4 GB; for regularly working from the USB drive, 8-16 GB is better; and if you want to keep most of your files on that USB drive, 20-30 GB on a 64 GB or larger drive is a good amount.
When you start the process, it's normal for Rufus to warn you that it will download versions of certain components (like Syslinux) or ask you which mode to use to write the image. Accept the download when prompted and select "ISO Image mode" when the writing mode choice appears. Keep in mind that everything on the USB drive will be erased.
Booting the PC from the USB with Linux
Now that the USB drive is ready, it's time to boot the computer from it. With the PC turned off, connect the USB drive to an available port and turn on the machine while immediately pressing the boot device selection key or the key that accesses the boot menu. This is usually F12, but depending on the manufacturer, it could also be F1, F8, F9, F10, Esc, or even Tab.
If a quick boot menu appears, select the drive corresponding to your USB drive and press Enter to continue. Otherwise, you'll need to enter the BIOS/UEFI using F2, Delete, or another key , go to the "Boot" section, move the USB drive to the top of the list, save the changes, and restart.
Once the computer boots from the USB drive, you'll usually see a welcome menu or a language wizard. Select your language using the mouse or the arrow keys and Enter . From there, depending on the distribution, you can choose between trying the system without installing it or proceeding directly to the installation.
In many Ubuntu-based distributions, booting into Live mode loads a fully functional desktop environment. From there, you can browse the internet, play multimedia, open documents, and more , without altering a single byte of the computer's internal disk. This is the ideal time to confirm that all the hardware is functioning correctly.
When you see an icon or shortcut on your desktop that says something like "Install Ubuntu", "Install Lubuntu", or similar, you'll know you have the option to permanently convert that PC to Linux by installing the system on the hard drive instead of just using the USB drive.
Install Linux as the only operating system (without dual booting)
If you're certain you want Linux as your sole operating system, the installation process is usually quite straightforward. When you open the installer, it will first ask for your language again, and then your time zone or region. Choose your country or city so that the time, date format, and some regional settings are configured correctly. If you prefer to keep Windows in a dual-boot setup, see how to install Linux alongside Windows step by step.
Next comes defining the keyboard layout. Here it's important to select the physical layout you actually have: Spanish, International Spanish, English, etc. This will ensure that the ñ, accents, and special symbols are where they should be, or that it fits your keyboard if it doesn't have certain characters printed on it.
The trickiest part comes when the installer asks you how you want to use the disk. To erase Windows and any other operating system and keep only Linux, you must choose the "Erase disk" or "Use entire disk" option . This will format the selected drive and create the necessary partitions for the distribution.
If your computer has multiple drives (for example, a primary SSD, a secondary SSD, and a storage HDD), the installer will display a list. Carefully choose which drive you want to install Linux on , usually the SSD where Windows was installed. The other drives don't necessarily need to be erased at this stage unless you specify otherwise, although you can later format them from within Linux to use them as additional storage.
Once you've decided on your partitioning strategy (erase everything, use an entire disk, etc.), the wizard will ask you to create your user account: account name, computer name, and password . You can select the option to log in automatically if you don't want to enter your password each time, although you'll still need it for administrative tasks.
Before applying the changes, the installer will display a summary of what it's going to do: which partitions it will create, which systems will be deleted, and what the disk will look like. This is your last chance to double-check that you're not about to accidentally delete data from another drive . If everything looks good, confirm and let the system do its work until it prompts you to restart.
What happens to the other internal drives when installing Linux?
If your PC has multiple internal hard drives, it's normal to wonder what will happen to them when you install Linux on the main drive. When performing a standard installation on a single drive, the other drives remain untouched unless you explicitly specify otherwise during repartitioning. In other words, if you install on SSD 1, SSD 2 and the HDD will remain unchanged.
However, if those extra disks still contain Windows data, old NTFS partitions and other file systems , forgotten systems, or previous installations, you'll probably want to format them from Linux to clean them up and use them for general storage, backups, game folders, or whatever else you can think of.
To do this, you can use graphical tools like GParted or the default disk manager from your new Linux distribution. Simply select the correct disk, delete the old partitions, and create new ones in your preferred format (usually ext4 for data in Linux). Avoid touching the disk where the operating system is installed unless you are absolutely certain of what you are doing.
Another option is to use one of those disks to store your /home folder or your personal data , thus clearly separating the system and data. This can be configured during installation (by manually creating partitions) or later by moving data, although in the latter case you need to be a bit more careful.
In any case, the key is that installing Linux doesn't necessarily mean indiscriminately wiping out all your drives. Only the drives you explicitly agree to during the setup wizard will be formatted, so take an extra minute to carefully identify each drive by capacity and model.
Installing Ubuntu or Debian on an old Windows PC
When your main goal is to revive an aging computer that barely runs Windows anymore, installing a lightweight distribution like Ubuntu with a simple desktop environment, or even Debian with an optimized configuration, can work wonders. The idea is to completely replace the old system and leave Linux as the only operating system, reducing resource consumption and improving performance.
In the case of Ubuntu, the procedure is very similar to the one described earlier: you create a Live USB with Rufus, boot from it, choose your language, and on the main screen you have the options "Try Ubuntu" or "Install Ubuntu." If you choose to try, the disk is left untouched; if you choose to install, the wizard will allow you to erase Windows and use the entire disk.
Debian, for its part, offers a graphical installation that, while somewhat more understated, guides you through the same steps: language, network, partitioning, user, etc. To simplify things, it's generally recommended to choose "use the entire disk" and "everything on one partition" so the installer can manage the space allocation. If you need proprietary firmware (for example, for certain Wi-Fi chips), it's a good idea to have previously downloaded the ISO that includes it.
In both cases, always keep in mind that the installation will erase the contents of the disk where you choose to install it . Therefore, before booting from the USB drive, it's advisable to back up your important documents, photos, and other files to another storage device. After the process, that old PC, which previously struggled to run Windows, will have a modern, secure, and much lighter Linux system.
Once the installation is complete and you restart your computer, it will boot directly into your new distro without displaying Windows. From there, all you have to do is install the applications you need (browser, office suite, media players, game clients, etc.) and get used to the new way of doing things, which you'll see isn't so different.
Converting your PC to Linux from USB, whether with a portable Live system or by installing it as the only system on the disk, opens many doors: you can extend the life of old hardware, move your work environment anywhere, help repair other people's computers and, incidentally, immerse yourself in the free software ecosystem and learn to manage a powerful and flexible operating system that does not depend on the limitations of Windows.
