- Pollo AI allows you to quickly create images and videos from text, although with little fine creative control.
- MyEdit offers AI-powered content generation alongside powerful image, video, and audio editing tools.
- Features like Image Design and MyEdit's AI Prompt facilitate complex scenes and better text prompts.
- For professional projects, MyEdit is more suitable by combining quality, precision and a complete workflow.
If you've made it this far, it's because you're already curious about Pollo AI and AI-powered image creation . And that's normal: we're seeing more and more AI-generated content, and it's easy to wonder how it's done and whether these tools are really worth using.
In this article, you'll find a complete guide on how to use Pollo AI to generate images and videos , what it offers exactly, its pros and cons, and why many creators seek alternatives with more control, such as MyEdit. Everything is explained in easy-to-understand language, without unnecessary technical jargon, and with clear steps you can follow even if you've never used an AI tool before.
What is AI Chicken and what is it really used for?
Pollo AI, also known as Pollo IA, is an online generative artificial intelligence platform that has become popular for its ability to create both images and videos from simple text prompts. You type what you want to see, and the system transforms that description into visual content.
The tool's main appeal lies in its focus on speed and simplicity : no editing or design experience is required. Simply write a scene, character, or action, choose a few basic options, and let the AI generate a short clip or image.
Pollo AI is designed especially for creators who need visual content quickly , for example for social networks like TikTok, Instagram Reels or YouTube Shorts, where speed and the number of posts are key.
In addition to creating short videos, Pollo AI is useful for making visual sketches or small storyboards that serve as a reference before producing something more elaborate, as well as for marketing campaigns or presentations that need a graphic resource without too many complications.
The platform functions as a kind of "hub" that connects several different AI models (such as Stable Diffusion or DALL·E in the image section), so you can try out styles and engines without leaving the same environment, which is convenient for experimenting if you are starting out.
Main features of Pollo AI for images and videos
To understand if using Pollo AI daily is worthwhile, it's a good idea to carefully review the tool's most important features for both images and video. It's not just about creating content from scratch, but also about transforming existing content.
The first thing to understand is that Pollo AI is available directly in your browser ; you don't need to install any heavy software. Simply visit the website, log in, and you can start creating content from any computer with an internet connection.
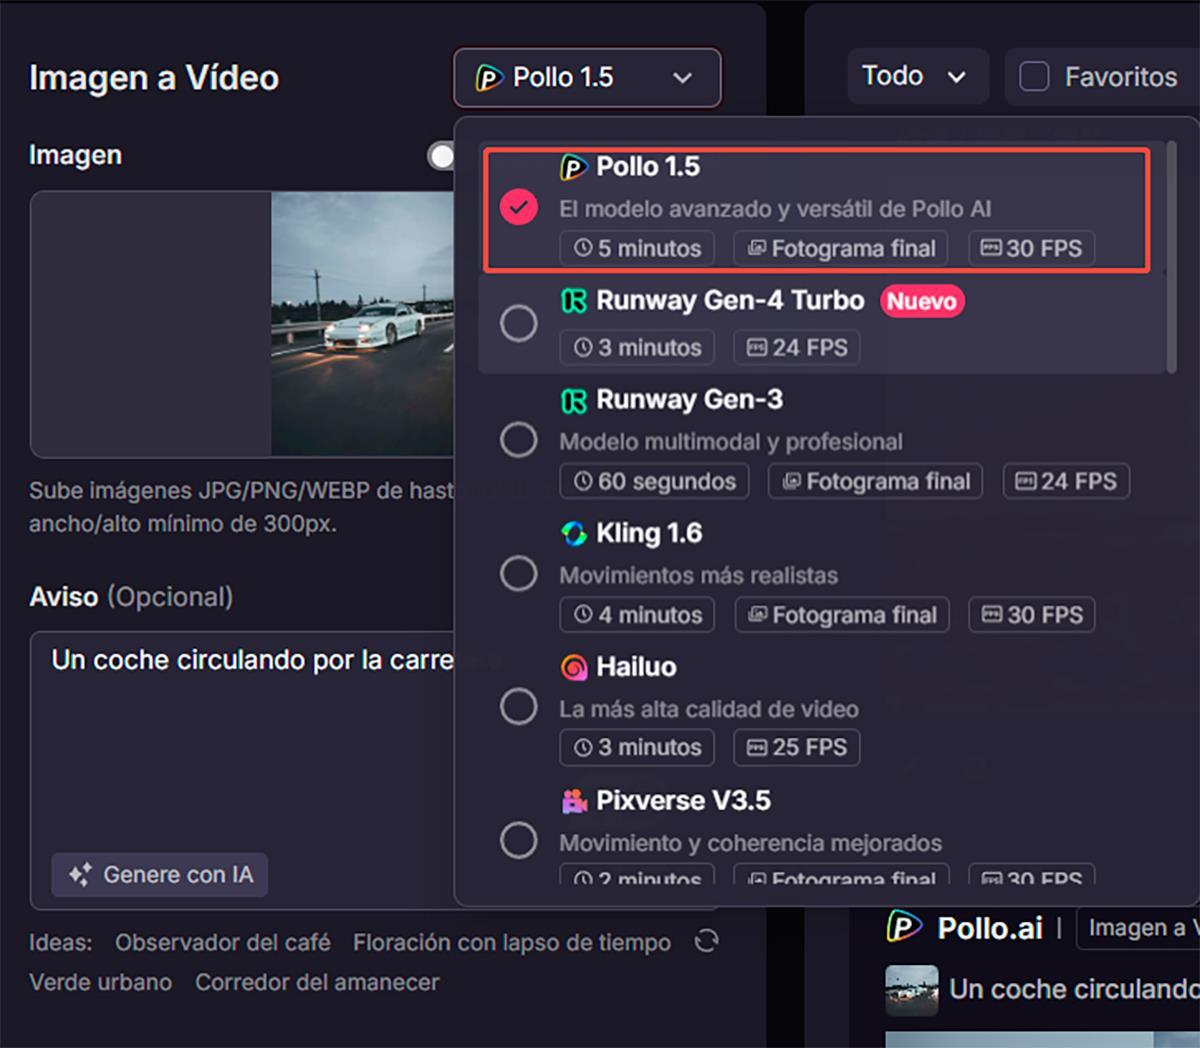
In the video section, the platform stands out for its text-to-video, video-to-video, and static image animation options , with different templates and styles so that the result adapts (more or less) to what you had in mind.
In the image section, the most interesting feature is the text-based AI image generator , where you enter a description and choose a model and style to obtain several proposals for illustrations, scenes, or characters that you can then download and share.
Another striking feature is that Pollo AI allows you to maintain the visual consistency of a single character : you upload a reference photo and the platform tries to respect its features when you use it in different images or videos, which is very useful if you want to create a recurring "mascot" or avatar.
Key features of Chicken AI
Within the platform you'll find several specific tools. These are the most relevant if you're interested in using Pollo AI to generate images and video clips :
- Text-to-video generation: This is the star feature in the video section. You write a description (for example, “a robot cooking in a futuristic kitchen with neon lights”) and the AI generates a short clip that attempts to reflect that scene. It's ideal for quick social media posts.
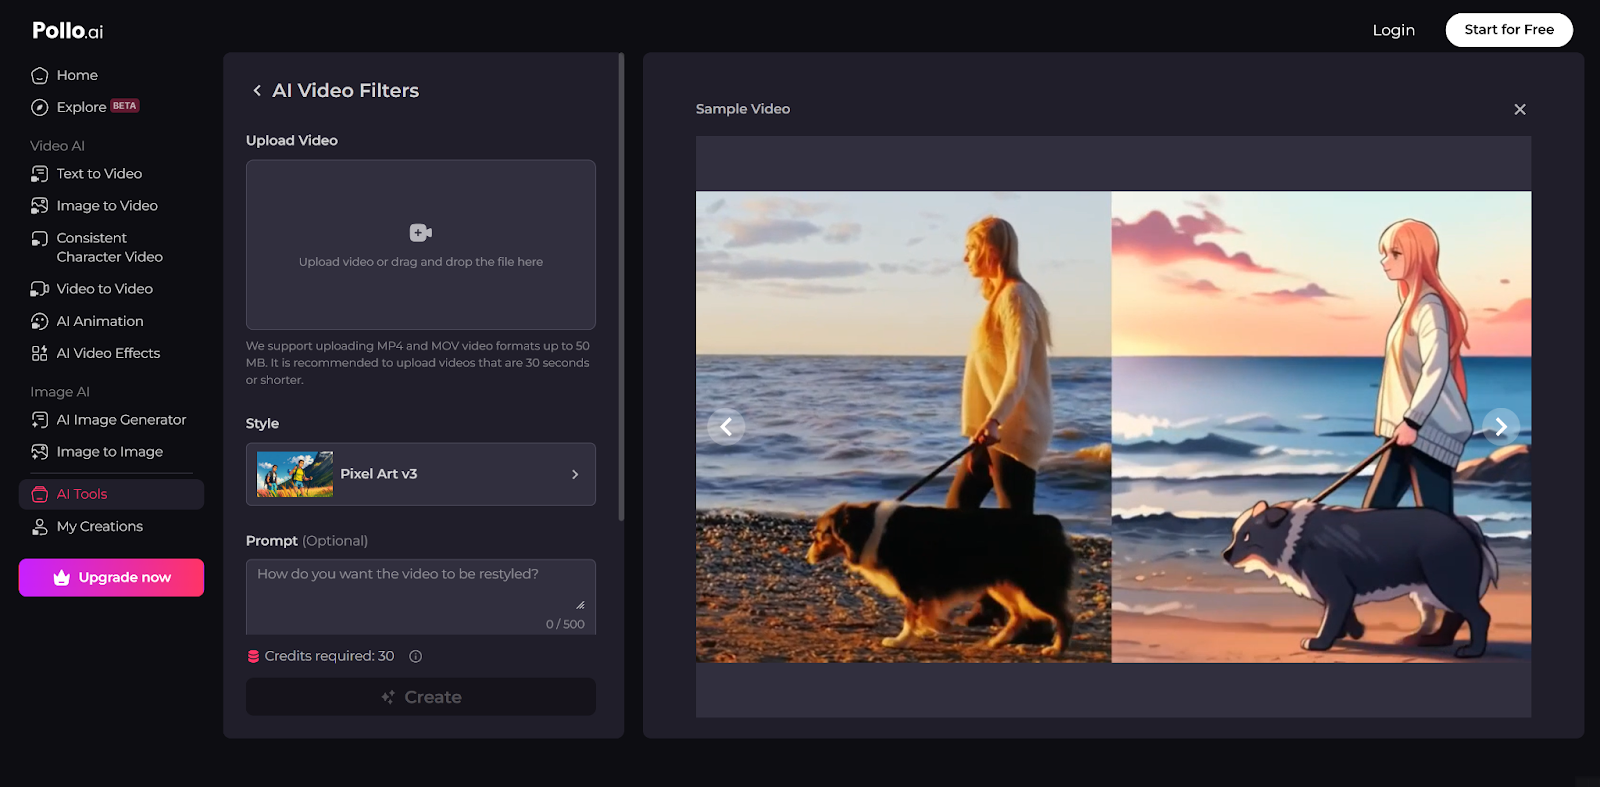
- Video by video with styles: You can upload a video you already have and ask the AI to transform it by applying one of the more than 30 available styles, such as anime aesthetics, Disney Pixar style, or other types of animation.
- Image-to-video animation: This function allows you to take a static image and Add movement to turn it into a short animated videoIt's useful for bringing to life illustrations or photos that you want to use in Stories or Reels.
- AI image generator from text: This is where Pollo AI shines for those looking for images. You write a prompt, choose the model (Stable Diffusion, DALL·E, etc.), and the system generates several versions of the image based on your description and the style you select.
- Characters consistent across different scenes: You upload a picture of a character (it can be a real person, a fictional character, etc.) and Pollo AI tries to respect its appearance when you generate new images or clips in which it appears, maintaining consistency.
Overall, Pollo AI prioritizes a highly automated and speed-oriented experience . It's perfect if you want to generate quick ideas or visual prototypes without getting bogged down in advanced parameters.
The downside is that your creative control over the outcome is quite limited . You depend almost entirely on how the AI interprets your description, which can lead to unpredictable or rather generic results, especially if you're aiming for a highly professional finish.
Advantages and disadvantages of using AI Chicken
Before diving in headfirst, it's a good idea to have a balanced view of what Pollo AI does well and where it falls short , especially if you're going to base some of your content on this tool.
Among its clearest advantages is that it's a fast, accessible, and easy-to-use platform . You don't need technical knowledge, you can generate images and videos from any browser, and the various AI models are already integrated, so you don't have to configure anything complicated.
It is also true that, for those starting out in AI creation, Pollo AI serves very well as a testing environment and visual inspiration : you can try out prompts, styles and models until you find the type of content that suits your projects.
On the downside, the biggest drawback is the limited control over the fine details of the final result . The tool dictates most of the composition, poses, lighting, and other key aspects, making it difficult to achieve a very specific finish or to replicate a particular style exactly.
Furthermore, some users perceive the results as somewhat repetitive or "generic" when compared to more advanced solutions geared towards professional editors, which allow layer-by-layer adjustment and in-depth retouching of both images and video clips.
How to use Chicken AI to generate images step by step
Let's get down to what you're interested in: learning how to use Pollo AI specifically to create AI-powered images . Although the interface is quite intuitive, it's helpful to follow a specific order to get the most out of it and avoid wasting time randomly changing options.
The basic flow consists of entering the website, choosing the appropriate image tool, configuring the model and style, writing a good prompt, and finally, downloading the images that convince you the most to use them wherever you want.
Before you begin, have a relatively clear idea of what you want to create. The more precise your text prompt, the less you'll depend on chance in the AI's results , and the closer you'll be to achieving the image you had in mind.
Step-by-step instructions for creating images with the Chicken AI generator
These are the general steps you should follow to generate AI images within Pollo AI using its text-to-image function:
- Visit the official Pollo AI website: Open your browser, go to the tool's website and log in or create an account if you don't already have one.
- Go to the AI Imaging section: In the main menu, look for the tab or section related to images (usually called "AI Image" or similar) and select the "AI Image Generator" option.
- Choose the generation model: Within the "Model" section, select the AI engine you want to use (for example, Stable Diffusion, DALL·E, or others available). Each one has a different generation style.
- Write your notice or prompt: In the text field dedicated to "Notice", describe in detail the scene, the visual style, the type of shot, the lighting, the atmosphere, etc. The clearer and more specific the description, the better the results you will obtain.
- Select a visual style: The platform lets you choose an artistic style (realistic, comic, anime, oil painting, etc.). Choose the one that best suits what you want to achieve, or leave it neutral if you prefer the model to decide.
- Adjust the aspect ratio and the number of images: Define whether you want horizontal, vertical, or square format, and how many versions of the image you want the AI to generate in each run.
- Click on Create: Once everything is set up, press the generate button and wait a few seconds for the system to process your request and display the results.
- Save and share: Review the generated images, select the ones you like best, and download them for use on social media, presentations, video thumbnails, or other projects.
If you want to get the most out of Pollo AI when generating images, it's best to refine your prompts little by little : change details, add descriptions about the lighting, camera type, artistic style, or mood you want to reflect.
How to create videos with Pollo AI from text
While this article focuses on "how to use Pollo AI to generate images," its text-to-video conversion feature, one of its main selling points, shouldn't be overlooked . By effectively combining both types of content, you can create complete social media posts in just a few minutes.
The mechanics are similar to those of the image generator: you choose the video tool, write the scene description, mark some basic parameters, and wait for the AI to generate a short clip that you can then download, share, or edit on other platforms.
Keep in mind that the duration of the videos is usually limited , as they are designed for short pieces like Shorts, Reels or TikTok, where it is more important to capture attention in seconds than to create a long film.
Step-by-step instructions for creating videos with AI Chicken
These are the essential steps you should follow to create videos using Pollo AI's text-to-video generator :
- Visit the Pollo AI website: Access it from your browser, log in and go to the main panel of the tool.
- Open the AI Video tab: In the menu, select the section dedicated to video and within it the option of “Text to video”.
- Choose the video model: At the top of the settings panel you'll see a model selector; choose the AI engine you want to use to generate your clip.
- Write the video ad: In the "Notice" field, describe in detail what you want to be seen in the scene: characters, environment, camera movement, visual style, atmosphere, etc.
- Adjust the aspect ratio and the number of videos: Decide if you want vertical, horizontal, or square format, and how many videos you want to be generated with that same prompt.
- Configure video visibility: Choose whether you want your creation to be public within the platform or to be protected, depending on the use you intend to give it.
- Click on Create and wait: Press the button to generate the video and wait for the AI to process your description and produce the clip.
- Download and share: Review the result and, if you're happy with it, save it to your device to upload it to your social networks or integrate it into other projects.
Although the results may be somewhat inconsistent, this feature of Pollo AI is very useful for testing video ideas without having to record anything yourself , or for creating experimental content that attracts attention on social media platforms.
Why many users are looking for alternatives to Pollo AI
After experimenting with Pollo AI for a while, many creators realize that, while it's a fun and fast tool, it doesn't always provide the level of control and quality they need for serious projects . This is where more comprehensive alternatives come in.
If you work with brands, manage a professional channel, or are part of a marketing team, you'll likely need a more robust workflow : being able to retouch an image in detail, clean up video audio, correct colors, remove unwanted objects, and so on.
Furthermore, when you want your content to have a very specific and consistent visual style , the randomness and unpredictability of some AI generators like Pollo AI ends up being more of a problem than a help.
For all these reasons, many users are making the leap to solutions like MyEdit, which combines image and video generators with advanced editing tools to polish each project to the professional level expected in campaigns, advertisements, or branded content.
MyEdit: a more complete alternative for creating and editing with AI
MyEdit has positioned itself as one of the most powerful alternatives to Pollo AI for those looking for more than just an automatic generator. It's not just an AI that creates images or videos: it's a kind of online editing studio with a multitude of integrated tools.
Like Pollo AI, MyEdit works directly in your browser , so you don't need to install anything. From the same interface, you can generate AI-powered images or clips, edit them, retouch photos, enhance audio, and much more.
Its strength lies in combining generation, editing, and post-production all in one place . This means you're not solely reliant on the AI to get it right the first time: if something doesn't quite work, you can correct and refine it with specific tools.
It is especially interesting for marketing teams, content creators, and small businesses that want high-quality results but don't have the time (or budget) to deal with complex professional desktop software.
Key features of MyEdit vs. Pollo AI
Compared to Pollo AI, MyEdit offers a wider range of features and is geared towards giving you real control over the final result . These are some of the most notable:
AI video and image generator: you can create visual content from scratch using text, just like in Chicken AI, but with the advantage of being able to provide reference images that help the AI get much closer to what you want.
AI Photo Editor: MyEdit includes advanced photo editing tools such as unwanted object removal, automatic photo enhancement, background removal, style changes, and trending creative effects.
AI-powered audio tools: This is where MyEdit clearly sets itself apart from Pollo AI. It offers features like noise removal, voice enhancement, vocal removal from a track, and instrument separation—essential if you produce videos with narration or music.
Advanced creative control with "Design to Image": This feature allows you to build complex scenes element by element . You can specify the position of each object on the canvas and describe it separately, achieving a much more precise composition.
Portrait to video with professional templates: MyEdit offers the option to animate static portraits, controlling the duration, format and template used, to obtain videos with a very polished look and ready to publish.
Advantages and disadvantages of MyEdit
MyEdit is not just a generator; it's a serious workspace for creating and enhancing multimedia content . Among its advantages is the ability to work with images, video, and audio in the same place, adjusting each element with considerable precision.
For users who are tired of unpredictable results, the big difference is that you don't depend solely on luck : if something in the generated image or video doesn't suit you, you can retouch it with the included tools until it's to your liking.
One point to consider is that MyEdit may require a bit more learning curve than an ultra-simple tool like Pollo AI, precisely because it offers more options and settings. However, the leap in quality is usually worth it for those seeking a more professional finish.
General comparison: AI Chicken vs MyEdit
If we put all of the above together, it becomes clear that Pollo AI and MyEdit are not designed for exactly the same type of user , even though both allow you to generate images and videos with AI from the browser.
Pollo AI prioritizes extreme simplicity: you generate something quickly and it's done. It's ideal if you want prototypes, immediate visual ideas, or informal content for social media without too many requirements.
MyEdit, on the other hand, is geared towards those who need better control over the creative process , with photo editing tools, reference-guided generation, advanced video features, and audio utilities that complete the workflow.
The most obvious difference is that, with MyEdit, you can adjust and refine your creations until you achieve a consistent and professional style , while with Pollo AI you are more likely to end up accepting "whatever comes out" because the editing scope within the platform itself is quite limited.
How to use MyEdit to generate AI-powered images
If you decide to take the plunge and try MyEdit as an alternative, you'll see that the process of generating images from text is very straightforward, but with added control thanks to the additional reference and editing options.
The interesting thing is that you can start with a text description and, if you want, upload a photo of your face or any other supporting image, so that the AI maintains certain features or style in the final result.
Step-by-step instructions for creating images from text with MyEdit
These are the basic steps to generate images in MyEdit using text and, if you're interested, a reference image:
- Access the MyEdit website: Enter from the browser and, once inside, go to the main menu.
- Open Image Tools: In the menu, select the “Image Tools” section and choose the “AI Image Generator” option.
- Choose the generation method: Within the generator, select "Generate Images" to indicate that you want to create images from a text prompt.
- Write your detailed description: In the text box, clearly and in detail describe the scene or character you want to achieve, including style, lighting, environment, etc.
- Upload a reference image (optional): If you wish, click on “Provide a reference image” to upload a photo (for example, of your face) that the AI will use as a guide.
- Choose a style or leave none: Select the style that best suits the aesthetic you are looking for, or leave the option on "None" if you do not want to limit it.
- Generate the images: Click on “Generate” and wait for the AI to create several proposals based on your description and the reference provided.
- Save your favorites: Review the generated images and use the download button (usually shaped like an arrow) to save the ones you like best.
The combination of text and a reference image allows MyEdit to achieve more consistent and personalized results , which is very useful if you want to use your own face in different styles or create recurring characters for your content.
Other useful MyEdit tools to enhance your creations
Beyond the image and video generator, MyEdit incorporates several extra tools that can make all the difference when you get stuck on prompts or need very specific content, such as complex scenes or product videos.
These additional features either don't exist or are much less developed on simpler platforms like Pollo AI, so they may be the deciding factor in switching tools if you're serious about content creation.
Get prompt ideas from an image
A very common situation is having a clear image in your head but not knowing how to explain it to the AI . For this, MyEdit offers the "AI Prompt" function, which generates a text prompt from an existing image.
- Go to MyEdit and then to Image Tools: From the main menu, choose the “Prompt AI” option.
- Upload the reference image: Click on “Start now” and upload the image you want to use as inspiration for the prompt.
- Generates the prompt automatically: Click on “Generate” and let the AI analyze the image and create a detailed text description.
- Use the resulting prompt: Copy that instruction and use it to generate new images with the AI image generator.
In this way, MyEdit helps you translate images to text , which is very practical for learning to write better prompts and achieving more consistent results in future creations.
Design complex scenes using the Image Design function
When you need to create an image with many elements (for example, several characters, objects, and a detailed urban environment), it can be difficult to rely on a single prompt. MyEdit's "Design to Image" feature allows you to compose the scene in parts.
- Select Design to Image in Image Tools: Go to MyEdit, open “Image Tools” and choose “Image Design”.
- Define the structure of the scene: Click on “Start now” and use the left panel to select different elements that you will place on the canvas.
- Draw boxes for each element: On the canvas to the right, draw rectangles indicating where each element will be placed and its approximate size.
- Describe each element separately: Within each box, write the specific description of that object or character (for example, “black cat sitting on the railing”).
- Add as many items as you need: Repeat the process for all components of the scene, adjusting positions and descriptions.
- Write a general description of the scene: In the text box below the canvas, describe the overall atmosphere (for example, “sunset on an Amsterdam canal with colorful clouds”).
- Select a style (optional) and generate: Choose an artistic style if you want and press "Generate" to have the AI build the complete image.
This system gives you a much higher level of control than a normal generator , because you decide in advance where everything goes and how it is described, achieving complex scenes without depending so much on chance.
Convert product photos into promotional videos
If you have an e-commerce business or sell products online, you'll be interested in MyEdit's "product photo to video" tool , designed to transform static images into promotional clips ready for social media.
- Go to Video Tools in MyEdit: From the menu, select “Video Tools” and then “Product Photo to Video”.
- Import your product photo: Click on “Start now” and upload the image of the product you want to promote.
- Choose the generation mode: Choose between Standard or Professional mode depending on the level of control and quality you are looking for.
- Adjust duration and format: Select the video duration and aspect ratio that best suits the platform where you will publish it (vertical, square, horizontal).
- Select a template: Choose the video template that best suits your brand and decide if you want to generate background audio synchronized with the clip.
- Generates and downloads: Click on “Generate”, wait for the AI to create the video and, once ready, save it to share it on your online store or social networks.
With this feature, MyEdit turns simple catalog photos into dynamic and engaging pieces without the need for filming or video equipment, something especially valuable for small businesses.
Throughout this overview, you've seen how Pollo AI can quickly generate images and videos from text, but also how its limitations in creative control can hold you back if you're looking for a more refined result. In contrast, tools like MyEdit add editing layers, advanced features for images, video, and audio, and specific utilities for prompts and complex scenes that help take your projects to a much more professional level without leaving your browser.

Table of Contents
- 1 What is AI Chicken and what is it really used for?
- 2 Main features of Pollo AI for images and videos
- 3 How to use Chicken AI to generate images step by step
- 4 How to create videos with Pollo AI from text
- 5 Why many users are looking for alternatives to Pollo AI
- 6 MyEdit: a more complete alternative for creating and editing with AI
- 7 General comparison: AI Chicken vs MyEdit
- 8 How to use MyEdit to generate AI-powered images
- 9 Other useful MyEdit tools to enhance your creations