- Overclocking increases the CPU and GPU frequency to achieve more performance, at the cost of higher temperatures, increased power consumption, and potentially a shorter lifespan.
- It is essential to first check temperatures, stability and hardware compatibility with stress tests and benchmarks before increasing frequencies.
- The adjustments are made primarily from the BIOS for the CPU and with software such as MSI Afterburner for the GPU, always with gradual increases.
- The success of overclocking depends on good cooling, constant monitoring, and careful management of voltage and power limits.
If you're thinking about getting into CPU and GPU overclocking but you're completely lost, don't worry: it's perfectly normal at first. Between BIOS, voltages, temperatures, benchmarks, and programs with strange names, it's easy to get confused if no one explains it to you clearly.
In this article, we'll see, step by step, how to get the most out of your processor and graphics card in a relatively safe way, what tools you need, what real risks there are, what performance you can expect, and in what cases it's not worth complicating things. All of this is explained in clear, approachable Spanish (from Spain), without leaving out any important details.
What is CPU and GPU overclocking and what is it used for?
When we talk about overclocking, we're referring to increasing the operating frequency of a component beyond the manufacturer's specifications. In computing, the most common practice is to increase the speed of the CPU, GPU, and even RAM to get more performance without changing the hardware.
By increasing the frequency, the component is able to perform more operations per second , which translates into more frames per second in games, shorter render times in video editing, greater agility when compressing files, or, in general, a more "wake-up" system.
A processor's speed depends primarily on two factors: the base clock speed , which comes from the motherboard, and the core multiplier . Multiplying the base clock speed (usually 100 MHz) by the multiplier gives the final clock speed in GHz. Overclocking essentially involves increasing this multiplier, and sometimes the voltage, to achieve higher speeds.
In a CPU that operates at, for example, 3,6 GHz, it's possible, with a good configuration and cooling, to overclock it to something like 4,4 or 4,6 GHz. This increase in clock cycles per second generates faster electrical signals within the chip, allowing the CPU to process data more quickly.
This is not limited to just the central processor: modern graphics cards (Nvidia GeForce and AMD Radeon) support core and memory overclocking, and the same is true for many RAM models , which can operate at frequencies higher than those indicated by the factory.
Is overclocking worth it? Advantages and when it pays off
The main motivation for overclocking is to gain performance for free , or almost free. Instead of spending money on a new CPU or GPU , you can squeeze out a few extra FPS or improve smoothness in demanding tasks simply by fine-tuning the settings.
The greatest benefits are usually seen in older or lower-mid-range systems , where a good overclock can bring performance closer to that offered by modern, higher-end components. Lab tests like those from 3DMark have shown that, in many cases, the machines with the worst specifications are the ones that achieve the greatest percentage improvement when overclocked.
On new, powerful PCs, it's also possible to increase performance somewhat, but the improvements are usually more modest. In those cases, the difference between stock and overclocked settings can be just a few percentage points, especially in GPU-intensive games where the CPU isn't the primary bottleneck.
For gaming, CPU and GPU overclocking can help increase FPS and smooth out frame drops , especially in CPU-intensive games, in esports at high refresh rates (144, 240 Hz), or when you're trying to get the most out of a high refresh rate monitor. If your operating system is a mess and you have tons of programs hogging resources in the background, it's best to optimize the software first before getting bogged down with overclocking.
In productivity tasks like video editing, 3D rendering, or code compilation, a good, stable overclock can significantly reduce wait times . In a rendering project, for example, those few minutes saved each time add up to many hours in the long run.
Check if your CPU and GPU can be overclocked
Not all processors or graphics cards accept overclocking in the same way, so the first thing to do is to find out if your hardware is truly "overclockable" and how flexible it is.
In the case of Intel, processors ending in the letters "K" or "KF" (like an Intel Core i7-9700K) and "X" series models come with an unlocked multiplier. This means the BIOS allows you to increase the core multiplier without having to adjust the system's base clock, making overclocking much easier.
If your Intel CPU isn't a K or X model, the multiplier is generally locked, and you can only adjust the motherboard's global base clock to a limited extent . This affects not only the CPU but also the RAM, the PCI Express connection, and other components, so the safe overclocking margin is quite small.
With AMD, the situation is simpler: all modern Ryzen CPUs have an unlocked multiplier, so they come "ready" for overclocking. As for graphics cards, both current Nvidia GeForce and AMD Radeon cards allow you to increase core and memory frequencies with the appropriate utilities.
If you want to check your processor in more detail, you can use tools like CPU-Z , review the technical specifications on the manufacturer's website, or look in the Windows Task Manager, under the Performance tab, to compare the base and maximum frequencies. Information about whether the multiplier is locked is also usually found in the BIOS.
Basic tools for overclocking and monitoring
Before touching any settings, you need a small software "toolbox" to see what your system is doing at all times and measure whether the improvements are really worth it.
For graphics, utilities like MSI Afterburner are practically standard. They allow you to modify GPU frequencies and voltages, adjust the fan curve, and view real-time usage, temperatures, and speeds during games or benchmarks.
To monitor system temperatures and sensors, programs like HWINFO, HWMonitor, Core Temp, and SpeedFan display the temperature of the CPU, GPU, motherboard, and other components, as well as voltages, power consumption, and fan speeds. These are essential to ensure your system doesn't overheat.
Regarding performance and stability tests, tools like Prime95, Cinebench, AIDA64, Intel BurnTest, OCCT, and 3DMark subject your PC to intense loads to check if the overclock holds up without errors or crashes. 3DMark, for example, focuses heavily on graphics performance and gaming.
For CPU and GPU-specific information, CPU-Z and GPU-Z display the exact model, real-time frequencies, voltage, and other technical details that are very useful for knowing your starting point and potential performance.
Preparation: temperatures, stability and starting performance
Before increasing anything, you need to make sure your system is healthy. The first step is to check the current CPU and GPU temperatures at idle and under light load, using HWINFO or a similar tool. If they're already running very hot out of the box, it's best to fix that before even thinking about overclocking.
If you notice your processor reaching high temperatures while performing basic tasks, you likely have a cooling problem, such as dried-out thermal paste or poor case ventilation . In that case, it's advisable to clean the fans, improve airflow, or even consider a better CPU cooler before adjusting clock speeds.
The next step is to run a stress test with the factory settings to verify that the system is stable as it comes from the factory. Programs like Prime95, OCCT, or AIDA64 can keep the CPU at 100% load for one or two hours. Meanwhile, you should monitor the temperatures to ensure they don't get too high.
It's important to do it this way because if you later experience crashes or blue screens after increasing the frequency, you'll know the problem stems from the overclocking and not from a system that was already unstable. This way, you have a clear stability benchmark to compare against.
Once you've verified stability, it's time to measure your system's baseline performance . This is where benchmarks like Cinebench (very useful for CPU testing), 3DMark (for gaming), or even specific synthetic tests for the GPU or memory come into play. Note the scores, average and maximum FPS, and maximum temperatures.
Access the BIOS and automatic or manual overclocking options
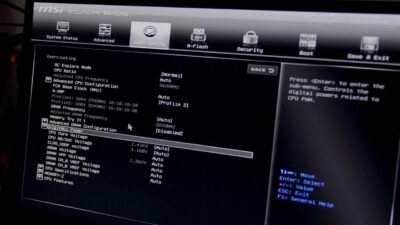
The truly reliable way to overclock the CPU is by entering the BIOS or UEFI of the motherboard, which is where the essential parameters for frequency, voltage, and core behavior are located.
To enter the BIOS, turn off your computer and turn it back on while repeatedly pressing the key specified by your manufacturer. This is usually Delete (DEL), F2, F10, or F12 , depending on the motherboard or laptop model. Boot screens often display a message like "Press F2 to enter Setup" indicating the exact key.
Each brand structures the menu differently, but there's almost always a section called OC, Overclocking, Advanced CPU Core Settings, Tweaker , or something similar. That's where you adjust multipliers, voltages, power limits, and other key parameters.
Many modern motherboards also include automatic overclocking profiles or predefined OC levels . These usually offer a small frequency increase within limits considered safe by the manufacturer, in a fairly straightforward way, although the results are rarely as good as a well-tuned manual adjustment.
If you're just starting out and hesitant to mess with too many things, automatic mode can serve as a good introduction, but if you want to get the most out of it, the best approach is still manual overclocking with small increments and stability tests between each change.
Changing the CPU multiplier and voltage step by step
The main setting you'll adjust in the BIOS is the CPU multiplier . Since the motherboard's base frequency is usually 100 MHz, a multiplier of 36 means 3,6 GHz, 40 would mean 4,0 GHz, and so on. The idea is to increase this value gradually.
A reasonable strategy is to increase the multiplier by one point at a time (for example, from 36 to 37, then to 38, etc.) and boot Windows after each change to perform a quick stability test and temperature reading. This way, you can quickly detect the point at which the system starts to fail.
If increasing the multiplier causes instability, crashes, blue screens, or test errors, it's usually a sign that the CPU needs a bit more voltage . In the BIOS, you'll see a Vcore value that, by default, may be set to "Auto" or around 1,20-1,25V depending on the CPU.
You can try increasing that voltage very gradually, for example in 0,01-0,02 V increments, until you find a point where the CPU can handle the new frequency without serious errors. Values around 1,35-1,40 V are generally considered a pragmatic limit for daily use on many modern CPUs, although it depends on the specific model and your cooling system.
The key is that every time you increase the multiplier or voltage, you run stress tests again and observe temperatures and performance . When you find a point where the system remains stable for hours and temperatures are within reasonable limits, you'll know you've found a "stable" overclock for daily use.
What is GPU overclocking and how is it done with programs like MSI Afterburner?
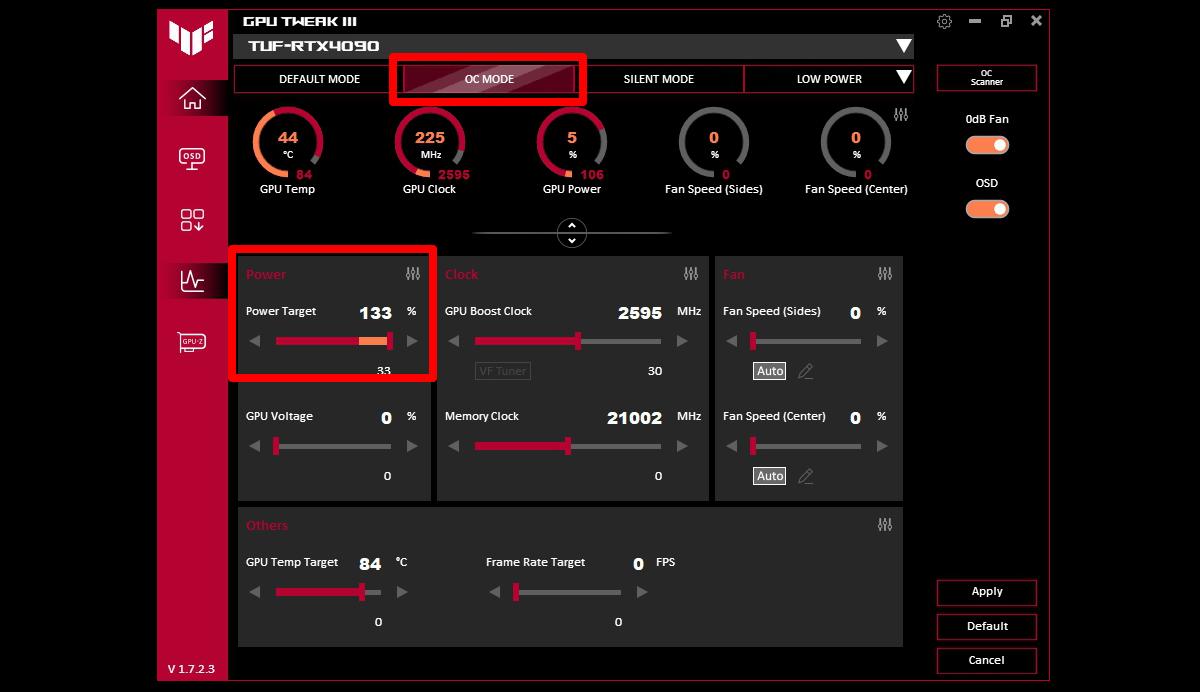
GPU overclocking is usually done from Windows using tools like MSI Afterburner , which allow you to increase the frequency of the graphics core, video memory, and adjust the fan curve without touching the card's BIOS.
The philosophy is very similar to that of the CPU: it involves gradually increasing the values , testing stability with benchmarks or demanding games, and monitoring that temperatures don't spike. Many users start by increasing the memory by a small percentage, then the core clock, and from there they experiment.
Afterburner and similar programs also allow you to modify the power and temperature limits that the graphics card is willing to accept. By slightly increasing these limits, the GPU stops limiting itself so quickly and maintains higher frequencies for longer, although always at the cost of increased power consumption and higher temperatures.
In modern Nvidia and AMD graphics cards, the driver and BIOS themselves usually apply protection mechanisms (throttling, power limiting, etc.) that automatically reduce the frequency if a certain threshold is exceeded, so it is relatively difficult to "fry" a graphics card just by increasing the frequency a little.
In any case, the same principles apply: use benchmarks like Unigine Heaven, 3DMark, or very demanding games to test stability and check for artifacts (strange pixels, lines, flickering) or crashes. If these occur, you'll need to lower the frequency or voltage slightly until the problems disappear.
Advanced methods: physical jumpers and low-level changes
Besides overclocking via BIOS or software, there are more "old school" methods such as modifying jumpers or bridges on the motherboard or graphics card to change the circuit's electrical configuration. This involves opening the computer and physically handling the components.
A jumper is basically a small plastic connector with a metal interior that is placed over specific pins on a circuit board to open or close a circuit . Changing its position modifies things like the base multiplier or certain voltage limits in older or very specific devices.
These types of modifications are delicate, require advanced knowledge of electronics and motherboard design , and are generally not recommended for beginners. A mistake when moving a jumper or performing a physical modification can render the motherboard or graphics card unusable.
That's why, in practice, almost all users today resort to overclocking via BIOS and software , which offers enough room for improvement without having to physically tamper with the circuit or risk the hardware so much.
Real risks of overclocking: temperature, stability, and warranty
Although overclocking is much safer today than it was years ago, it's still a way of pushing hardware beyond the manufacturer's specifications . This involves risks that should be carefully considered before starting.
One of the most obvious risks is the increase in temperature and power consumption . An overclocked CPU or GPU generates more heat, and if the cooling system isn't adequate, the component can spend many hours operating at high temperatures. In the short term, the system usually protects itself by reducing the frequency or shutting down, but in the long term, that extra heat can accelerate degradation.
There's also the issue of system instability . Pushing components to their limits increases the likelihood of crashes, random restarts, game errors, or even data corruption if the failure occurs during a write operation. That's why it's always a good idea to keep backups of important data.
Another point is the warranty: in many cases, overclocking is considered an officially unsupported modification , which can void the manufacturer's warranty. While proving certain types of overclocking is difficult, there are situations (for example, physical modifications or a modified BIOS) where it can be quite clear.
Regarding lifespan, increasing the voltage and frequency of the CPU or GPU subjects the transistors to continuous additional stress . This can shorten their theoretical lifespan (from, for example, 15-20 years to 12-15 years), although in practice most users upgrade their PCs long before this limit becomes a real issue.
Is overclocking safe these days?
With modern hardware and a bit of common sense, overclocking is relatively safe as long as it's done sensibly . Current CPUs and GPUs include safeguards that reduce frequency, limit power consumption, or even shut down the system if things get too extreme.
This makes it quite difficult to "fry" a processor simply by changing the multiplier a few points or by performing moderate voltage tests. More commonly, if you go too far, the PC will fail to boot, get stuck in a boot loop, or display a blue screen until you restore reasonable settings.
If your computer fails to boot after a BIOS change, almost all motherboards offer options like Clear CMOS or Reset CMOS , either via a dedicated button or a specific jumper. Activating these options erases the BIOS settings and restores the system to its factory configuration.
In the worst-case scenario, you can always resort to the classic method of removing the motherboard battery (the typical coin cell battery), waiting a few seconds, and replacing it. This will cause the BIOS to lose its stored configuration, and upon startup, all values will be restored to their defaults.
While it's difficult to destroy the hardware in one fell swoop, the extra thermal and electrical stress is real and can shorten the component's lifespan over time . It's not usually dramatic, but it's something to keep in mind when deciding how much you want to push it.
How to diagnose and troubleshoot problems after overclocking
If after overclocking you start noticing strange behavior (crashes, errors in games, graphical artifacts), it's time to perform a systematic diagnosis to find the problem and correct it.
The first step is to run stability tests and benchmarks again , such as Prime95, Cinebench, AIDA64, or OCCT for the CPU, and 3DMark, Unigine Heaven, or other GPU benchmarks. The goal is to reproduce the problems under load and see if the system consistently fails.
While performing these tests, it's crucial to monitor the temperature in real time using tools like HWMonitor, Core Temp, or SpeedFan. For a CPU, ideally, even under heavy load, the temperature should remain within a reasonable range, approximately between 40 and 65 °C under moderate use, and without approaching the manufacturer's maximum specified temperature.
If you notice problems arising when the temperature rises significantly, or that the system is thermal throttling, the solution involves lowering the multiplier and voltage , improving cooling, or reducing the power limit. Less overclocking means less heat, lower power consumption, and a larger safety margin.
Nor should we forget the software aspect: outdated graphics drivers, a very old BIOS, or chipset drivers can cause instabilities that worsen with overclocking. Keeping drivers and BIOS up to date helps the system communicate correctly with the CPU, GPU, and the rest of the components.
Laptops, overclocking, and their limitations
In theory, you can also overclock a laptop's CPU if the processor is unlocked and the BIOS allows it, but in practice it is something that is not usually recommended for most users.
Laptops have very tightly packed components, with much more limited cooling systems than desktop towers. When frequency and voltage increase, the heat generated can rise rapidly , and the device doesn't always have enough ventilation to dissipate it without excessive noise or continuous thermal throttling.
For this reason, many manufacturers lock both the CPU and the BIOS to prevent adjustments to critical frequency or voltage parameters. Some advanced gaming models do allow certain adjustments, but generally, you should proceed with extreme caution.
If you still decide to try and your laptop has an unlocked CPU, the procedure would be very similar to that of a desktop computer: gradual adjustments in the BIOS, stability tests, temperature monitoring , and extreme caution with voltages. Any excessive increase can significantly shorten the lifespan of the computer.
As a safer alternative for laptops, optimizing software, reducing background programs, cleaning the system, and taking care of cooling (cooling pads, dust removal, thermal paste replacement) usually yields better results than aggressive overclocking.
Optimization and overclocking software for less advanced users
For those who are not comfortable messing with BIOS or technical parameters, there are third-party utilities that greatly facilitate both system optimization and certain forms of controlled overclocking , especially on GPUs.
Some programs close background processes, stop unnecessary services while you play, and free up RAM, allowing your existing hardware to perform at its best without needing to increase clock speeds. It's a less aggressive way to improve gaming performance without increasing the risk.
There are also gaming-focused programs that, in addition to optimization, integrate simplified GPU overclocking features . They analyze your configuration, propose a performance profile, and automatically apply changes to frequency and fan speeds to get even more out of your graphics card.
While these tools don't replace the flexibility of manual overclocking, they are very useful for users who prefer a more "one-click and go" solution . Even so, it's important to remember that any frequency increase generates extra heat, so monitoring temperatures remains essential.
In any case, whether you choose tools like these or overclock manually, the key is that the system remains stable, cool, and behaves predictably . If you start noticing strange errors, it's wise to backtrack a bit on the settings.
With all of the above, it is clear that CPU and GPU overclocking can be a very effective way to get the most out of a PC without changing hardware , as long as you understand what you are doing, you progress little by little, you monitor temperatures and stability, and you accept that there is a certain compromise between performance, noise, consumption and lifespan of the components.