- Comprehensive calibration encompasses everything from mechanical bed leveling to fine-tuning of the extrusion flow.
- Precise control of steps per millimeter and temperature is crucial to avoid defects such as stringing or underextrusion.
- The use of specific test pieces allows for the validation of dimensional accuracy and layer adhesion in the hardware.

If you've ventured into the world of additive manufacturing, you know that simply pressing the print button and hoping for magic isn't enough. For a part to fit perfectly the first time, especially if you're trying to model real-world objects like a watch buckle with complex angles, you need your printer to be incredibly precise. There's nothing more frustrating than designing something down to the millimeter and then finding that the dimensions are completely off when it comes out of the printer.
Having a properly tuned printer is fundamental to ensuring the material adheres correctly and the finishes are clean. Sometimes we confuse simply adjusting a parameter, like increasing the temperature, with a thorough calibration . While the former is a minor adjustment, calibration is a systematic process of measurement and testing that harmonizes all the hardware, from the motors to the nozzle, so they work together seamlessly.
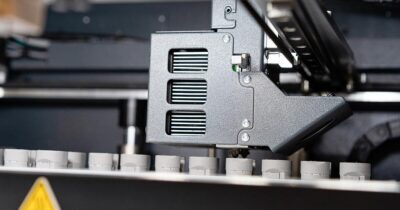
When should we get started with the calibration?

You don't need to be obsessive, but there are times when checking the settings is essential. The most logical thing to do is when you first assemble the machine or if you've had to move it, since any bump can misalign the axes. It's also advisable to do a general check after replacing any mechanical parts, updating the firmware, or if you notice that your prints are starting to produce recurring defects that weren't there before.
The ABCs of basic calibration: Bed, nozzle, and shafts

To prevent the print from peeling and ensure a flawless first layer, proper build platform leveling is crucial. If the bed is tilted, the nozzle might be too far away, preventing filament from adhering, or too close, potentially damaging the print surface or causing jams. There are two ways to achieve this: manually, using the classic paper trick to feel slight resistance, and automatically, using sensors like the BLTouch that intelligently adjust the Z-axis .
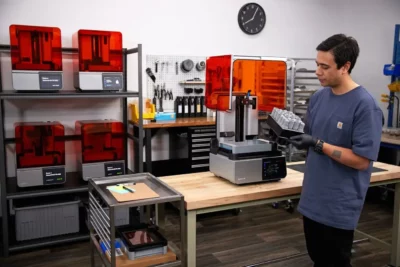
On the other hand, we can't forget about verticality. It's vital to check that the Z-axis is perfectly straight and that the X-axis moves smoothly without any jerking or play. With more advanced equipment, such as IDEX dual-head systems, things get a bit more complicated because you have to ensure that both nozzles are aligned with millimeter precision. If you're going to print multi-material parts, any misalignment between the two print heads will cause the layers to not align, so fine calibration down to the micron is the only way to avoid disaster.
Mastering the extruder and steps per millimeter

One of the areas where people often get lost is in the steps per millimeter (e-steps). Essentially, this tells the motor exactly how much to rotate to push one millimeter of plastic. If this fails, you'll get overextrusion (too much material and bulky parts) or underextrusion (gaps and brittleness). To fix this, the most reliable method is to mark the filament , for example, 120 mm from the extruder, ask the machine to extrude 100 mm, and measure how much is actually extruded. If it's not the expected 20 mm, you'll need to use a mathematical formula to update the value in the firmware and save the changes.

Advanced settings: Flow, retraction, and heat

Once the mechanics are sorted, we move on to the software and the material chemistry. The flow rate is the percentage of material that actually comes out; even if the extruder is working correctly, each filament behaves differently, and you may need to adjust the percentage in the slicer between 95% and 105% to achieve the exact wall thickness.
To avoid those annoying stringing threads or "hairs" left behind by printed parts, you need to calibrate the retraction. This involves finding the sweet spot where the nozzle retracts just the right amount of filament as it moves. If you overdo it, you could cause a jam; if you don't, the part will look like a cobweb. The best way to solve this is to print a specific retraction test and observe the results.
Ultimately, temperature is the determining factor in fluidity. Printing with PLA is not the same as printing with PETG or ABS, so we recommend consulting a PETG vs. PLA comparison guide to choose the right material. Ideally, you should print using a temperature control system , where the machine changes the temperature every few layers. This allows you to visually see at which temperature level there is better adhesion, less warping, and an optimal surface finish.
Validation tools and parts
To avoid going in blind, there are models specifically designed for testing the machine. The calibration cube is essential for measuring actual dimensions with calipers, while thin-walled pieces are used to detect excess material . Additionally, for the most meticulous, there are external tools such as digital belt tension gauges , which ensure that the motors aren't damaged and that the circles don't come out as ovals.
Having a methodical process, from physical leveling to thermal optimization, is what distinguishes a mediocre print from a professional piece. By combining the use of precise gauges, flow testing, and constant hardware tuning, material waste is minimized, and any design, no matter how complex its geometry, is guaranteed to be produced with complete dimensional accuracy.
