- Configure shortcuts and native options on mobile and PC to quickly and easily capture and record your screen.
- Organize your screenshots with folders, tags, text search, and automatic deletion rules to avoid chaos.
- Choose capture tools according to your needs: basic, advanced, with powerful editing, or focused on video.
- Consider compatibility, learning curve, and cost to choose the solution that best fits your daily workflow.
If you're one of those people who live by taking screenshots, your mobile phone and computer are surely full of images you took "just in case". News, WhatsApp conversations, notes, software errors, quick tutorials… In the end, it all ends up in an endless folder of screenshots that are impossible to review calmly; perhaps this is for you. organize your digital desktop.
The good news is that there are many ways to bring some order without going crazy. From super-fast capture shortcuts to apps that tag, search for text within images, and automatically delete what you no longer needLet's see, step by step, how to capture, edit, organize, and manage your screenshots on both your mobile phone and computer, and which tools are really worth it.
How to take and manage screenshots on your mobile phone
Smartphones have made taking screenshots almost automatic. With just a couple of buttons, you can save a snippet of conversation, a map, or a web page.But if you don't have a good grasp of how the captures work and where they are stored, it's easy to lose control.
Taking a screenshot on Android
On most Android phones, the basic method is always the same. Open the screen you want to save and press the power button and the volume down button simultaneously.You'll notice a small animation or sound, and you'll see a thumbnail in a corner.
In some models, if that shortcut doesn't work, there's an alternative: Press and hold the power button for a few seconds and tap the “Screenshot” option. which appears in the menu. If you still don't see it, it's best to consult the manufacturer's support page, because each brand may place the access point in a different location.
After taking the screenshot, A preview usually appears in the lower left corner or an icon appears at the top of the screenFrom there you can quickly edit, share, or delete it without having to go to the gallery.
Scrolling screenshots on Android (wide screen)
When you need to save a long conversation or a full page, a scrolling screenshot is ideal. In Android 12 and later versions, many devices allow you to "capture more" in screenshots of scrolling screens..
The flow is simple: Take a normal screenshot with power + volume down Then, at the bottom of the screen, tap the "Capture More" option (or similar, depending on the brand). Next, Use the cropping guides to select how much of the scrollable screen you want to include.This way you avoid taking five screenshots in a row of the same chat and then having a mess of loose images.
View, edit, and share screenshots on Android
On recent Android phones, captures are mainly managed from the Google Photos app. Open Photos, go to the collections or albums view and locate the “Screenshots” folder.where they are automatically grouped.
If your device doesn't have the Photos app or you're using an older version of Android, You'll probably see an app called "Gallery"Inside you'll find an album view and a specific "Screenshots" folder where all the images you take with the phone's physical buttons are saved.
Record your screen on Android
It's not all about still photos: sometimes you want to show a process step by step. That's what screen recording is for. Swipe down twice from the top to fully open the quick settings and look for the “Record screen” icon..
If you don't see it at first glance, it's usually enough to Swipe to the side for quick access or tap "Edit" To add the recording icon from the list of available buttons. Once you have it, simply:
- Tap “Record screen” and choose whether you want to include audio and show taps by pressing the screen.
- Start the countdown and perform the actions you want to record.
- To stop, swipe up from the top again and tap the recording notification.
Recordings are usually saved within the Photos app itself, typically in a section of videos or “Movies” within the “On this device” sectionIt's worth keeping an eye on them from time to time, because they take up quite a bit of space.
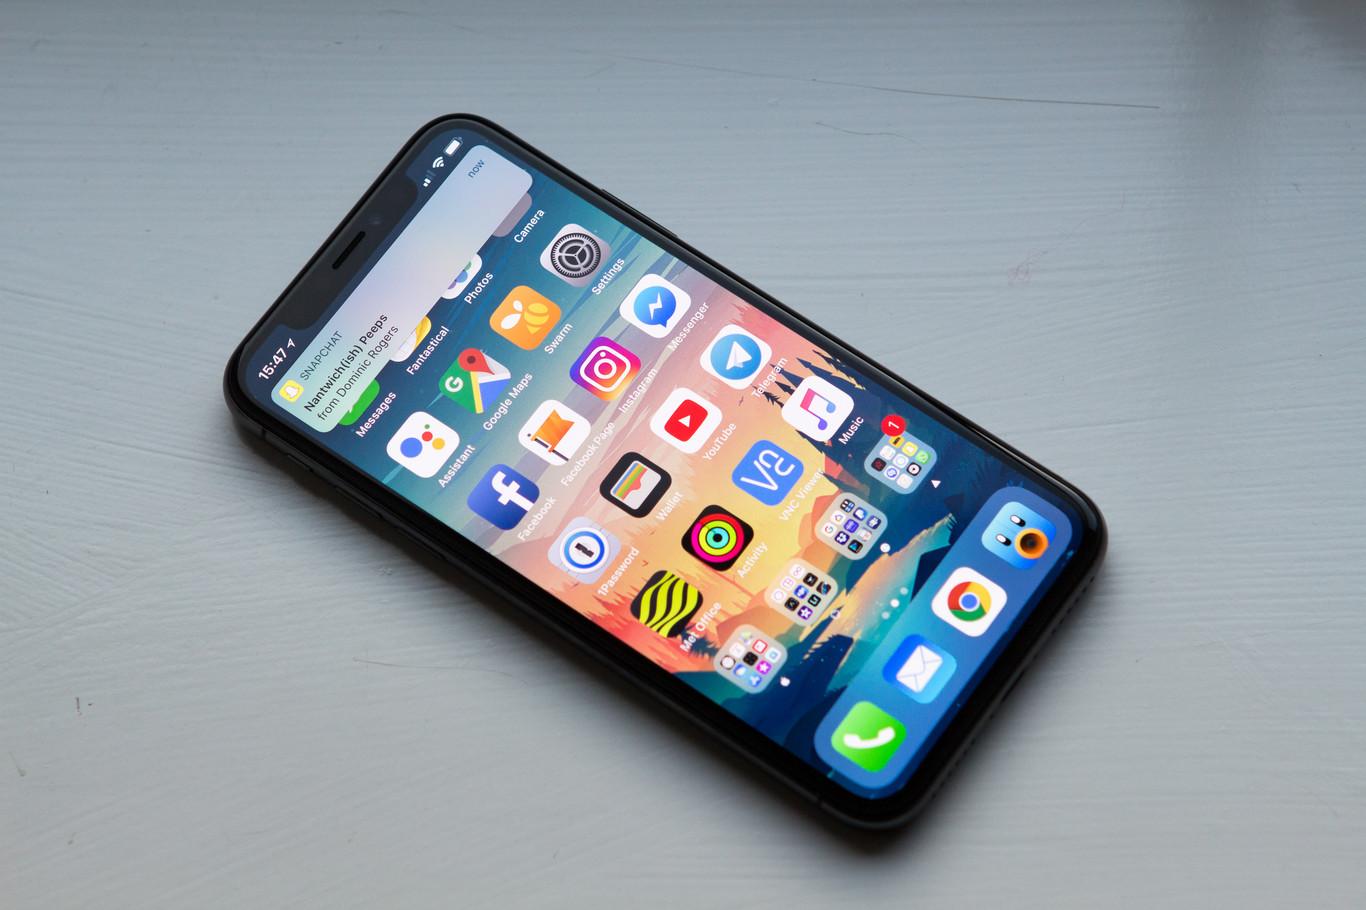
Extra control on iPhone: capture previews
On iPhone, in addition to the classic capture methods, there's a small setting that can help you better manage how you view screenshots. By default, screenshots are displayed full screen immediately after they are taken.which can be a bit invasive.
If you prefer that only a discreet thumbnail appears in the bottom left corner, you can change it like this:
- Open Settings on your iPhone and go to “General”.
- Tap the “Screenshot” section.
- Turn off the “Full screen previews” option so that only the temporary thumbnail is displayed.
This detail may seem minor, but It significantly reduces interruptions when you take many captures in a row.For example, when documenting a process or saving several steps of a conversation.
Why you need to organize your screenshots
If you take a second to look at it, you probably take several screenshots a day: a tweet you don't want to miss, an interesting article, event schedules, a map, a receipt… Multiply that by weeks and months, and the result is usually a gallery full of screenshots.
The first problem is obvious: Many captures are "use and discard" and only make sense for a few minutes or hours.Others, however, you do want to keep as a reminder or long-term reference. When they're all mixed up, you end up wasting time scrolling through your film reel without finding anything.
Furthermore, the iOS and Android photo systems only provide basic assistance: They create a specific album of screenshots, but they don't allow advanced organization within that folder.Without external help, it is very difficult to tag, add notes, automate deletions, or search for text within screenshots.
That's why specific apps dedicated to this problem have appeared. Its goal is simple: to give you a fast system for capturing and, above all, a comfortable environment for organizing and cleaningThe key is that the saving process should be as immediate as taking the screenshot, without extra steps that you end up abandoning out of laziness.
Tools for managing screenshots on your mobile device
Aside from the native functions of Android and iOS, there are specialized applications that focus solely on your captures. On iPhone, one of the most interesting examples is ScreenshotPROwhile on Android there are several alternatives with similar philosophies.
ScreenshotPRO on iPhone
ScreenshotPRO is designed for those who have a camera roll full of screenshots. Its biggest advantage is that it only deals with screenshots, both those you take and those that arrive in the photo library from other apps., such as WhatsApp or other apps that save images to your camera roll.
Within the app you have five key functions for your captures: organize, label, search, delete and annotateWith "organize", for example, you can move screenshots, copy them to other folders, or delete them in bulk, keeping only what you really want to preserve.
The tags section is especially useful if you take screenshots of different themes or applications. You can create labels like “WhatsApp”, “social media”, “work”, “invoices”, “travel”, or whatever you wantThis way, when you want to find something specific, you won't have to sift through thousands of images.
Another strong point is its intelligent search engine. ScreenshotPRO is able to find text within imagesIn other words, it recognizes the words that appear in a screenshot and allows you to locate it by typing that text. From there, you can even create new tags with the results.
Finally, the automated deletion option is gold for those who hoard without restraint. You can set rules so that certain types of captures are deleted after a specific time.or keep only those with specific tags or notes. It also allows you to add links and annotations to each screenshot to remind you why you saved it.
Yes, Some advanced features are locked in a paid "premium" version with an annual fee.Even so, there are other similar apps in the mobile ecosystem that offer free, somewhat more basic but equally useful options to start cleaning up your camera roll.
Programs for capturing and managing screenshots on a computer
In the PC world, screenshots are also commonplace: documenting errors, preparing tutorials, creating presentations, sending instructions to a colleague… Here you have a good range of programs, from very simple options to professional solutions with advanced editing and automation.
In the PC world, screenshots are also commonplace: document errors, prepare tutorials, create presentations, send instructions to a colleague or even project the mobile screenHere you have a good range of programs, from very simple options to professional solutions with advanced editing and automation.
Snagit: Advanced Capture and Powerful Editing
Snagit is one of the most complete tools for those who work a lot with visual content. It allows you to capture specific areas, the entire screen, windows, take panoramic captures, and even record the screen and webcam with audio..
In addition, it includes a very powerful image editor. You can crop, rotate, highlight areas, add arrows, text boxes, shapes, stamps, and all kinds of annotations., ideal for creating professional-looking manuals, tutorials or training materials.
Another great advantage is the ease of sharing. Captures or videos can be saved on the computer or sent directly to services such as Google Drive, Dropbox, YouTube, Twitter, and other destinations.reducing the intermediate steps.
Snagit is complemented by Screencast, a service that Generate links to share screenshots and videos without having to deal with large filesYou take the screenshot with Snagit, edit it if you want, and then choose "Share link": Screencast creates the URL and copies it to the clipboard, ready to send to whomever you want.
It's a fantastic solution for professional use, although Its main drawback is that it's a paid service and can be expensive for users who only need basic functions.Even so, it usually offers trial versions to assess whether it fits into your workflow.
Windows Snipping Tool
Windows includes its own built-in utility: the Snipping Tool (or Snipping and Annotation in more recent versions). It allows you to capture the entire screen, a specific window, or a custom area drawn with the mouse..
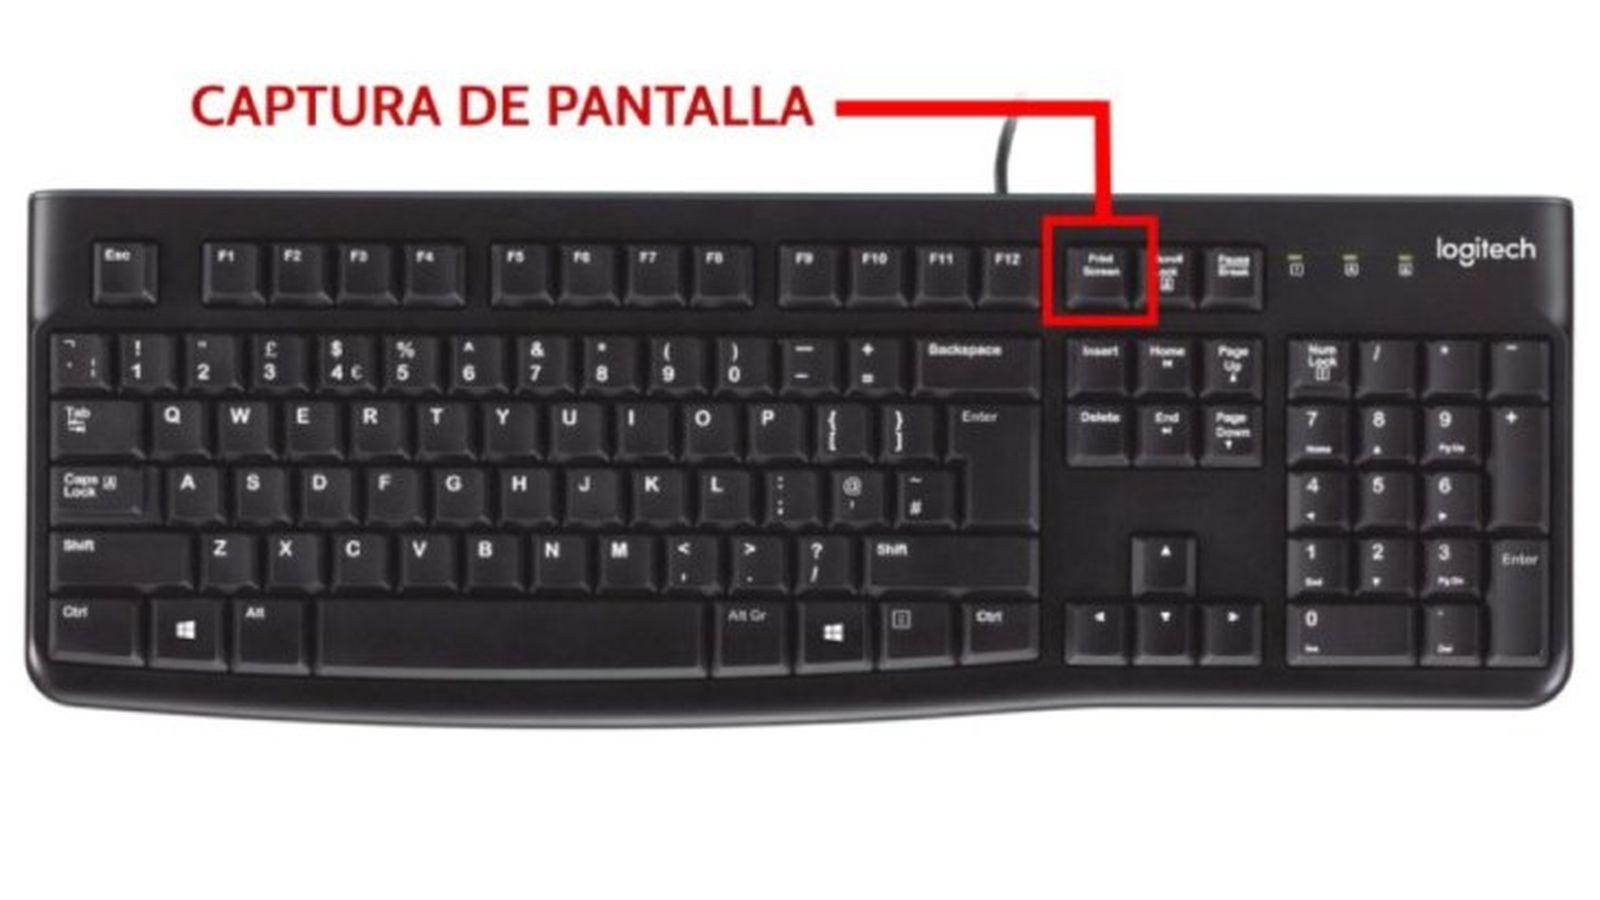
It's ideal for quick tasks and for those who don't want to install anything extra. After taking the screenshot, you can save the file, copy it to the clipboard, or make simple annotations. how to underline or write over it with basic strokes; also, if you need to know where the captures are stored on Windows 10.
Its strengths are clear: It's free, comes pre-installed, and is very easy to use, even for those who struggle with technology.In return, its editing functions are quite limited compared to those of more advanced programs.
Another detail to keep in mind is that Not all older versions of Windows include exactly the same toolTherefore, there may be slight differences between teams.
LightShot: speed and simplicity
LightShot is a lightweight solution, ideal for those who just want to quickly capture and mark something on the screen. It allows you to select an area, make basic annotations (text, drawings, shapes) and copy or save the image instantly..
It has a desktop version and also a browser extension, and it's free and open sourceAnother interesting extra is that it allows Search on Google for images similar to the screenshot you took, which is sometimes useful for locating sources or related information.
However, their philosophy is simplicity: The editing functions are basic; it doesn't allow video recording or scrolling screenshots.And if you use the extension, you need an internet connection for some functions.
Greenshot: lightweight and very practical on Windows
Greenshot is another classic among free and open source programs for Windows. It allows you to capture the entire screen, windows, specific regions, and even take scrolling screenshots in some applications..
It includes a small editor for Add text, shapes, and quick notessufficient for technical documentation, internal reports, or communication within a team.
Its interface is simple and quite customizable. The combination of being free, lightweight, and having varied export options makes it very attractive For users who want something more than the Snipping Tool but without getting too complicated.
The main drawback, It's only available for Windows, and again, the editing tools fall short compared to professional solutions.It also does not allow screen recording.
PicPick: all-in-one with advanced editor
PicPick goes a step further, offering a very wide set of visual tools. It allows you to capture the entire screen, windows, specific areas, and also take scrolling screenshots., very useful for long web pages.
Its built-in editor is one of its greatest strengths. It includes annotations, effects, drawing tools, and color management features. as a color picker, ideal for designers or content creators.
Furthermore, It allows you to record the screen and export the result in MP4 or GIF format., and its tabbed interface lets you work comfortably with multiple captures at once.
PicPick is free for personal use and open source, although Professional use requires a license, and the free version includes ads.Some advanced features may take a little time to master.
ScreenPal: focused on video and tutorials
ScreenPal (formerly Screencast-O-Matic) is very popular among those who record video tutorials. It allows you to capture the screen and webcam with audio.which makes it perfect for online training, technical support, or course creation.
Also offers basic editing tools for both image and videosuch as cropping, adding annotations, and making minor adjustments. Captures can be saved locally or easily shared via links and compatible platforms.
Available a free version with limited features and paid plans that unlock more toolsThe free version usually includes a watermark and lacks some advanced options.
SnapDraw: detailed annotations
SnapDraw is geared towards users who need to clearly mark their screenshots, for example in technical documentation. It offers several capture modes (full screen, windows, regions, scrolling) and a comprehensive set of annotation and drawing tools..
The images are automatically saved in the system's images folder, and They can be uploaded directly to social networks or cloud services, which speeds up the sharing of results.
It's very comprehensive for being free, although it also It offers paid versions with more options.Its main drawbacks: it only works on Windows, It doesn't allow screen recording and its interface can seem a bit complicated at first..
Nimbus Capture: versatility with cloud integration
Nimbus Capture offers an interesting balance between features and simplicity. It allows everything from basic captures to scrolling captures and video recording., in addition to including simple annotation and editing tools.
It stands out for its integration with cloud services. It works especially well with Google Drive, Slack, Dropbox, and other platformsTherefore, it is very practical in collaborative work environments.
It has a functional free version and a paid subscription that unlocks advanced features, such as certain automations or programming functions.
ShareX is a true Swiss Army knife, designed for users who want a high level of control. It's free, open source, and offers a multitude of capture modes, including full screen, windows, custom areas, and scrolling..
It includes an editor for cropping, annotating, and adding shapes, but its strength lies in automation. It allows you to define complete workflows: for example, capture, resize, upload to a cloud service and automatically copy the link to the clipboard.
Furthermore, It integrates with more than 80 cloud hosting servicesTherefore, sharing content is almost instantaneous. However, the interface can be overwhelming at first, and the learning curve is steeper than with other simpler tools.
LightScreen: light and discreet
LightScreen is committed to absolute simplicity. It works as a background process that is activated with hotkeys.It takes the capture and saves it automatically according to the settings you have defined.
Although it doesn't offer sophisticated editing, It includes basic functions such as highlighting, annotating, or cropping., enough for many everyday uses.
Its great advantage is that It's fast, free, very lightweight, and works well even on low-powered computers.Its limitations include being available only for Windows, not recording video or taking scrolling screenshots, and having modest editing options.
Tips for choosing your ideal capture tool
With so many options available, it's easy to get lost. Ultimately, it's about finding the tool that best fits your actual workflow. It's not the same for someone who only wants a couple of screenshots a day as for someone who documents processes all the time..
Compatibility with your system
The first thing to do is check if the program works on your operating system. Many tools focus solely on Windows, while others also work on Mac or Linux.It's also a good idea to check that they are compatible with your specific system version; if you use Windows, consult our guides on Windows tricks to master your PC.
Features you'll actually use
Make a quick inventory of what you need: Do you want to just capture and quickly mark up, or also record video, create GIFs, automate cloud uploads, or perform scrolling captures? Not all tools offer the same thing.
If you only take occasional screenshots, options like the Snipping Tool or LightShot will probably suffice. If you work creating content, documentation, or tutorials, programs like Snagit, PicPick, Nimbus, or ShareX can give you much more flexibility..
Level of experience and learning curve
Another key factor is how much time you are willing to invest in learning how to use the tool. Simple interfaces with few buttons are usually ideal for those who just need to get by..
However, if you want to automate complex workflows or integrate your captures with dozens of services, It assumes that tools like ShareX or very complete solutions will require an adaptation period.In those cases, it helps a lot to have tutorials, guides, or official documentation.
Cost and payment model
Finally, there's the wallet. Some apps are completely free, others operate on a freemium model, and a few require a one-time payment or subscription.Consider whether you really need the professional features or if a well-chosen free option more than covers your daily needs.
If your use is intensive and professional, investing in a good tool can save you many hours in the long run. However, if you only take occasional screenshots, you'll probably have more than enough with lightweight free solutions..
In short, managing your screenshots well involves combining three things: a fast, frictionless method for capturing, a convenient system for organizing and cleaning up your storage, and a tool that truly adapts to your workflowWith the options we've seen for mobile and computer, you have plenty of room to experiment, stick with what feels most natural to you, and finally stop getting lost among thousands of meaningless screenshots.

Table of Contents
- How to take and manage screenshots on your mobile phone
- Why you need to organize your screenshots
- Tools for managing screenshots on your mobile device
- Programs for capturing and managing screenshots on a computer
- Snagit: Advanced Capture and Powerful Editing
- Windows Snipping Tool
- LightShot: speed and simplicity
- Greenshot: lightweight and very practical on Windows
- PicPick: all-in-one with advanced editor
- ScreenPal: focused on video and tutorials
- SnapDraw: detailed annotations
- Nimbus Capture: versatility with cloud integration
- ShareX: Power and automation for advanced users
- LightScreen: light and discreet
- Tips for choosing your ideal capture tool