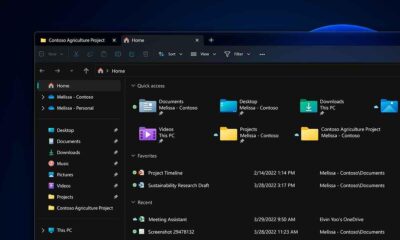
- File History creates successive versions of documents in user folders and saves them to an external or network drive.
- You can configure the copy frequency, retention time, and which folders to include or exclude to optimize space.
- Restoration allows you to recover files and folders to their original location or a different one without overwriting the current version.
- It's ideal for everyday errors, but for complete system backups it's best to combine it with more advanced backup solutions.

Losing an important document at the last minute, accidentally deleting an entire folder, or having a file corrupted just when you need it most are the kinds of things that can ruin your day. Luckily, Windows includes a feature designed precisely for these situations: File History , a kind of "time machine" for your personal documents.
With this tool, Windows periodically saves versions of your files to an external or network drive. This way, if you make a mistake, you can recover a previous version of a file or folder in just a few clicks. In this guide, you'll see in detail exactly what File History is, how to activate and configure it in Windows 10 and Windows 11, how to restore documents step by step, what common problems it causes and how to fix them, and also what more powerful alternatives you have when this feature falls short.
What is File History and how does it actually work?
File History is a backup feature that first appeared in Windows 8.1 and is still present in Windows 10 and Windows 11. It doesn't create a full system image, but instead saves successive versions of your user files so you can revert to previous versions if something goes wrong or you make a mistake while editing.
By default, this system only protects the most common folders in your profile: Documents, Pictures, Videos, Music, and Desktop , as well as some related items like Favorites, Contacts, and certain OneDrive files that are available offline. If you want to include other locations, you can add them to a Windows library to include them as well.
Behind all of this, Windows monitors whether files are created, modified, or deleted in those folders. Each time it detects changes, it creates a copy of the affected files on a backup drive (an external hard drive, a large USB drive, or a network location) and organizes them by version with a date and time stamp. Over time, this generates a fairly comprehensive history of how your documents have evolved.
It's important to understand that File History is not a disk cloning system or a comprehensive operating system backup. It only covers selected files and folders , not applications, complete Windows configurations, or entire partitions.
What data does File History protect and what is left out
When you enable this feature, Windows focuses on the folders associated with your user account. This means that, without you having to do anything, it will back up all the items you save within the default libraries and the Desktop . If you usually work directly there, you'll be well covered from the start.
Specifically, File History saves copies of:
- Documents: texts, spreadsheets, presentations, PDFs and similar.
- Images: photos, screenshots, graphics, etc.
- Videos: home recordings, clips, editing material.
- Music: audio files that you have stored locally.
- Desktop: everything you have "lying around" on your Windows desktop.
- Favorites and contacts linked to the user profile.
- OneDrive Files that are available offline on your PC.
In addition, Windows uses the concept of Libraries to group related content. A library is simply a view that brings together several different physical folders. If you include a folder from another drive within a library (for example, "Documents"), File History will automatically begin protecting it as well.
On the other hand, some elements are left out: it doesn't back up the entire hard drive, the complete system, or installed programs. It's also not designed for backing up open databases or locked files , because many of those files aren't backed up correctly while they're in use.
Prerequisites and copy drive for File History
Before you can take advantage of this feature, you need to have a location ready to store the backups. File History doesn't save data on the same disk as Windows; it requires an external or network drive to prevent a primary disk failure from also losing the backups.
The most common options are:
- Un usb external hard drive (HDD or SSD) dedicated to backups.
- A large USB drive, although in the long run something more robust is better.
- An network drive or NAS accessible from your device.
Ideally, the drive should have plenty of space, especially if you plan to store versions for a long time. The more modifications you make to your documents and the longer the retention period you set, the more storage space File History will consume.
How to enable File History in Windows 10 step by step
In Windows 10, this feature is disabled by default, so you have to enable it manually. The most comprehensive way to do this is through the Control Panel , where all the advanced options are located.
To activate it from the Control Panel, follow these steps:
- Connect your external hard drive or make sure you have access to the network drive where you want to save the backups.
- Open the Control panel (search in the Start menu).
- Sign in Security system and then in File History.
- Windows will detect the available drive and display its status. If everything is correct, you will see the option. Activate.
- Click on Activate to start the automatic backup.
If you have multiple external drives connected or want to change the drive being used, you'll find the Select drive option in the side panel . From there, you can choose another device or even add a network location , such as a shared folder on another computer or a NAS.
When you switch drives, Windows will ask if you want to migrate existing backups to the new location or start a clean backup from scratch. Choose based on whether you want to keep the old backups on the previous drive.
Configure File History in Windows 10 (advanced options)
Once activated, it's worth taking a few minutes to adjust the settings so it doesn't take up too much space and backs up files at the appropriate frequency. All of this is controlled from the Advanced settings link within the File History section of the Control Panel.
In the advanced settings section you can adjust, among others, these parameters:
- Frequency of copiesBy default, Windows saves changes every hour, but you can reduce the interval to 10 minutes or extend it to once a day, depending on how critical your work is and how quickly the drive fills up.
- Version retention periodYou can leave it configured to save the versions "forever" or specify that they should be deleted after a certain number of months or years, or when the disk starts to run out of space.
- Folder exclusionIf there are specific paths that you don't want to back up, you can add them to an exclusions list so that File History ignores them.
In practice, it makes sense to adjust the frequency to something intermediate, like every 6 or 12 hours, if you want a reasonable balance between security and storage space usage . If you work all day with constantly changing documents and are very concerned about losing a single edit, you can tighten the interval even further.
Regarding retention time, keeping copies indefinitely is convenient, but on small disks, it eventually takes its toll. A very useful option is for Windows to keep versions "until space is needed," so they are only cleaned up when the disk starts to run out of space.
The exclusions section is useful for avoiding backing up large amounts of irrelevant data. For example, you can exclude the Downloads folder , since you can easily download almost everything there again, or certain cache directories, temporary files, or large media collections that you prefer to protect with a more specific strategy, such as a cloud backup.
Enable and manage File History in Windows 11
In Windows 11, things get a little more complicated in terms of the interface. Microsoft has been hiding this feature from the Settings app, and many people think it's disappeared, but it's still accessible through the classic Control Panel.
To access it in Windows 11, you can:
- Open the Start menu, type Control panel and press Enter.
- Ir a Security system and then to File History.
Once there, the basic setup is virtually identical to that of Windows 10: you choose the backup drive, activate the service, and adjust the advanced options. However, there are some significant changes: it's no longer as flexible for adding new folders outside of the default locations, and some of the integration with the Settings app has been reduced.
In current versions of Windows 11, accessing "Backup options" from Settings focuses more on OneDrive and cloud syncing, relegating File History to the classic panel. However, you can still use the same options to exclude folders, change the backup frequency, and select drives.
If you're having trouble getting your external hard drive detected or adding folders from Settings, it's usually more reliable to go directly to this module in the Control Panel and do everything from there. And if something gets stuck, you can always disable File History, restart your computer, and then re-enable it to force a clean reconfiguration.
How to add or exclude folders from the backup
Although File History has a fairly limited list of default locations, you can play with libraries and exclusions to fine-tune what is and isn't saved in your backups.
To add an additional folder to the backup in Windows 10, a very practical trick is:
- Go in the File Browser to the folder you want to protect.
- Right-click on it and choose Include in library.
- Select an existing library (for example, Documents) or create a new one.
In this way, Windows will consider that folder as part of the library, and File History will also begin monitoring it. In Windows 11, the options for adding external paths are somewhat more limited, but the basic behavior of libraries remains.
To exclude folders you don't want to back up, return to the File History module in Control Panel and open the Exclude Folders section . From there, you can add paths one by one using the "Add" button.
It is very common to exclude:
- Downloadsbecause it takes up a lot of space and its content is usually easily recoverable.
- Application cache and temporary folders that you don't want to save.
- Certain very large multimedia collections that you prefer to store in the cloud or with a different system.
- OneDrive full version, if you already trust its own versioning system and don't want to duplicate copies.
How to make an initial backup using File History
The first time you enable this feature, Windows will perform a full backup of all selected locations. This initial process can be considerably slow , especially if you have many gigabytes of photos, videos, or documents stored.
Be patient: the first run takes a while because the system has to copy everything from scratch. From then on, subsequent backups will be much faster because only the files that have been modified or added since the last cycle are backed up.
If you want to manually run a backup at any time, you can click the "Run immediately" button in the File History section of the Control Panel. However, it's more common to leave it on automatic and let it run according to your chosen schedule.
How to restore files and folders using File History
The most interesting part comes when something goes wrong and you need to undo your work. Windows offers several ways to restore your data, depending on whether you remember where the file was located or simply know that "something is missing."
The most direct method is to restore previous versions from File Explorer :
- Open Explorer and navigate to the folder where the file you deleted or modified was located.
- Right-click on the folder (or on the file itself, if it still exists) and choose Restore previous versions.
- In the Previous Versions tab, you'll see a list of copies by date and time. Select the one you're interested in.
- You can open it to take a look using the option to open in File Historyor go directly to restoring it.
If you decide to restore, you have two options: overwrite the current version in its original location or use the "Restore to…" option to save that copy in a different folder, for example a temporary folder on the Desktop, and thus compare calmly before deciding which one to keep.
Another way is to go directly to the File History interface for restoration. To do this:
- Open the Control Panel and go to File History.
- Balance Restore personal files in the side menu.
A window will open with a file explorer. At the bottom, you'll find arrows to navigate between dates, and at the top, a search box . You can browse through the folders, double-click to open them, and select one or more files or directories to restore using the green restore button.
If you want to avoid overwriting your current version, right-click the restore button and select " Restore to…" again . It's a very convenient way to recover older versions without risking losing the latest one.
What if File History was not enabled?
For there to be anything recoverable, File History must have been turned on before the file was deleted or modified. If you never turned it on or turned it off a long time ago, there won't be any versions in that backup.
In that case, you can still try other options:
- Review the Recycle Binin case the file is still there.
- Check if it was saved in OneDrive or another cloud service with its own version history.
- Use a data recovery program that analyzes the disk for erased blocks that have not yet been overwritten.
There are specialized solutions, such as MiniTool Power Data Recovery, that allow you to scan your PC, external hard drives, SD cards, or USB flash drives to try to recover accidentally deleted files. The sooner you use it after the loss and the less you write to that drive, the greater the chance that the deleted data hasn't been overwritten.
Common File History problems and how to fix them
Like any other Windows feature, File History isn't without its flaws. Below is a compilation of the most common problems and their practical solutions to save you the trouble.
One of the most common errors is that the system shows File History as enabled, but it's not actually creating new backups . If you suspect something is wrong, first check the last backup date in the Control Panel. If it's significantly older, you need to investigate.
A first step is usually to restart the associated service. To do this:
- Write services.msc in the Start menu and open the services manager.
- Look for the File history service.
- Right click and select Restart.
Another common problem is that the copies start taking up too much space on the destination disk. Because the system saves multiple versions of the same file and doesn't use incremental or differential backups like third-party solutions, the amount of gigabytes used can grow very quickly.
To reduce the impact, you can:
- Change the copy drive to a larger one from the options Select unit.
- Adjust version retention to delete old copies after a reasonable amount of time.
- Use the built-in cleanup (from Advanced Settings, with the version cleanup option) to get rid of backups you no longer need.
Some users also find that certain folders don't appear in the history even though, in theory, they should be protected. In these cases, it's helpful to disable File History, re-enable it, delete and re-add the affected folders or libraries, and check again after a forced backup.
Advantages and disadvantages of File History compared to other solutions
File History has one clear advantage: it's free, integrated into the operating system, and designed for ease of use by anyone, without requiring complicated configurations. The interface is relatively simple , and its version-based organization makes it very convenient for retrieving specific edits.
Furthermore, it integrates well with File Explorer and Control Panel, so you can access previous versions very directly, without having to open external programs or install anything else.
However, it also has significant limitations. For starters, by default it only protects the current user account and its associated folders , so it doesn't serve as a global backup of the entire system. If you want to protect yourself against a major disk failure or a Windows boot problem, this tool falls short.
Another drawback is that it doesn't handle advanced differential and incremental backups like dedicated backup programs do. This means backups tend to take up more space, and you lack sophisticated methods for optimizing storage usage.
That's why many more demanding users turn to third-party software like EaseUS Todo Backup or MiniTool ShadowMaker. These solutions allow you to create complete system images , full disk backups, and support incremental and differential backups, encryption, compression, advanced scheduling, and even the creation of bootable media to restore your computer even if Windows won't boot.
When is it appropriate to use alternatives to File History?
If you only need to protect some work documents, important photos, and personal files, and you don't want to overcomplicate things, File History is a perfectly good option. It works very well for the typical "I've deleted a document" scare , as long as you have it enabled and properly configured.
However, if you manage multiple computers, use your PC for intensive work, or want a serious protection plan against critical failures, ransomware, or hardware problems, the most sensible thing to do is combine it or replace it with more powerful solutions.
Programs like MiniTool ShadowMaker allow you to choose any file or folder for backup, schedule recurring tasks, define incremental and differential backup schemes, and create backups of the entire operating system . This way, if Windows ever stops booting, you can restore the entire environment to a previous state using a WinPE-based boot disk.
Ideally, File History should be integrated into a broader security strategy: also use OneDrive synchronization for certain documents, periodic system image backups, and, if the data is particularly sensitive, at least one copy outside the office or home , either in the cloud or on a device stored elsewhere.
If you get into the habit of occasionally checking that File History is active, your backup drive has enough space, and the services are working correctly, you'll have a good buffer against everyday errors. And, by using more advanced system backup tools, you'll find it much easier to recover from any serious disaster without losing your documents or having to start from scratch with your computer.