- Printer problems in Windows are usually due to incompatible drivers, system updates, print queue errors, or connection failures (USB, WiFi, or Bluetooth).
- Microsoft is removing legacy V3 and V4 printer drivers in Windows 11, which particularly affects older printers and forces the use of modern drivers or the IPP class driver.
- Before taking drastic measures, it's advisable to check cables, network, printer status, update or reinstall the driver, and use Windows troubleshooting tools.
- When nothing else works, erasing the printer and configuring it again (even with manual ports, duplicate profiles, or COM port) usually brings it back to life and prevents recurring errors.
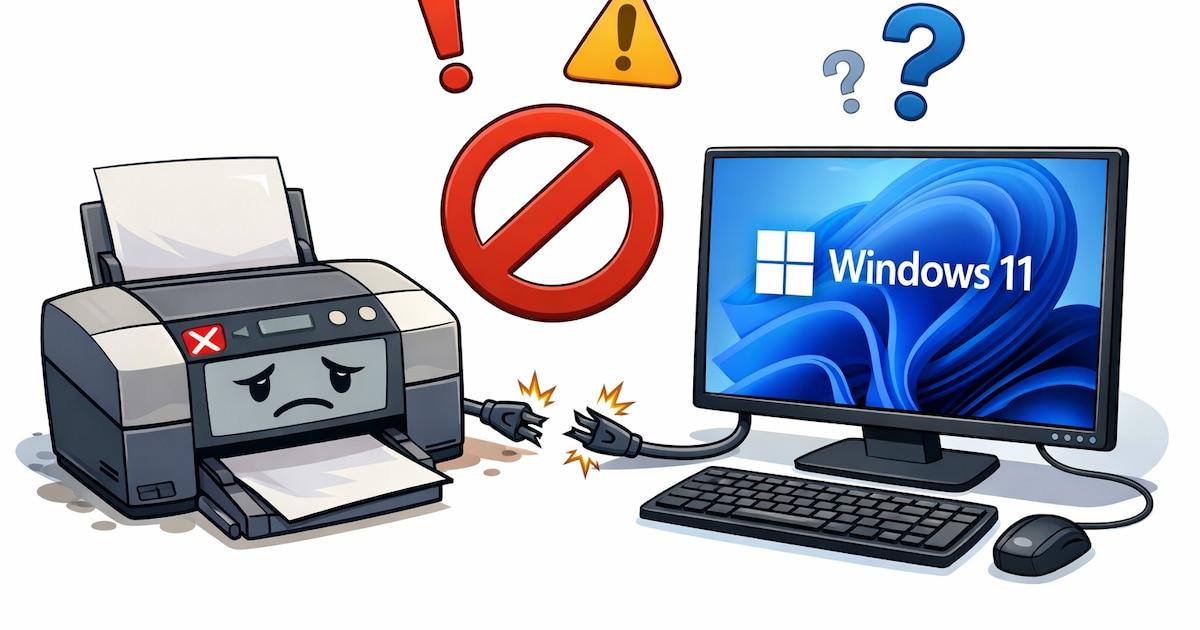
If you have a printer connected to Windows, you've probably encountered problems with it more than once: it won't print, it disappears, the print queue gets stuck, or it stops working after an update . And, as is often the case, all of this happens just when you need to print a document the most.
Printer behavior in Windows 10 and Windows 11 can be quite erratic, and Microsoft's recent decisions regarding older printer drivers and changes to the printing system have only added to the complications. This guide will provide a clear and organized overview of what's happening with printers in Windows, why they malfunction, how new updates affect older models, and step-by-step instructions on how to get printing working normally again.
Why do printers cause so many problems in Windows?
Behind most printer failures in Windows are a few recurring causes: incompatible or outdated drivers, changes in Windows Update, print queue errors, misconfigured ports, or unstable connections (USB, network, WiFi, or Bluetooth).
These problems were already noticeable in Windows 10, but with Windows 11 things have become a bit more complicated. Microsoft has modified the printing services and driver model several times, so printers that previously worked without problems now appear as generic, lose configuration options, or simply stop printing after a system update.
Additionally, some errors occur because Windows 11 detects the printer as a generic device and fails to apply the correct driver. In other cases, the privacy and security settings themselves may block printing, especially if you use intermediary applications or manufacturer software that requires additional permissions.
To make matters worse, the classic problem of a jammed print queue is still very much present: locked documents that prevent anything else from coming out, frozen print services, or corrupted spool files that have to be emptied manually.
The end of legacy V3 and V4 drivers in Windows 11
One of the most important changes affecting many users is the phase-out of "legacy" V3 and V4 printer drivers in Windows 11, especially in versions 24H2 and 25H2.
These legacy drivers are designed years ago for older hardware . The V4 model was introduced with Windows 8, so we're talking about technology that's over a decade old. Although these drivers have allowed older printers to continue working on modern computers for a long time, Microsoft considers them obsolete, insecure, and difficult to maintain.
With the Windows 11 update KB5074105, Microsoft is activating the beginning of the end of this support: starting in January 2026, Windows 11 will stop supporting printers that depend on V3 and V4 drivers , closing a transition process that the company announced in September 2023 to allow manufacturers and users to adapt.
The official reason is clear: these legacy drivers have stability problems and pose a security risk ; they have become a weak point in the system, and continuing to support them complicates both Windows maintenance and protection against vulnerabilities.
In practice, this means that many older printers may fail to install or function correctly on Windows 11 24H2 and 25H2 if an updated alternative driver is not available. Microsoft's goal is to focus on modern, more secure, and universal technologies , such as the IPP class driver built into Windows 10 and Windows 11, which allows printing without installing third-party software.
What to do if your printer is old or relies on legacy drivers
If you're using an older printer, the first thing you should check is whether it relies exclusively on outdated V3 or V4 drivers and doesn't have a modern driver compatible with Windows 11. This scenario is especially common in small businesses, schools, or offices that continue to use devices whose manufacturers no longer update them.
Microsoft recommends, as a first step, contacting the printer manufacturer to check if there is an updated driver or a universal driver for newer versions of Windows 11. Many manufacturers have released unified drivers in recent years that can extend the lifespan of older models.
If the manufacturer no longer offers support and there are no recent drivers, you'll have to seriously consider replacing the printer with a current model . It can be frustrating to have to replace a device that "still prints fine," but if the operating system stops recognizing it or does so only partially, there will come a point where you have no reasonable alternative.
For those who have already encountered this problem after an automatic update, there is a temporary solution: uninstall the specific update . In Settings > Windows Update > Update history, you can find KB5074105 and remove it, provided the system still allows it. However, it's advisable to back up your data before making any changes and understand that this solution is a short-term fix.
Microsoft's strategy is clear: prioritize modern drivers, such as the IPP class driver , strengthen security, and simplify maintenance. The percentage of affected users may be low globally, but those who rely on an older printer and don't prepare in advance could face a serious workflow problem.
Typical errors when installing or connecting the printer in Windows
One of the most frustrating situations is when, after following the installation wizard, Windows displays an error and the printer fails to complete the installation . In this case, it's best to start by ruling out the simplest causes.
First, check the USB connection if the printer is wired: unplug and replug it when prompted by the software, try a different USB port on your computer, change the cable, and if you have other devices connected, disconnect them while you're testing. Many installation errors are caused by a faulty cable or ports with power issues.
Another key check is to rule out any viruses or malware preventing the printer software from installing. Run a full scan with your updated antivirus software and make sure there are no unexpected security blocks. You can also turn off the printer, unplug it for a minute, and then turn it back on to force a clean boot.
If the installer keeps giving errors, go to Settings > Devices / Bluetooth & devices > Printers & scanners and run the Windows print troubleshooter. Sometimes it fixes internal services or settings that aren't immediately obvious.
If your computer can't find your printer, you'll need to add it manually . In Windows, go to Add printers and scanners, wait for it to search, and if it doesn't appear, click "Update" or "The printer I want isn't listed" to force an advanced detection and even install the corresponding driver.
Printer offline, failing WiFi, and other network problems
Another very common category of failures comes from the network connectivity side : WiFi printers that do not appear, devices that say they are offline, or equipment that is on a different network.
If the printer doesn't have internet or local network access, check the basics: that it's turned on, connected to the same Wi-Fi network as the computer , and within range of the router . Sometimes simply turning it off, unplugging it for a few seconds, and turning it back on, along with restarting the PC, is enough.
Don't forget to check your own connection: open a webpage on your computer or mobile device and confirm that the router and line are working correctly . If there are any interruptions, unplug the router, wait half a minute, and plug it back in.
When your printer appears as "offline" in Windows, it's important to check the device status in your system. In Windows 10, for example, go to Settings > Devices > Printers & scanners , select your printer, click "Open queue," and in the Printer menu, make sure that the "Pause printing" and "Use offline printer" options are not selected . If they are selected, deselect them.
If the print queue is stuck and nothing seems to be progressing, open the list of pending documents, select the jobs, and cancel them . In many cases, deleting everything and resending the document resolves the issue. If the system is unresponsive, you can try pressing Ctrl+Alt+Delete, opening Task Manager, closing the involved applications, or even restarting your computer.
WiFi and Bluetooth printer: when the wireless one won't work
WiFi and Bluetooth printers are very convenient, but they also bring their own share of headaches, especially on Windows 10 and Windows 11. One of the most frequent problems is that the printer doesn't detect the PC or the PC doesn't detect the printer even though they are on the same network.
With Wi-Fi printers, it's important to check how the device itself scans for or searches for devices on the network . Each manufacturer has its own method: menus on the printer's screen, WPS buttons on the router, wizards on your mobile device, etc. If you don't complete this pairing process correctly, the printer may never be able to "see" your computer.
Although a driver is usually added during the installation process, it's a good idea to check the manufacturer's website for a newer version . An outdated driver can cause detection problems, print quality issues, or loss of advanced features.
If your wireless printer is still unresponsive, another very useful tool is the Windows printer troubleshooter . In Windows 10, for example, you can go to Settings > Update & Security > Troubleshoot > Printers and run it to check settings, ports, and services.
In the case of Bluetooth printers, first check the device itself: that the Bluetooth icon appears on the printer's screen , that it is not paired with another device (if it is, turn off that device, disable its Bluetooth, or delete the pairing), and that it is compatible with the type of encryption and network band you are using.
If the problem lies with your computer, the Windows Bluetooth driver itself might be the culprit, especially on older PCs. In that case, you can try several options: installing updates from Windows Update, using the hardware troubleshooter, reinstalling the driver from Device Manager, trying the system's generic driver, or even applying a driver from another version of Windows in compatibility mode.
Problems with cartridges, print quality, and paper jams
Not all printer errors are due to the operating system. Often, the problem lies with the printer's hardware itself: cartridges, toner, rollers, fuser, paper type, or internal sensors.
A fairly common problem is that the printer indicates a cartridge is empty or unrecognized when you know it has ink or that you just replaced it. In these cases, check if the cartridge has an identification chip and if it's clean. If it doesn't have a chip, contact your supplier; if it does, you can gently clean the detector or the metal contacts.
If you've just installed a new cartridge and it's not being recognized, remove it and carefully reinsert it . Sometimes it's not properly seated. It's also possible you're using a low-quality compatible cartridge that the printer's firmware is rejecting.
With laser printer toner cartridges, a classic trick is to gently shake them to redistribute the toner powder when they've been sitting for a while; if the toner is too compacted, the print quality will be poor or intermittent. Don't forget to also check the thermal fuser in laser printers, as a faulty one can cause smudges, shadows, or poor toner adhesion to the paper.
Regarding print quality, if you see misaligned lines, misplaced colors, or text that appears to be "dancing ," you most likely need printhead alignment or cleaning. From the printer's control panel or the print properties in Windows, look for the maintenance section and run the alignment or cleaning options, following the instructions.
If your prints are blurry, consider factors such as paper type, humidity, ink quality, or printing mode . Very cheap or damp paper, an economy printing mode, or too low a density can ruin the result. You can improve sharpness by increasing the print quality settings and using higher-quality paper, especially for photos.
The classic "paper jam" is another common problem. The paper might be wrinkled, damp, misaligned, or simply not compatible with that printer. Dirty feed rollers or an uneven surface can also contribute to jams. If the paper jams, don't force it out: check for an eject button (often marked with a sheet of paper and an arrow), turn the printer off and on again to see if the rollers eject the paper, carefully open the covers, and gently remove any remaining paper.
Failing drivers, error messages, and a blocked print queue
Another source of problems lies with the printer drivers themselves . Many users see messages such as "the driver is not available," or the printer goes from displaying all its advanced options to showing only a generic panel with two basic tabs.
This can happen because the driver has become outdated , because the manufacturer has released a faulty version, or because a Windows update has broken compatibility. There are also cases where the driver installation has been corrupted by power outages, crashes, or other errors during the process.
First, try updating the driver from Device Manager: look for the Printers section, right-click on your model, and select "Update driver" so Windows can try to find a newer version. If it can't, go directly to the manufacturer's support website, find your model, and download the latest stable driver.
If the default Windows drivers are insufficient or you continue to experience conflicts, uninstall the current software, restart your computer, and reinstall the printer from scratch . In many cases, completely removing the printer is more effective than repeatedly patching a corrupted installation.
When the print queue repeatedly gets stuck, you might need to empty it and manually restart the printing service . Here's how: Open the Services application (by searching "Services" in the Start menu), locate Print Spooler, right-click it, and select Stop. Then, navigate to %WINDIR%\system32\spool\printers, delete its contents, return to Services, open Print Spooler's properties, set the Startup type to Automatic, and click Start and OK. Once you've done this, your print queue will be cleared.
Error messages displayed on the screen or indicated by LED lights are also a frequent source of confusion. For any unusual code or combination of beeps, the most direct approach is to consult the printer's manual or the manufacturer's official website , where error indicators and troubleshooting steps are usually listed. Many modern printers even display step-by-step instructions on their own control panel.
Specific solutions in Windows: update, reinstall, and use system tools
Beyond checking cables and cartridges, Windows offers several tools to recover a printer that has stopped working after an update or configuration change. A nearly mandatory step is to restart the system at least once after a major Windows 10 or 11 update; some changes don't fully take effect until the computer is restarted.
If your printer is compatible with Windows 10 or 11, the next step is to make sure you have the latest software from the manufacturer . In the case of HP, for example, you can use the HP Smart app to detect and repair basic problems, and if that doesn't resolve them, download the latest driver package from their support website.
In Windows, you can also use System Restore as a last resort if a recent update has rendered your printer unusable and no other solution works. In the recovery options of Windows 10 or 11, you can choose a previous restore point when everything was working correctly.
The built-in troubleshooter is another very useful tool. From Settings, you can search for "printing" or go to Update & Security > Troubleshoot > Printer (in Windows 10) or its equivalent in Windows 11. This tool checks services, queues, permissions, and typical settings that often break.
When you've tried everything and the problem persists, one surprisingly effective solution is to uninstall and reinstall the printer . In Settings > Devices (or Bluetooth & devices) > Printers & scanners, select your printer and choose "Remove device." Restart your computer, then return to that section, click "Add a printer or scanner," and let Windows detect the device again. This often corrects incorrect port and driver associations.
Adding and reinstalling printers in Windows 10 and Windows 11 (manual and advanced)
If automatic detection doesn't work, you can add the printer manually using the advanced Windows wizards. This is especially useful for network printers, older models, or installations with specific ports.
In Windows 11, go to Start > Settings > Bluetooth & devices > Printers & scanners. Make sure your printer is turned on and connected (via USB or network), then click "Add device" or "Update" and wait for it to appear. If you see it in the list, select "Add device" to have Windows attempt to install it automatically.
If the printer doesn't appear after the search, choose the option to add it manually . You'll see several ways to locate the printer: by network address , by name, with advanced detection, or as a local or network printer with manual configuration. All of these work for both wireless and wired printers, but if the printer is connected directly to the computer, the clearest option is "Add a local printer or a network printer with manual configuration."
In that wizard, Windows will ask you to choose a port. Select "Use an existing port" and choose the port to which the printer is connected: USB for a wired connection, or the classic LPT (parallel) and COM (serial) ports for very old computers. Then, click Next to install the driver.
If you have a driver disc from the manufacturer, select "I have a disc" and point it to the appropriate drive. Otherwise, choose "Windows Update" to have the system download an updated list of supported models. When the list is ready, select the manufacturer in the left column and the exact model in the right, and click Next.
After that, you can enter a descriptive name for the printer (for example, one that includes its use or location) and decide whether or not you want to share it with other devices on the network. If only you will be using it, select "Do not share this printer" and continue. Before finishing, it's a good idea to click "Print a test page" to make sure everything is working, and if it goes well, close the wizard by clicking "Finish."
COM port and special printing configurations
In some environments, printers connected via COM (serial) port are still used , either because the hardware is old or because COM-to-USB adapters are used to maintain legacy devices on modern equipment.
When setting up this type of printer, you must ensure that your computer has a working COM port (physical or emulated) and that you select the correct port during Windows installation. If, upon logging off or restarting, you find that the COM port number has changed, the printer may suddenly stop working. In such cases, you will need to review the port settings in the printer properties and reassign the correct COM port.
For a COM printer to function correctly, it is essential to install the correct drivers and adhere to the communication parameters (speed, bit depth, parity) specified by the manufacturer. Although most printers today use USB, Ethernet, or Wi-Fi, these cases still exist in companies with specialized hardware.
Another advanced trick that can make your life easier is to install the same printer multiple times on Windows with different configurations . This is very useful for having, for example, one color profile and one black and white profile, or one high-quality version and one draft mode version, without having to change settings every time you print.
To do this, first find out which port your printer uses and which driver is assigned to it. In the search bar, open Control Panel, go to Hardware and Sound > View devices and printers, right-click on your printer, and open "Printer Properties." On the Ports tab, you'll see the current port, and on the Advanced tab, the driver in use.
Next, from the same Devices and Printers window, click "Add a printer ," choose "The printer I want isn't listed," and select "Add a local or network printer with manual settings." Choose the same port you saw before, select the same driver, confirm that you want to use the one already installed, and give it a different name to remind you of the settings you're going to apply (for example, "Black and White Laser Printer").
Once created, go into the Printing Preferences of that "new" printer and adjust the settings you want (black and white only, draft quality, duplex, etc.). Windows will save these settings separately, and when you go to print from any program, you'll see several "printers" even though it's physically the same printer. It's a very practical way to save time on a daily basis.
In some cases, Windows 10 may internally combine these settings and show only one printer in certain menus, but from Devices and Printers or from advanced menus you will still be able to manage each profile separately, change names or delete those you no longer need.
With all of the above in mind, if your printer stops working in Windows, the best strategy is to troubleshoot step by step: restart your computer and printer, check connections, verify the network, clear the print queue, update or reinstall drivers, use the troubleshooter, and, if necessary, add the printer manually or even duplicate it with different configurations . It might take a while, but there's almost always a way to get it working again before giving up and buying a new one.
