- Overscan is a desynchronization phenomenon that causes the image to be enlarged and the edges to be lost on modern screens.
- The most effective solution is usually found in the TV's internal settings, by activating specific modes for PCs or games.
- When the TV does not offer options, it is possible to adjust the image scale using the graphics card control software (NVIDIA, AMD or Intel).
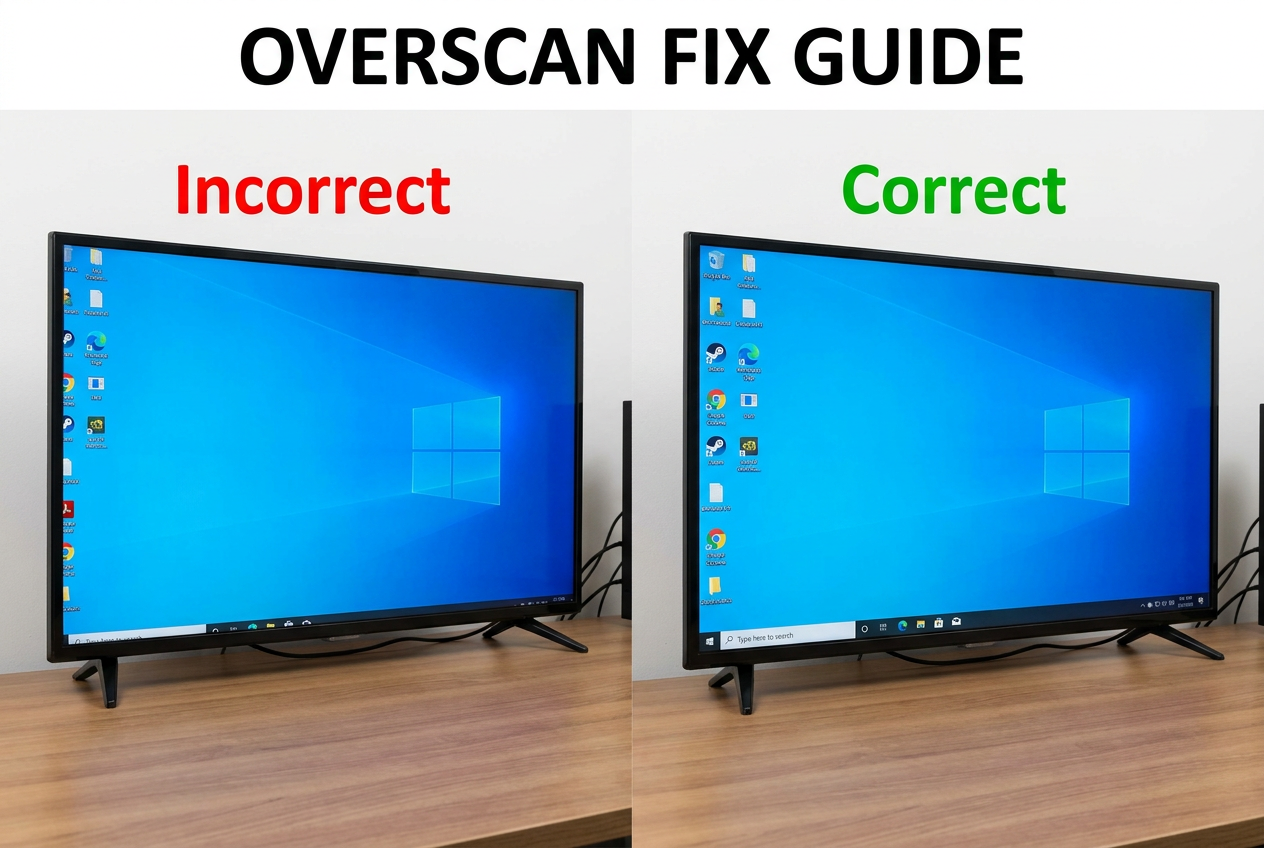
I'm sure it's happened to you: you connect your laptop to the living room to watch a movie or play a game, and suddenly you realize the taskbar has disappeared or the mouse cursor is going off-screen. It's a frustrating feeling, especially when you try to open a menu and can't see the "OK" button because the TV has taken the liberty of cropping the image from the sides.
This problem, technically known as overscan , is more common than you might think. It's not that your PC is broken, but rather a legacy of older televisions that persists today. Essentially, the TV attempts an artificial zoom that ends up cutting off the edges of the screen , depriving us of a vital part of the visual information.

What on earth is overscan and why does it happen?
To understand this mess, we have to look back. CRT televisions worked with an electron beam that drew the image line by line. Back then, there was a small margin of error in the synchronization, so manufacturers made the image slightly larger than the glass to avoid any cuts or strange lines at the edges.
The problem is that, even though we now use LCD or OLED panels, where each pixel is a tiny light bulb, broadcasting systems still use older protocols for efficiency. This causes a horizontal synchronization mismatch when receiving a digital signal, making the TV enlarge the image more than it should. If you see the channel logo or the time cut off, you have a clear case of overscan. However, be aware that if you see black bars around the screen, that's an aspect ratio problem, or underscan , which is a different issue altogether.
Tips for adjusting the picture on your TV
Before you drive yourself crazy fiddling with your computer, the smartest thing to do is check your TV, since that's where the problem is solved 99% of the time. Each brand calls it something different, but what you're looking for is an option that says "Screen Fit," "Screen Adjustment," or "JustScan . "
- Samsung: Look for the option called "Screen Fit" in the image settings.
- LG: You need to locate the "JustScan" mode so that the pixels fit perfectly.
- Other brands: Look for any aspect ratio menu and select "Original" or "Exact Fit".
If you have a Smart TV, there's a foolproof trick: rename the HDMI input to "PC" . Doing this automatically disables image post-processing and changes the chrominance subsampling to 4:4:4, making text appear sharp and eliminating jagged edges. It's also highly recommended to activate "Game Mode ," which removes anti-aliasing filters and reduces input lag, making the TV behave more like a real monitor.
Solutions from PC software
If your TV is old or doesn't have those menus, don't give up. You can force the adjustment through your graphics card drivers. Depending on your hardware, the steps will vary:
If you use NVIDIA , go to the Control Panel, then to "Adjust desktop size and position," and on the Size tab, check the box for "Enable desktop resizing ." There you can move sliders until the image fits perfectly.
In the case of AMD Radeon , it's even simpler. In the Display settings, you'll find a dedicated slider to reposition the screen and eliminate overscan . If that's not enough, you can try integer scaling or AMD's scaling mode to adapt the image to the panel.
For those with integrated Intel graphics , you need to go into the HD Graphics Control Panel, select the TV, and choose the "Customize aspect ratio" option under the scaling menu to manually adjust the margins.
Special cases: Mac, Consoles, and Hidden Menus
If you're a macOS user and don't have NVIDIA or AMD software, you can go to System Preferences, then Displays, and use the Underscan slider to shrink the image until it's full. Don't forget to also check the refresh rate (Hz) in your TV settings.
Regarding video games, some come with their own drivers that override the Windows driver. Therefore, many games require you to calibrate the edges at the beginning; if you skip this step, the HUD or map will likely be out of view. On consoles, this sometimes occurs due to internal synchronization within the game engine, although it's usually resolved by using the TV's game mode.
As a last resort, there are hidden service menus. For example, on some Panasonic Viera models, you can access them by pressing specific keys on the side panel and the remote control to modify the V and H (vertical and horizontal) parameters. However, be very careful, because touching something you shouldn't in the service menu can cause serious problems.
To avoid these headaches, it's best to always prioritize the TV's hardware settings, such as PC mode or screen adjustment, and leave the graphics card's software settings as a backup plan. If none of this works, external tools like Custom Resolution Utility (CRU) allow you to create custom resolutions that Windows doesn't natively offer, forcing the screen to accept a format that doesn't crop the image.