- GRUB is the GNU boot manager that selects and loads the operating system, supporting BIOS/UEFI and Multiboot.
- GRUB 2 adds modules, improved file system support, UUID searching, and a graphical menu/terminal.
- The configuration is managed via /etc/default/grub and 40_custom, regenerating with update-grub or grub2-mkconfig.
- Security: Password-protect GRUB, use LUKS encryption, and have strong password policies.
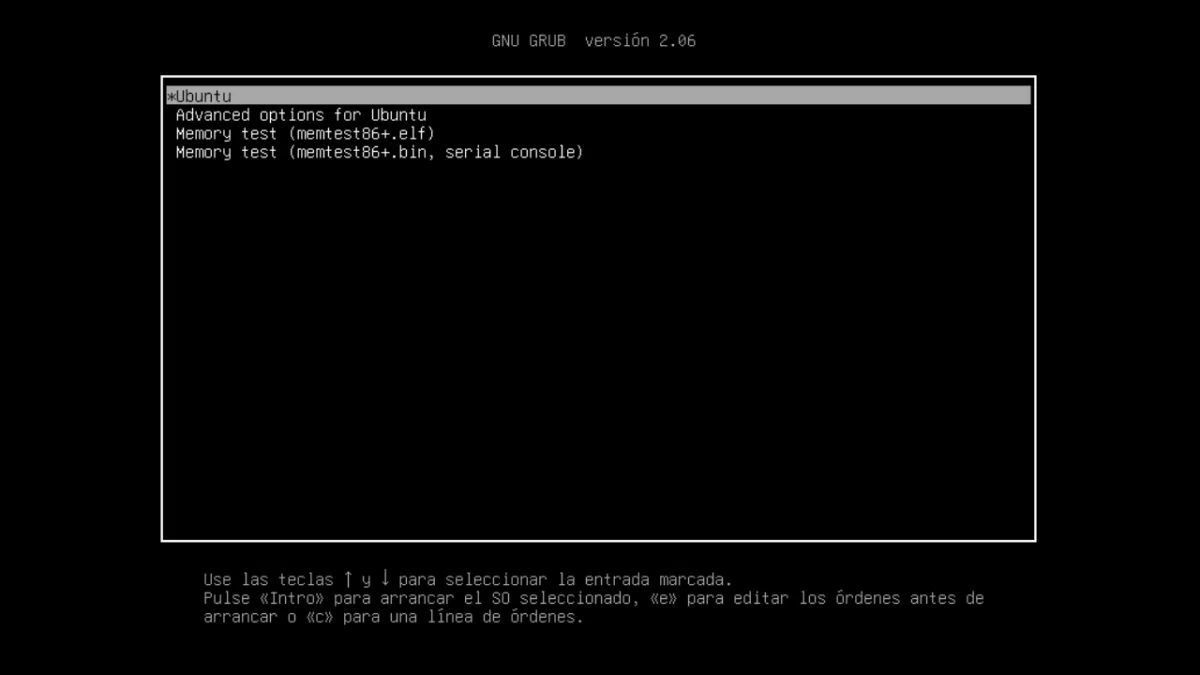
If you've installed GNU/Linux on your computer or use multiple operating systems, you've probably heard of GRUB. It's that small but powerful program you see just before your system boots, allowing you to choose what to load. While it often goes unnoticed, its role is crucial for starting the operating system and smoothly handing control over to the kernel.
In the world of PC booting, GRUB has become the de facto standard due to its power and flexibility. Born within the GNU project, it is now the most widespread boot manager in GNU/Linux , compatible with a wide range of architectures and file systems, user-friendly for novices, and at the same time a Swiss Army knife for those who fine-tune every detail of the boot process.
What is GNU GRUB and what is it for?
GNU GRUB (GNU GRand Unified Bootloader) is a multi-boot manager: software that the firmware (BIOS or UEFI) runs when the computer is powered on to select and load an operating system. It allows users to select menu items, pass parameters to the kernel, boot from the network, and even interact with a console to troubleshoot specific problems.
It is mainly used in GNU/Linux distributions, although it has also been used by other systems such as Solaris on x86. On modern UEFI systems , the firmware directly loads the GRUB executable located in the EFI system partition (ESP) , provided it is registered in NVRAM; in BIOS/MBR, GRUB occupies initial sectors of the disk and continues from there.
Beyond the typical menu, GRUB complies with the Multiboot Specification, meaning it can boot compatible kernels seamlessly . And once the kernel is in memory, GRUB hands over control and its job is done, which is no small feat.
Technical sheet and project data
GRUB is part of the GNU ecosystem and is distributed as free software under the GNU GPL v3 or later license . Its development is open source, with an official repository, bug tracker, and website, and a very active community.
It is written primarily in C and assembler, and runs on several platforms: IA-32, x86-64 and PowerPC, among others. The current branch is GRUB 2 (a reimplementation of the historic “GRUB Legacy”). The latest stable version released is 2.12 (December 20, 2023). If you want to check your local version, you can run: grub-install --version and you will see the corresponding chain.
A bit of history and evolution
GRUB began as an initiative by Erich Stefan Boleyn within the context of GNU Hurd and the Mach microkernel. To resolve the disparity in boot methods, the Multiboot Specification was created, which facilitated bootloaders and kernels "speaking the same language." In 1999, Gordon Matzigkeit and Yoshinori Okuji spearheaded its adoption as an official package of the GNU Project.
Around 2002, a group of Japanese researchers started PUPA (Preliminary Universal Programming Architecture) with the goal of rewriting GRUB to make it more robust and modular. This effort resulted in GRUB 2 , while the previous version became known as "GRUB Legacy" (whose version 0.97 was last updated in 2005). From 2007 onwards, several distributions migrated to GRUB 2, and by the end of 2009, the vast majority included it by default.
How to boot your computer with GRUB (BIOS and UEFI)
When you turn on your PC, the firmware runs its checks (RAM, clock, devices, boot order) and looks for a bootloader. On systems with BIOS/MBR, control is passed to the Master Boot Record (MBR), the initial 512 bytes of the disk. GRUB was divided into stages: Stage 1 (minimal code in MBR), Stage 1.5 (in later sectors, bridging to understand file systems), and Stage 2 (menus and advanced functions). In GRUB 2, that "1.5" no longer exists; now there are specific images such as boot.img, core.img and modules (*.mod) that are combined according to the installation.
In UEFI, the process is more direct: the firmware executes the GRUB EFI binary from the EFI partition , provided it is correctly installed and registered. In both cases, GRUB presents a menu or console, loads the chosen kernel, and then transfers execution to it.
Multiboot specification and compatibility
GRUB implements Multiboot, allowing compatible kernels to be booted without specific "tricks." Furthermore, for systems that do not support it (such as Windows or DOS ), it offers chainloading, targeting the first sector of the partition where its bootloaders reside.
Its file system compatibility is extensive: Btrfs, ext2/3/4, FAT12/16/32, exFAT, HFS/HFS+, ISO9660, Nilfs2, NTFS, ReiserFS, ZFS, ROMFS, JFS, XFS , among others. It can also read from LVM volumes and RAID arrays, a significant advantage when the storage structure is complex.
Featured Features and Functions
- Menu interface Configurable and highly flexible interactive terminal, with Tab auto-completion and Bash-style shortcuts.
- Support of LBA (Logical Block Addressing) to overcome classic BIOS limits and read beyond 1024 cylinders.
- Capacity for network boot (PXE/TFTP) and remote terminals, useful in centralized management scenarios.
- Automatic decompression and recognition of multiple executable formats.
- Persistent storage of variables with save_env/load_env y
grub-editenv(when the platform allows it). - All RAM detection, disk geometry independence, and search mechanisms by labels and UUID.
- Graphical support for menus and backgrounds, and a modular design that maintains core.img small and loads modules as needed.
Key terminology: devices, partitions, and paths
GRUB names disks and partitions in its own way. The first disk is usually (hd0), the first partition (hd0,1) In GRUB 2 (remember: in GRUB 2, numbering starts at 1; in Legacy, it started at 0). To refer to an entire disk, the partition is omitted: (hd0).
To indicate files, the device is combined with the path: (hd0,1)/ruta/al/archivo. It also supports blocklists (block lists) when it is necessary to indicate the exact location on disk of a file that is not visible as such in the file system, for example (hd0,1)+1 for the first sector of a partition, useful with chainloader +1.
The "root filesystem" in GRUB is not the same as the "/" in Linux. It is simply the root partition from which GRUB will read its files ; once the Linux kernel takes control, it defines its own actual root, and everything else in GRUB becomes irrelevant.
GRUB Interfaces
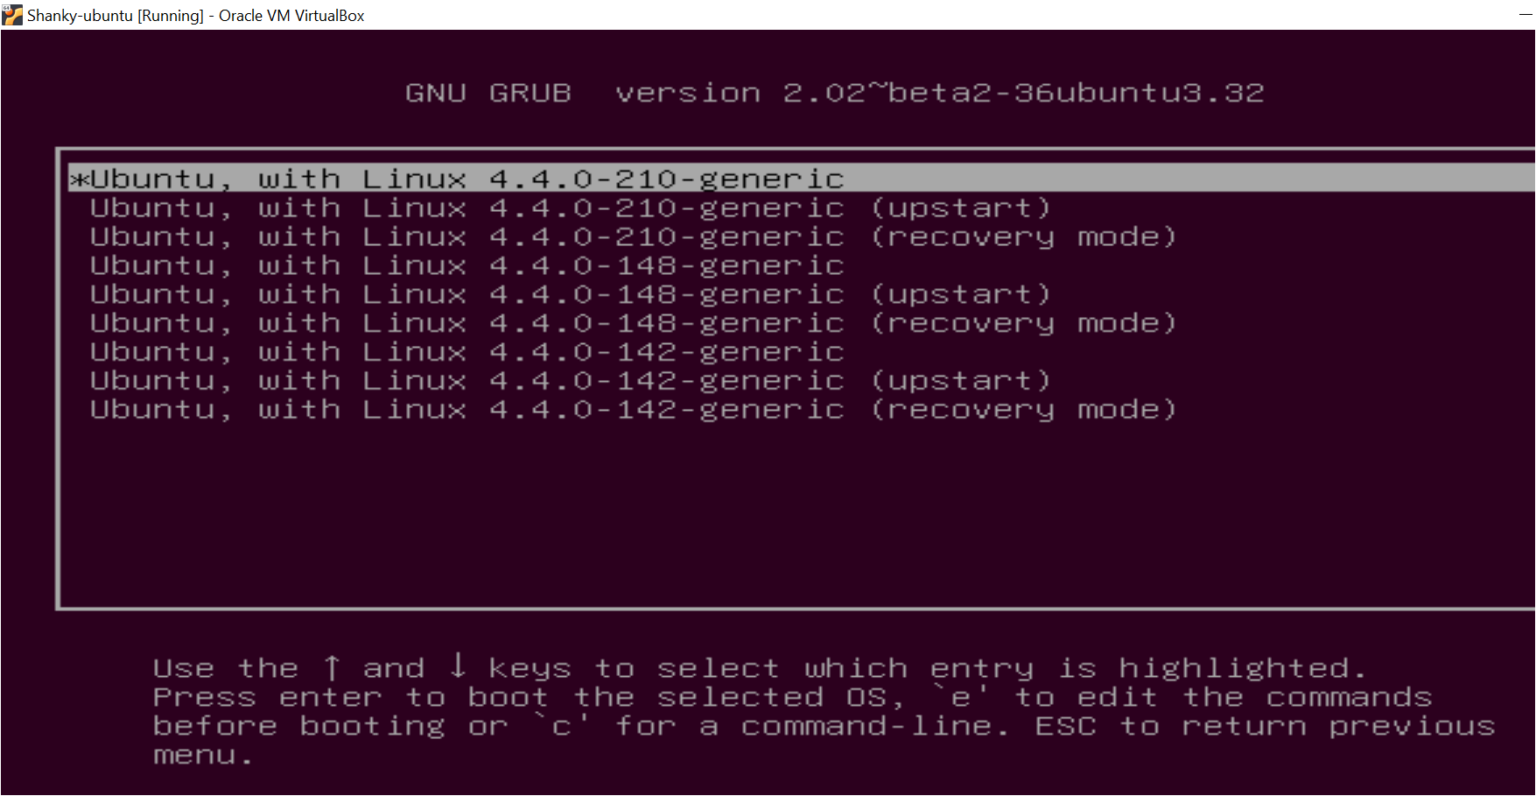
GRUB offers three main views. The most familiar is the menu , with pre-configured entries; you can navigate with the arrow keys, boot with Enter, edit an entry with "e", or open the console with "c".
The input editor lets you modify lines on the fly (add with "o/O", edit with "e", delete with "d") and, if everything looks right, boot with "b". It's ideal for testing kernel parameters without touching files.
The console is the most powerful mode: it supports contextual autocompletion, editing shortcuts, and all of GRUB's internal commands for locating disks, loading kernel/initrd, or chainloading. If the configuration file is missing or corrupted, GRUB will launch you here so you can manually resolve the issue.
Common error messages
Errors can appear in the initial stage (more limited) or when loading menus and modules (more descriptive). Below is a compilation of representative codes that GRUB may display, paraphrased for clarity :
- 1: Invalid or non-absolute path; 2: Invalid file type (not a regular file); 3–4: Corrupt data/header during decompression; 5: damaged partition table or invalid.
- 6: Stage1/Stage2 incompatibility; 7: Loading below 1 MB is not supported; 8: Attempted to boot without loading a kernel; 9: Unknown boot failure.
- 10: Multiboot features not supported; 11: Device not recognized; 12: Invalid device; 13: Unsupported executable format.
- 14: The file system prevents the entire file from being read; 15: file not Found; 16: Inconsistent file system structure.
- 17: Cannot mount the selected partition; 18: Cylinder outside the range supported by the BIOS (typical on older drives); 19: Initrd before kernel.
- 20: Modules before a multiboot kernel; 21: Selected disk does not exist; 22: Non-existent partition; 23: Error interpreting a number.
- 24: Access to a block outside the partition; 25: Disk read error; 26: Too many symbolic links; 27: Unknown command.
- 28: Item does not fit in memory; 29: Disk write error; 30: Invalid argument; 31: File not sector aligned (ReiserFS, use notail).
- 32: Authentication required; 33: Serial device not configured; 34: No free sectors for Stage 1.5 after the MBR (conflict with EZ-BIOS or partition starting too early).
Basic GRUB Commands
In the console you can run very useful interactive commands. For example, boot starts the last loaded (kernel or chainloader), and chainloader <archivo> loads a sector or file from a chain; the typical shortcut for Windows is chainloader +1.
displaymem displays memory usage according to the BIOS, which is handy if you're unsure of the detected RAM. With initrd <archivo> you specify the initial RAM disk image needed by the kernel.
To install to MBR from the GRUB Legacy console, you used install with the routes to Stage1, Stage2 and, optionally, to the configuration file. Today in GRUB 2, from the system, it is normal to use grub-install and regenerate the menu with update-grub/grub2-mkconfig.
The command kernel specifies the kernel binary and its parameters, for example: kernel /vmlinuz root=/dev/sda5It is usually preceded by root (hdX,Y) o rootnoverify to set the partition from which GRUB will read.
Configuration files and directives
In GRUB Legacy the menu resided in /boot/grub/menu.lst o grub.conf, with directives such as color, default, fallback, hiddenmenu, password, timeout, splashimage and blocks title with the orders for each system.
A classic example (paraphrased) would include a Linux section with root (hd0,2), kernel with its root parameter=/…, and boot; and another for Windows with rootnoverify (hd0,1) y chainloader +1.
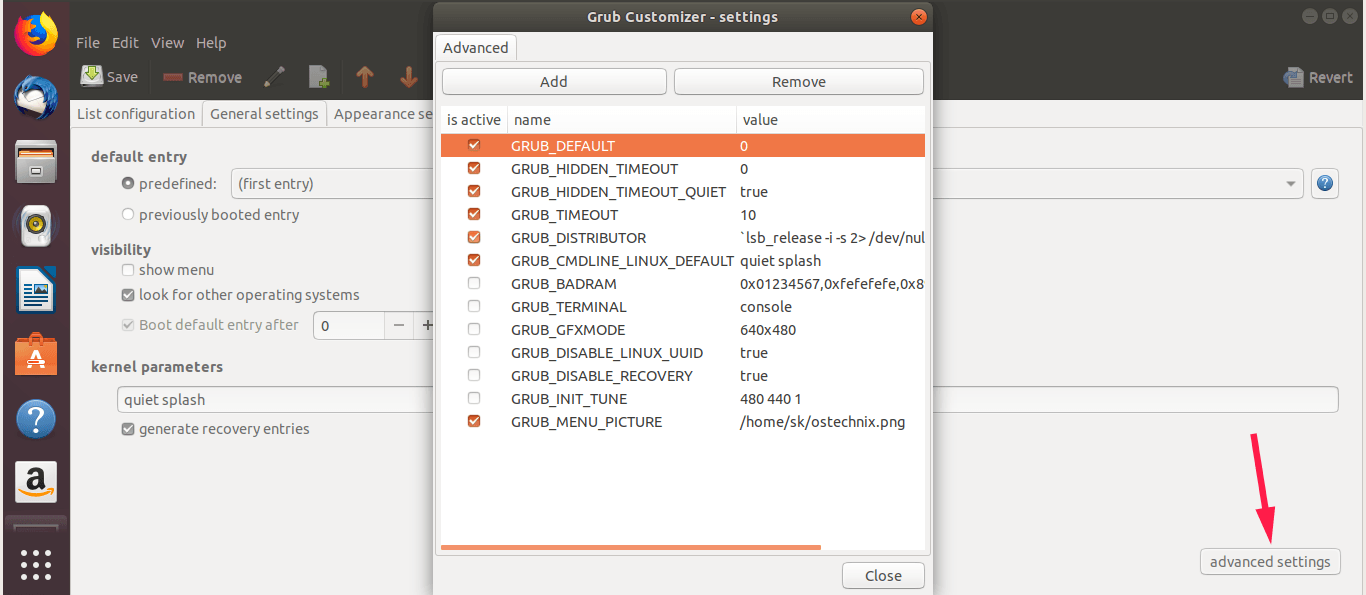
In GRUB 2 the automatically generated file is /boot/grub/grub.cfg. It is not recommended to edit it by hand; instead, it is adjusted /etc/default/grub (values such as GRUB_TIMEOUT, GRUB_DEFAULT, etc.) and custom entries are added in /etc/grub.d/40_custom. Then it is executed update-grub o grub2-mkconfig to regenerate the menu.
Key differences between GRUB Legacy and GRUB 2
- The configuration file went from
menu.lst/grub.confagrub.cfg, with renewed syntax and commands and automatic generation by means ofgrub-mkconfig. - Partition numbering starts at 1 in GRUB 2 (in Legacy it started at 0).
- Persistence of variables with
save_env/load_envin some configurations. - Better route detection and search by UUID/tags; more file systems supported.
- Direct reading from LVM and RAID.
- Terminal and menu graphics, and reorganized images: Stage 1.5 is gone;
boot.img,core.imgand dynamic modules (*.mod).
Security and hardening with GRUB
A poorly secured boot manager is a sieve. If someone with physical access can edit kernel parameters or launch a different entry, it effectively disables your security measures . That's why it's advisable to protect GRUB with passwords and implement best practices.
Establish a strong password to limit entry modifications or console access. In GRUB 2, use usernames and passwords with grub-mkpasswd-pbkdf2 and configure the corresponding rules in the scripts of /etc/grub.d/.
It also includes disk encryption using LUKS , so that even if someone steals the computer, they won't be able to read the data. It also ensures that the system's password policies are strict to reduce brute-force attacks.
Manage your log history wisely : those that give clues to an attacker should be minimized or centralized with access controls; those that help audit malicious attempts should be aggregated and analyzed in a secure location.
To detect other installed systems and generate entries automatically, install os-proberIt will save you time and prevent errors when recreating the menu.
Instalation and maintenance
If you didn't install GRUB during your distro's installation, you can do so later. In GRUB 2, from the system, run sudo grub-install /dev/sdX (replace with your disk) and then sudo update-grub o sudo grub2-mkconfig -o /boot/grub/grub.cfgYou will see the menu on the next boot.
From a GRUB Legacy console, the classic procedure is to indicate the root and run the installation: root (hd1,0) followed by setup (hd1,0) for the first partition of the second disk, or setup (hd1) if you point to the MBR of that second disk.
Edit directly /boot/grub/grub.cfg This is not a good idea in GRUB 2, even if it is technically possible. The recommended route is to change /etc/default/grub, use /etc/grub.d/40_custom for own content and regeneration.
Practical questions and useful shortcuts
How to know which is the boot partition on /dev/sda? On BIOS/MBR systems: sudo fdisk -l /dev/sda (see the asterisk for “Boot”). In GPT/UEFI: lsblk -o NAME,FSTYPE,PARTTYPE,PARTFLAGS,MOUNTPOINT and look for the EFI partition (FAT32, type EF00/flags esp). Also sudo efibootmgr -v displays the recorded boot entries.
How do I get the UUID of a partition? With blkid o lsblk -f. For example: uterine sudo blkid /dev/sda2 returns its UUID and other metadata.
How do I make GRUB 2 wait 10 seconds before entering the default entry? Adjusts /etc/default/grub with GRUB_TIMEOUT=10 (and, if applicable, GRUB_TIMEOUT_STYLE=menu) and executes sudo update-grub o grub2-mkconfig.
GRUB Legacy commands to install on the first partition of the second disk? Open the console and run: root (hd1,0) and then setup (hd1,0). If you wanted the MBR, it would be setup (hd1).
Steps to change GRUB 2 configuration? 1) Edit /etc/default/grub (e.g., GRUB_DEFAULT, GRUB_TIMEOUT), 2) add entries in /etc/grub.d/40_custom if you need them, 3) regenerate with update-grub/grub2-mkconfig, 4) reboot and test.
Where to put custom menus in GRUB 2? En /etc/grub.d/40_custom (or own files in /etc/grub.d/ with proper permissions). Never edit by hand /boot/grub/grub.cfg except in an emergency.
Where were the entries stored in GRUB Legacy? En /boot/grub/menu.lst o grub.conf, according to the distribution.
How do I access the GRUB console from the menu? Press the "c" key in GRUB 2 or Legacy. To edit a specific entry, press "e". Both shortcuts are very useful when you need to diagnose problems on the fly.
Examples of common options
Default boot selection: GRUB_DEFAULT=0 the first inning starts; with GRUB_DEFAULT=saved remembers the last used configuration. After the change, regenerate the configuration.
Wait time: GRUB_TIMEOUT=4 adjusts the menu delay; with 0 starts without pausing; in some scenarios you can hide the menu with GRUB_TIMEOUT_STYLE=hidden for a cleaner start.
Menu update: on Debian/Ubuntu and derivatives, sudo update-grub; in others, sudo grub2-mkconfig -o /boot/grub/grub.cfg. Make sure you have os-prober installed if you want to detect other systems automatically.
Although GRUB also appears in contexts outside of GNU/Linux, remember that it is not a support service. If your problem is specific to Windows, the most practical thing to do is go to forums dedicated to that system for focused help.
GRUB has evolved from a simple boot menu into a true pre-system environment, capable of booting multiple operating systems, managing complex disks, and helping you recover a system with just a couple of commands. With proper configuration and some hardening (GRUB passwords, LUKS encryption, well-managed key policies and logs), you'll have a robust, flexible, and, above all, controlled boot process.