- It is essential to properly prepare the remote equipment: activate the appropriate service, open the firewall, and define users with permissions.
- Security is based on strong passwords, network-level or multi-factor authentication, and systems that are always up to date.
- There are multiple remote desktop solutions (RDP, Chrome, Splashtop, TSplus) to cover different environments and devices.
- The most common problems are usually due to network, firewall or permissions, and are solved by checking those key points.
If you work remotely, do on-call support, or simply want Access your PC from anywhere as if you were sitting in front of it., set up a remote desktop It's becoming almost mandatory. These days you can do it with built-in Windows tools, third-party solutions like Splashtop or TSplus, and even the Chrome browser.
Throughout this guide you will learn step by step how Activate, secure, and use a remote desktop on Windows, macOS, Linux, Android, iOS, and ChromebookWhat requirements do you need, how to overcome typical network or firewall problems, and what alternatives do you have if the native Windows function falls short or is not available in your edition?
What is a remote desktop and what is it used for?
A remote desktop is a technology that allows you control another computer remotely as if you were sitting in front of itYou see their screen, move the mouse, use the keyboard, open programs, copy files, etc. The connection is established through the local network or the Internet and is encrypted so that no one can "spy" on what you do.
In practice, a remote desktop is used to Access your files and applications without carrying your PC around., work remotely from home using your office computer, provide assistance to family members or clients, manage servers, or keep computers running in another location without having to travel.
The most common tools are the function of Windows Remote Desktop (RDP)Third-party applications such as Splashtop or TSplus and browser-based solutions such as Chrome Remote Desktopwhich greatly expands the range of devices you can connect from.
Basic prerequisites before setting up a remote desktop
Before you start messing with settings, it's important to confirm that A series of minimum requirements must be met on the PC you want to connect to and on the device you will be accessing from.
To use the native Windows Remote Desktop (RDP), the first critical point is that the remote computer runs a compatible editionIn general, you need Windows 10 or 11 Pro or EnterpriseHome editions do not support incoming RDP connections, although they can act as a client to connect to other PCs.
It is also essential that the computer you are going to connect to is powered on, logged in and connected to the network or that you can remotely turn on your PCThere's no point in having RDP enabled if the PC is turned off or on a network you can't access, whether via Wi-Fi, cable, or VPN.
Finally, the user who will configure remote access must have administrator permissions on the destination computer. Only then will you be able to activate the remote desktop function, open the corresponding port in the firewall, and add other authorized users to log in.
How to enable Remote Desktop in Windows 10 and Windows 11 from Settings
The most direct and user-friendly way to enable RDP in Windows 10 and 11 is through the app of System settingswhere Microsoft has already grouped all the controls under the "Remote Desktop" section.
First, on the PC you want to connect to, open Start > Settings > SystemIn the left-hand menu or the center column, depending on the exact version, you'll see a section called "Remote Desktop." Go there to see the available options.
Inside that screen you will find the switch “Enable Remote Desktop”Activate it; Windows will display a window asking for confirmation, because doing so opens a port on the system accessible via the network. Accept by clicking "Confirm" to allow remote connections.
In that same window you will also see the Name of the team you will need to use later from the RDP clientIt's a good idea to write it down or copy it, although if you prefer, you can use it directly later. IP address of the remote computerwhich is usually more reliable on networks with unstable DNS.
Below the main switch, Windows offers an option to Keep your PC active and discoverable on private networksIt is recommended to leave it enabled, because it prevents the device from entering deep sleep mode and disappearing from the network, which would prevent remote connection.
Additional security settings: network-level authentication and allowed users
Once remote desktop is enabled, it's advisable to strengthen security so that so that just anyone who finds your open port can't connect. performing an automatic scan of IPs over the Internet.
From the same “Remote Desktop” screen in Settings, you have a link to "Advanced configuration"Upon entering, you will see the option “Require teams to use Network Level Authentication (NLA)"Check that box so that the RDP server only starts the graphical session after the user has successfully authenticated."
The main advantage of NLA is that blocks many automated access attemptsThis is because it forces the client to send valid credentials before reserving resources on the system. If you're only going to connect from modern clients (Windows 10/11, official Microsoft apps, etc.), it's recommended to leave NLA always enabled.
On the remote desktop main screen you will also see a link of the type “Select users who can have remote access to this computer”Clicking it opens the classic window where you can add specific users (in addition to administrators, who are already allowed by default).
From there you can use the “Add” button to introduce additional accounts that can connect via RDPThis is very useful if you want to have a small group of people with access, or if you manage a family member's PC and prefer them to use their own account instead of yours.
Enable Remote Desktop from the classic Windows Control Panel
If you're more of an "old school" user or work on teams with older versions of Windows Server, you might find this more comfortable. Activate RDP from the classic Control Panel, where the historical remote access configuration is located.
To do this, open the Start menu, search for "Control Panel" and open it. Once inside, go to System and security> SystemIn the left panel, you should find a link called “Remote access settings” or “Allow remote access to this computer.” Click on it.
The system properties window will open, and on the "Remote Access" tab, in the "Remote Desktop" section, select the option. “Allow remote connections to this device”In modern versions, there is also a checkbox to require network level authentication, which should also be checked.
When applying the changes, Windows Enable the remote desktop service and adjust the basic permissionsFrom that same dialog box you can click on “Select users…” to add authorized accounts, just like you did from Settings.
Enable remote desktop using Command Prompt or PowerShell
In professional environments, it is sometimes useful to automate configuration with scripts or commands, especially when Many devices are managed simultaneouslyIn Windows, you can enable RDP by modifying the registry and firewall rules from the console.
With Command Prompt running as administrator, simply use one command that change the appropriate value in the registerThe key setting is fDenyTSConnections, which determines whether incoming RDP connections are blocked or allowed.
After that, it's important to add a rule in the Windows firewall so that connections to the “Remote Desktop” rules group are enabledOtherwise, the service would be active but the port would remain blocked.
If you prefer PowerShell, you can do the same with cmdlets like Set-ItemProperty to modify the registry and Enable-NetFirewallRule to activate the remote desktop rules group. This method is especially convenient for integrating it into deployment or automation scripts.
Configure the Windows firewall to allow remote desktop connections
For a remote connection to work, simply activating the service is not enough: the firewall must also be in place. allow traffic entering through the standard RDP port (TCP 3389)Windows usually does this automatically when you enable the feature, but it's good to know how to check it.
From the system search bar, type "firewall" and open the option “Allow an application through the Windows Defender Firewall”You can also access it from Control Panel > System and Security > Windows Defender Firewall.
In the list of applications, locate “Remote Desktop” and press the button “Change settings” If the boxes are locked, select the "Private" network option and, if necessary, "Public" to allow RDP traffic on those profiles.
After saving the changes, the firewall rule will be adjusted so that Incoming connections to the remote desktop service are not blockedIt is recommended to check from another device that you can now connect using the IP address or the computer name.
Remote desktop access from different devices (Windows, macOS, iOS and Android)
Once the remote PC is ready, the next step is connect from the local deviceOn Windows you have the classic "Remote Desktop Connection" app (mstsc), but Microsoft also offers modern clients for mobile devices and macOS.
On a Windows PC, simply open the Start menu and type “Remote Desktop Connection” and run the tool. In the window that appears, enter the computer name or its IP address, click on “Connect” and enter the authorized user credentials.
If you connect from macOS or iOS, Microsoft provides the call Windows App / Microsoft Remote Desktop through the Mac App Store and the App Store. Once installed, simply add a new PC by specifying the hostname or IP address, username, and, if desired, some visual settings or redirected device options.
On Android the process is very similar: you install the application Microsoft Remote Desktop From Google Play, tap the "+" to add a new PC, enter the connection details, and save the profile. Tapping on that profile will start the remote session, and you'll see the PC's desktop on your mobile phone or tablet screen.
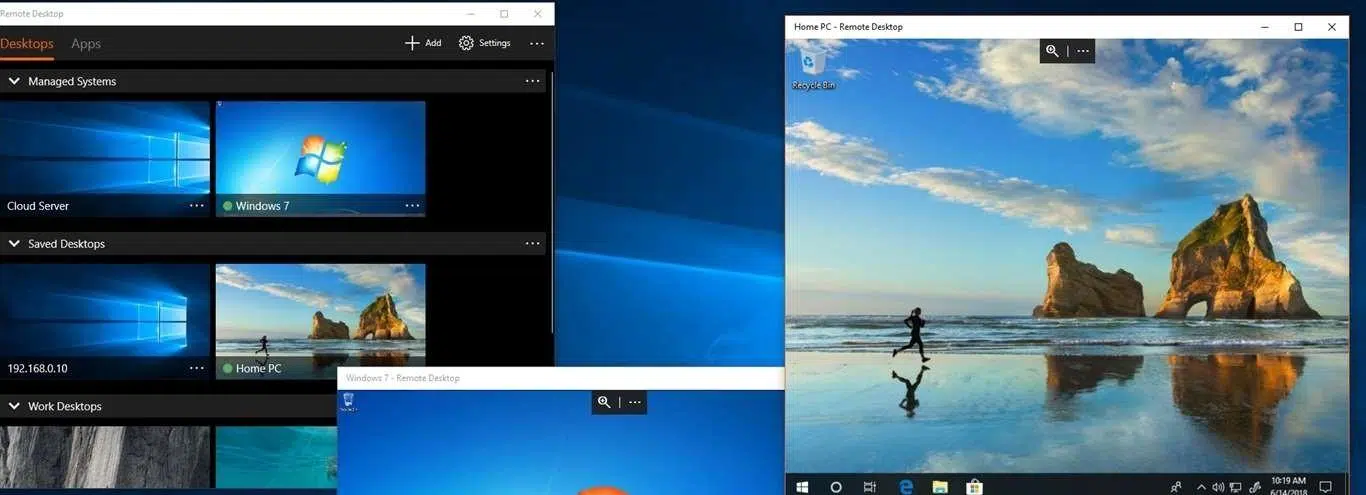
In the most recent versions of Windows there is also a "universal" remote desktop app downloadable from the Microsoft Store, designed for unify the experience across different devices and manage multiple saved connections in a more visual way than with the classic client.
Secure remote access from outside your network: router, VPN, and ports
Connecting remotely within the same local network is relatively simple, but if you want access your PC from the Internet (for example, from home to the office computer) You need a little more work and, above all, common sense regarding safety.
Microsoft recommends not to recklessly expose port 3389 to the Internet, but use a VPN (Virtual Private Network)With a VPN, you create an encrypted tunnel between your device and the network where the remote PC is located, as if you were physically connected to that LAN.
To do this, you will need to subscribe to or deploy a reliable VPN service, follow the provider's instructions to configure the client on your computer or mobile device, or create your own VPN from within the VPN. Settings > Network and Internet > VPN adding the necessary credentials.
The classic alternative is to configure a port forwarding to port 3389 of the remote PC, so that connections arriving at the router's public IP address They are redirected internally to the specific computer. It's a functional solution, but much less secure if not combined with other layers of protection.
In any case, when you open a port to the outside world, it's advisable to use strong passwords, network-level authentication, and, if possible, multi-factor authentication to minimize the risk of unauthorized access by brute force attacks or automated bots.
Using Chrome Remote Desktop on Windows, macOS, and Linux
If you prefer not to deal with complicated ports and system configurations, or you need to control devices that don't have RDP, a very convenient alternative is Chrome Remote Desktop, which works through the browser and a small additional component.
To set it up, open Chrome on the computer you want to control and visit the page remotedesktop.google.com/accessIn the "Configure remote access" section, click Download to install the extension and associated service.
During installation, the system may ask you the device password or permission to modify security settingsThis is especially important on macOS and some Linux distributions. Once completed, you can define a name for the computer and a PIN that will be used for remote access.
You can also use Chrome Remote Desktop for share your session with another personIn that case, go to remotedesktop.google.com/support, download the "Get Support" component, and generate a one-time code to send to the technician or person who will help you.
The guest will log in to the same page, enter the code in the "Provide Support" section, and, after your confirmation, will have full control of your desktop until you click "Stop Sharing." The code expires after use, and you will be asked periodically to confirm that you want to continue sharing.
Configure Chrome Remote Desktop on Linux and customize the session
On Linux, Chrome Remote Desktop support is based on a specific 64-bit package that Install the necessary host components to create a virtual desktop session in background.
After downloading and installing the Debian package from the official website, you will still need to go to remotedesktop.google.com/access to enable remote connections with a name and PIN. From then on, the device will appear in your list of available devices.
If you want to customize the graphical environment that launches when you connect (for example, force Cinnamon, KDE, or similar), you can create a file in your home folder called .chrome-remote-desktop-session with an exec command that invokes the desired environment.
To find out which command to use, check the .desktop files in the directory /usr/share/xsessions/ Look for the line that begins with “Exec=”. That command, combined with Xsession, is the one you'll include in the script so that that specific session always starts when you use Chrome Remote Desktop.
It should be noted that some desktop environments do not allow two simultaneous sessions from the same userTherefore, in such cases it is advisable to use a different environment for the local session and the remote session, or to log out of one before using the other.
Configure and use Splashtop for cross-platform remote access
In addition to Microsoft and Google tools, there is a whole range of commercial solutions focused on performance and ease of use. One of the most widespread is Splashtop, which offers fast and secure remote access from almost any current operating system.
The first step to getting started with Splashtop is to create a user account on your platformThis account will be the "command center" from which you will manage all your teams, mobile devices, and remote sessions.
Then you will have to download the Splashtop Business app On the devices you'll be using to control other computers—this could be a Windows or macOS PC, an Android phone, an iPhone, an iPad, or even a Chromebook—you'll need to log in with your account on each one.
On the computers you want to control remotely, you must install the component called Splashtop StreamerIt is also available for Windows, Mac, and some Linux distributions. The Streamer runs in the background and acts as a "bridge" between your device and the remote computer.
During the Streamer installation, you can adjust options such as whether it starts at system boot, which users have access, security preferences, and image quality. It's common practice to leave it configured for to start automatically and always be ready to receive connections.
Once both the Streamer and the Business app are set up, you will see the following in the main Splashtop interface: List of computers linked to your accountSimply click or tap on the one you want to control and the remote session will begin, with high-quality transmission and very low latency.
Advantages of Splashtop over other remote desktop solutions
Splashtop has carved out an important niche for itself compared to other tools because It combines good performance, high security, and reasonable prices.This makes it a powerful option for businesses, educational institutions, and demanding individual users.
In terms of user experience, the connections offer very low latency even over long distanceswith high-definition video support and workflows that include video editing, graphic design, or software development without the session becoming an ordeal due to lag.
In terms of compatibility, Splashtop works on Windows, macOS, Linux, iOS, Android and ChromebookThis allows for seamless integration of traditional desktop computers with tablets and mobile devices, while maintaining the same remote access tool for everyone.
In terms of security, the platform implements 256-bit AES encryption, TLS, multi-factor authentication, device verification, and session loggingThese measures allow compliance with audit requirements and minimize the risk of unauthorized access by a third party.
For IT support teams, Splashtop includes very practical features such as file transfer, remote printing, integrated chat, session recording, and unattended accessAll of this is managed from a control panel that makes it easy to handle dozens or hundreds of remote machines.
TSplus as an alternative to RDP for companies
Another option to keep in mind if you manage many users is TSplus, a remote access solution geared towards business environments which seeks to simplify the publishing of applications and desktops without the complexity of traditional Microsoft Remote Desktop services.
TSplus allows you to centralize applications on a Windows server and provide remote access to internal or external users with advanced security options, web access portals, and management tools that are easier to handle than a full RDS farm.
By combining TSplus with good security practices and robust password policies, many organizations achieve reduce licensing and maintenance costs compared to direct RDS deployments, while maintaining a comfortable user experience.
Key security aspects of any remote desktop solution
Regardless of the tool you choose, the critical point is always the same: Don't leave a door open to your network or your equipment that could be exploited by an attacker. Therefore, it is advisable to apply a series of general best practices.
The first thing is to use strong and unique passwords for all accounts with remote accessForget about simple or repeated passwords across services; ideally, you should use a password manager and internal policies that require you to change them periodically.
It is also highly recommended to enable two-factor authentication (2FA or MFA) Provided the solution supports it: Splashtop includes it by default, and many corporate VPNs do as well. This way, even if someone steals your password, they still won't be able to log in without the second factor.
Maintain the operating system and remote desktop software fully updated It's another fundamental pillar. Updates fix vulnerabilities that, if left unpatched, can be exploited to take control of a system or intercept data.
If you work with Microsoft RDP, leave the network level authentication (NLA) Whenever possible, significantly reduce the attack surface. And if you need to support legacy clients that don't support it, ideally, enable them only temporarily and on highly controlled networks.
Finally, in more sensitive environments it is advisable monitor and record all remote sessionsso that you can audit who has entered, at what time and from what device, and thus detect anomalous or suspicious behavior.
Common problems and how to solve them
Even if you follow all the steps to the letter, it's common to encounter Typical issues encountered when attempting to establish a remote desktop connectionLuckily, most have a quick solution if you know where to look.
One of the most common problems is that "remote desktop isn't working" without further explanation. In this case, you need to check that The function is actually enabled on the remote PCthat the firewall allows the corresponding port and that the Remote Desktop service is running.
If the message you receive is "permission denied", it's probably the account you're trying to log in with. is not part of the group of users with permitted remote accessGo back to the RDP settings and explicitly add that user to the remote desktop users list.
When you connect within the same network but the session is not established, it is advisable to check that Both devices are actually on the same subnet and there is no additional segmentation (such as VLANs or Wi-Fi policies isolating clients). For external connections, also check the router and port forwarding or VPN settings.
In more serious cases, you can resort to Windows Event Viewer Check the "Application" and "System" logs for RDP-related errors. It also helps to keep your network drivers up to date, as outdated drivers can cause unexpected connectivity drops.
If you're using Chrome Remote Desktop and something isn't working properly, check that the browser is Make sure your antivirus is updated and that it's not blocking UDP traffic or ports 443 and 3478. and that both the host and the client have full internet access. On corporate networks, the administrator may have restricted or blocked the tool.
Setting up and using a remote desktop might seem daunting at first, but once you understand the requirements, activation steps, and minimum security measures, it becomes an incredibly convenient work and support tool: from RDP integrated into Windows to solutions like Splashtop or TSplus or Chrome Remote DesktopYou have options for almost any scenario, budget, and device type, always with the possibility of fine-tuning the security level according to how demanding your environment is.

Table of Contents
- What is a remote desktop and what is it used for?
- Basic prerequisites before setting up a remote desktop
- How to enable Remote Desktop in Windows 10 and Windows 11 from Settings
- Additional security settings: network-level authentication and allowed users
- Enable Remote Desktop from the classic Windows Control Panel
- Enable remote desktop using Command Prompt or PowerShell
- Configure the Windows firewall to allow remote desktop connections
- Remote desktop access from different devices (Windows, macOS, iOS and Android)
- Secure remote access from outside your network: router, VPN, and ports
- Using Chrome Remote Desktop on Windows, macOS, and Linux
- Configure Chrome Remote Desktop on Linux and customize the session
- Configure and use Splashtop for cross-platform remote access
- Advantages of Splashtop over other remote desktop solutions
- TSplus as an alternative to RDP for companies
- Key security aspects of any remote desktop solution
- Common problems and how to solve them