- A guest WiFi network creates a separate internet access that isolates visitors from your local network and protects your devices.
- Most routers and operators allow you to activate this network from the web interface or mobile apps with settings for name, password, security and duration.
- Setting different passwords, blocking access to the intranet and, if possible, time and bandwidth limits significantly strengthens security.
- Manufacturers and operators such as D-Link, Google, Huawei, Orange or Movistar integrate specific functions to easily manage guest WiFi.
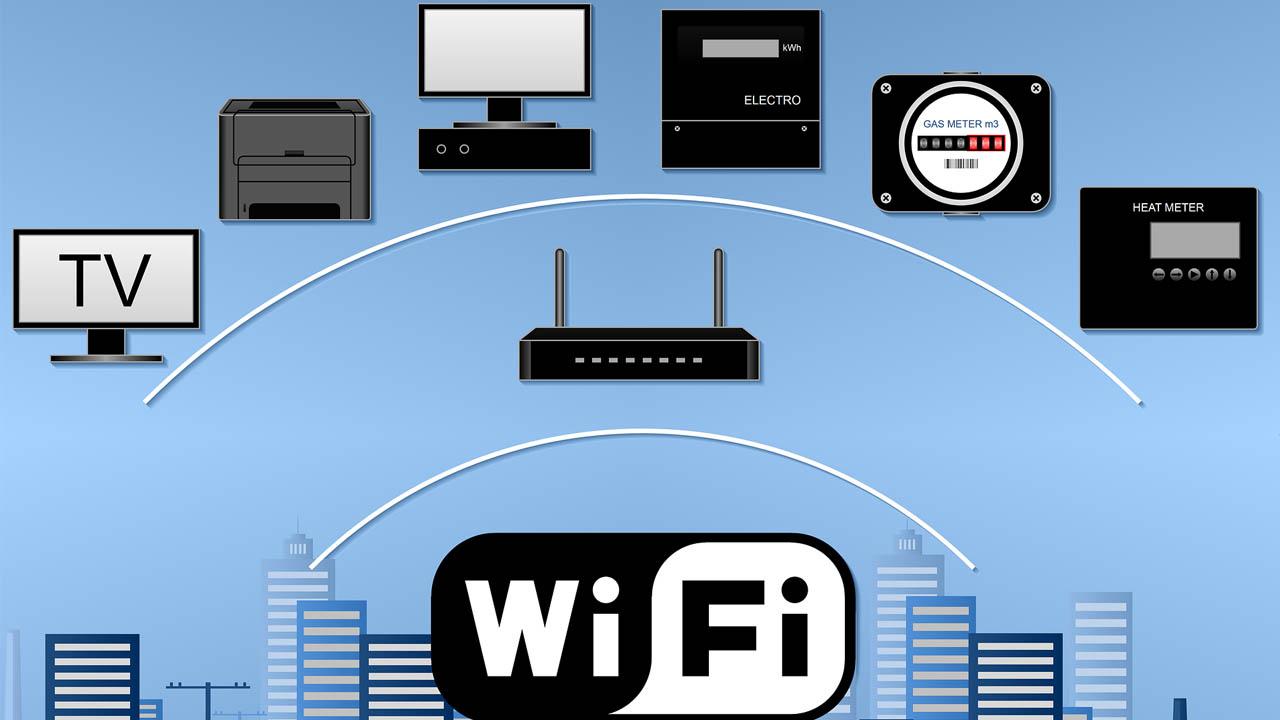
If every time someone comes to your house the first thing they ask for is your Wi-Fi password, it's time to consider a more convenient and secure solution. Having a well-configured guest Wi-Fi network allows you to continue being a good host without compromising the security of your home network.
With a separate guest network, your friends, family, or even clients in an office can connect to the internet while your computers, NAS, printers, and other devices remain secure. This article will show you how to set up a guest Wi-Fi network on any router , which options to enable, what each internet service provider offers, and what interesting extras manufacturers like Google, Huawei, D-Link, and Orange provide.
What exactly is a guest WiFi network and why should you care?
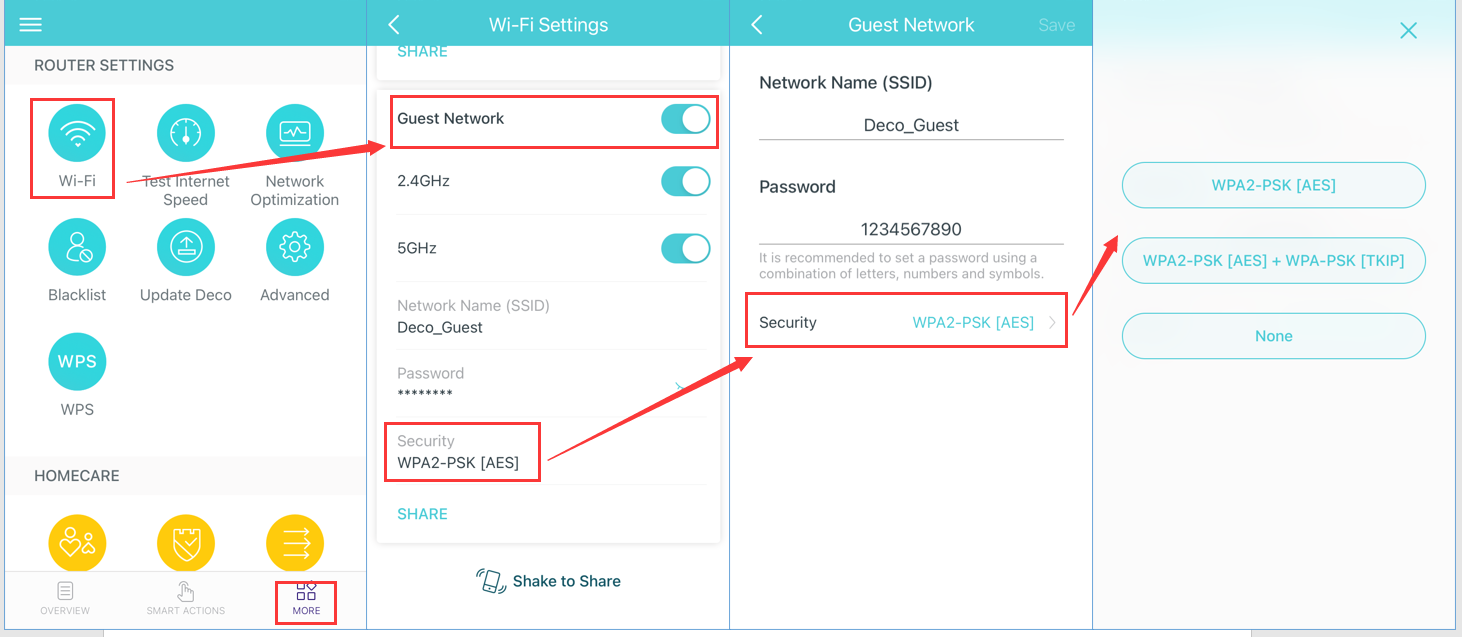
A guest Wi-Fi network is essentially a second wireless network separate from your main Wi-Fi , with its own name (SSID) and password. It's created from the router and usually appears with a suffix like "_guest" or "_invitados", although you can name it whatever you like.
The key to this system is that devices connecting to the guest WiFi only have access to the Internet , but cannot see or communicate with the equipment on your internal network: computers, network hard drives, printers, smart TVs, IP cameras, etc.
Without this isolation, every time you share your home Wi-Fi password, you're opening the door to potential threats coming from your visitors' phones or laptops . That person might not have malicious intentions, but they could have a Trojan, malware, or other malicious application on their device capable of moving across the local network.
By separating guest traffic, you turn your router into a "digital bouncer": you let people into the internet, but you don't allow them into the "backstage" of your network . This extra layer of security is especially important in homes with many IoT devices (TVs, smart speakers, smart plugs, etc.) and in small offices.
Another very practical advantage is that the guest network can be activated and deactivated at will . Many routers even allow you to program it to turn off automatically after a few hours, ideal for a party, a business meeting, or occasional visitors.
Advantages of using a guest WiFi network versus sharing your main password
When someone asks for your password, you can choose to share your main Wi-Fi password, generate a QR code, use WPS, or create a guest network. The latter is by far the most recommended option if security is important to you.
If you give out your usual password, you're granting that person full access to your local network : shared folders, NAS drives with private or corporate data, printers, smart home devices, etc. Even if you trust the person, you can't monitor the status of their mobile phone or laptop.
Using a QR code or the WPS button can make connecting easier without saying the key out loud, but it doesn't solve the underlying problem : once inside, the guest device remains on your internal network, with the same permissions as your own devices.
With guest Wi-Fi, on the other hand, external devices only see a "tunnel" to the internet. They can't browse your LAN, access your router, or snoop on your laptop while it's on. This means that a potential virus or malware won't be able to spread to your home devices.
In addition, many routers allow you to limit bandwidth or the number of users on the guest network, as well as the maximum connection time. This is perfect for preventing visitors from overloading your connection , especially in offices or spaces with high foot traffic.
How a guest WiFi network works in practice
On a technical level, most modern routers (including those provided by internet service providers) integrate a wireless access point capable of creating more than one simultaneous Wi-Fi network . Each network has its own SSID and its own security settings.
When you activate the guest network, the router creates a "separate environment" or VLAN where all guest traffic is isolated from the rest . From there, only internet access is allowed, but without a direct route to the internal network.
From the user's perspective, the process is very simple: your guests will see another WiFi network in the available list on their mobile phone or computer, enter the specific password for that network, and browse normally, as if it were any other wireless connection.
In most models, you can also choose which WiFi band the guest network will use: 2,4 GHz or 5 GHz . 2,4 GHz is the most common choice because it offers greater compatibility with all types of devices and a longer range, although the network is slightly slower than on 5 GHz.
Some mid-range and high-end routers also allow you to control advanced parameters of this guest zone: MAC address filtering, bandwidth management, maximum number of clients , or even set specific operating hours.
Basic steps to set up a guest WiFi network on any router
Although each manufacturer and provider has its own interface, the general procedure is very similar. By following this guide, you can activate guest Wi-Fi on most home routers on the market.
The first step is to access the router's settings. This is usually done by entering the device's IP address into your web browser , which is typically 192.168.1.1 or 192.168.0.1 by default. This information is usually found on a sticker underneath the device or in the manual.
Once you access the page, you will need to enter your router's administrator username and password . Many routers come with generic credentials (admin/admin, admin/1234, or even a blank password), so it is essential to change this password as soon as possible to prevent unauthorized access.
After logging in, go to the wireless or Wi-Fi settings section . There you should find a section called something like "Guest Network," "Guest Zone," or "Guest Wi-Fi." Some routers display it directly in the main menu.
Activate the corresponding checkbox or switch to enable the guest network. From there, you can adjust several basic parameters: network name (SSID), password, security type, and whether or not you want guests to have access to the internal network. It's always advisable to block access to the intranet or local network by selecting the corresponding option.
Recommended settings: name, password, and security
When your router asks for the network name (SSID), you can use something recognizable to your guests, without giving away too much about your main network. For example, you could use something like “Pepe's_House_Guests” or “Office_WiFi_Guest”. Avoid including overly personal information in the name.
Regarding the password, ideally it should be different from your main Wi-Fi password and maintain a minimum level of complexity. It's acceptable for the guest network to have a slightly simpler password to share without problems, but never leave it blank except in very specific and controlled situations.
In terms of security, the recommended standard remains WPA2 (ideally WPA2-PSK) . If your router offers WPA3 and all your devices are relatively recent, you can use it on the main network; on the guest network, it's sometimes advisable to keep WPA2 to ensure compatibility with older mobile phones and laptops.
Very important: If you see an option like “allow access to the local network” or “allow access to the intranet,” always leave it disabled for the guest network. This ensures that all connected devices remain isolated and can only access the internet.
Regarding the frequency band, most experts recommend that guest Wi-Fi operate on 2,4 GHz for compatibility . This frequency is slower than 5 GHz, but it provides better coverage in all rooms, and virtually any device can connect without problems.
Time and bandwidth management for your guests
Some router models include options to limit the duration of the guest network connection . You can set an activity period (for example, 1, 2, or 4 hours), and after that time, the network will automatically deactivate.
This feature is very useful in many environments: at home when you're hosting a party, in a small business to prevent visitors from continuing to use the WiFi after they leave, or in employee break rooms where you want to prevent the network from becoming overloaded throughout the day.
In offices and coworking spaces, solutions have even been proposed such as placing a QR code in the break room that allows quick access to the guest network with a one-hour lease. This way, users have a connection during their break, but it is automatically cut off afterward to prevent abuse.
In addition to time limits, many routers also allow you to manage the bandwidth available to the guest network. This prevents someone from downloading huge files or streaming in 4K and leaving everyone else without enough bandwidth.
Other common settings include limiting the number of devices connected at the same time and the option to schedule times when the guest network will be active or off, which is very convenient for maintaining some control without having to constantly access the router.
Specific options in routers from well-known operators and manufacturers
In addition to the generic configuration from the router's web interface, many operators and manufacturers have created their own applications to make the process of setting up, managing, and shutting down the guest network as easy as possible.
In the case of Orange, their Livebox Fiber router includes a particularly easy-to-use guest WiFi service . This system creates an additional network to your main network to provide internet access to visitors without exposing devices on your internal network.
From the "My Orange" app, you can view your connection status, connected devices, and manage who accesses the Wi-Fi and when. In the "Settings" section, you can change the Wi-Fi name and password , restart the router, schedule shutdown times, and even share the password via email, WhatsApp, or Bluetooth.
If you prefer to do it from your browser, simply access the Livebox Fiber configuration website, go to the "Wi-Fi" tab, and then to "Guest Wi-Fi." There you'll find the activation button, the name field (SSID), a timer to schedule how long the network will be on , and the Wi-Fi password you'll need to give your guests. Once you save the changes, the network will remain active until the timer turns it off or you manually deactivate it.
Please note that, in this specific case, the guest WiFi is not replicated through the Orange Wi-Fi Premium or Wi-Fi 6 repeaters, so the coverage of that network will be that of the main router.
Setting up guest networks in carrier apps and Smart WiFi
Other companies, such as Movistar, have also integrated guest network management into their mobile app. With the Mi Movistar app, and more specifically the Smart WiFi app , you can control your home network from your mobile device without needing to use a web browser.
In this case, the process is as simple as downloading the app, going to the "My Network" section, and activating the guest Wi-Fi with your preferred name and password . From that moment on, you can share that network with whomever you want and deactivate it when you no longer need it.
Smart WiFi also lets you optimize your connection speed , change your WiFi name and password, see connected devices, and block any intruders stealing bandwidth. This combination of control and a guest network helps you maintain a much cleaner and more manageable network.
In most of this operator's fiber optic plans, the Smart WiFi app is included at no extra cost, so it's a good idea to take advantage of it if you want to manage your WiFi without complicating things with advanced router menus.
In summary, at Orange, Movistar and other similar companies, the trend is clear: to centralize the management of guest WiFi in a user-friendly app , accessible to any user without technical knowledge.
Example configuration on D-Link routers: Guest Zone
D-Link routers typically include a feature called Guest Zone , which is simply a Wi-Fi network for guests. To configure it, you also need to access the router's web interface by entering its IP address in your browser, usually 192.168.0.1.
Once logged in, using the administrator password (which you should change if it's still the default), go to the "Settings" menu and then to the "Wireless" section, where you'll find the advanced Wi-Fi options. There you'll find the "Guest Zone" option, from which you can activate the dedicated guest network.
Within that section, you need to mark the status as active, choose which bands the network will broadcast on (2,4 GHz, 5 GHz, or both), and define the SSID and password . As with other routers, creating the guest network on 2,4 GHz is usually sufficient to ensure compatibility with almost any device.
A unique feature of some D-Link models is that, if they are compatible with voice control via Amazon Alexa or Google Assistant , you can use smart speakers to announce or display the password to guests. You can also use the D-Link WiFi app to quickly check the guest zone name and password without accessing the web interface.
These routers also maintain the same security principle: the Guest Zone only provides access to the Internet, not to the local network, thus drastically reducing the risk that a compromised device could affect the rest of your network.
Guest WiFi in mesh ecosystems like Google Nest WiFi
In mesh network systems like Google Nest Wifi, the guest network is also very common. The idea here is to create a separate network that guests can use throughout the house thanks to the mesh points, but with limited internet access and access to a few shared devices that you choose.
From the Google Home app you can activate or deactivate the guest WiFi network, change its name, its password and decide which smart home devices can be visible to visitors (for example, a Chromecast, a smart TV or certain speakers).
In addition to turning the network on and off, the system allows you to easily share the password with guests via SMS, email, or other apps. You can even display the password directly on devices like Google Nest displays.
Another advantage is the integration with the privacy features offered by Google Nest Wifi, which details what data is collected and how it is managed, providing extra transparency for users who are more concerned about their privacy.
If you use a mesh system , it's worth checking its official app to see if it includes guest mode, as virtually all modern models have incorporated it as a standard feature.
Control the guest network with apps like Huawei AI Life
In the case of routers from manufacturers like Huawei, the configuration of the guest network can be done both from the router's administration website and from its own application, Huawei AI Life , available for mobile phones.
From the router's settings page, the usual way is to go to "More features > Wi-Fi settings > Guest Wi-Fi" and enable the option. From there, you can set the access duration, security type, and password that your guests will use.
The Huawei AI Life app greatly simplifies this process: first, connect your phone to the router's Wi-Fi, open the app, select the router, and go to the "Guest Wi-Fi" section. From there, you can turn the network on or off, choose the name, password, and how long it will remain active.
An interesting feature is the "30-minute delay" function, which allows you to extend the guest network usage time in half-hour increments as many times as you want, very useful if the visit lasts longer than expected.
It's important to note that devices connected to the guest Wi-Fi on these routers are isolated from each other, so guest-to-guest sharing is not supported . Furthermore, in multi-router setups, only the main router typically supports this type of guest Wi-Fi.
Best practices for security and management of connected devices
Once you've set up your guest network, it's a good idea to occasionally check which devices are connected to your Wi-Fi . You can do this through the router's web interface or the official app, depending on the model.
If you see unfamiliar device names on your main network, the best course of action is to change your Wi-Fi password to force all devices to re-authenticate. This will cut off access to any intruders who might be using your connection without permission.
Similarly, if you notice someone is using the guest network excessively, you can disconnect them from the router's control panel or temporarily disable the network . This is why it's so useful that many routers include timers or automatic schedules.
Another basic tip is to keep your router's firmware updated , as updates usually bring security patches and sometimes improvements or new features for managing guest WiFi.
By combining these best practices with a well-configured guest network, you will have a much more secure environment against malware, unauthorized access, or privacy issues related to visitors.
A well-designed guest Wi-Fi network lets you continue sharing your connection without headaches, keeping your devices safe and your network organized. Taking advantage of the options offered by most routers (or your internet service provider's apps) to create, limit, and disable this secondary network is one of the easiest ways to significantly improve the security of your home or office Wi-Fi without any hassle.

Table of Contents
- 1 What exactly is a guest WiFi network and why should you care?
- 2 Advantages of using a guest WiFi network versus sharing your main password
- 3 How a guest WiFi network works in practice
- 4 Basic steps to set up a guest WiFi network on any router
- 5 Recommended settings: name, password, and security
- 6 Time and bandwidth management for your guests
- 7 Specific options in routers from well-known operators and manufacturers
- 8 Setting up guest networks in carrier apps and Smart WiFi
- 9 Example configuration on D-Link routers: Guest Zone
- 10 Guest WiFi in mesh ecosystems like Google Nest WiFi
- 11 Control the guest network with apps like Huawei AI Life
- 12 Best practices for security and management of connected devices