- Understanding the difference between local and Microsoft accounts is key to choosing the most appropriate option.
- Windows 11 makes it easy to add, remove, or switch accounts, providing flexibility and security.
- Proper permission management and synchronization protect your files and personal data in different environments.

Managing user accounts in Windows 11 is essential for those who share a computer or want to separate personal and professional use. Often, when purchasing or setting up a computer, a Microsoft account is used, but later the need arises to change it for privacy, security, or simply to adapt the computer to new needs.
In this article, I'll explain in detail how to change your Microsoft account in Windows 11, whether to a local account or a different Microsoft account. I'll also review the differences between the two types of accounts and give you tips for optimal and secure management of your computer. If you want complete control over access and synchronized information on your PC, keep reading because you'll find all the steps and recommendations here.
What is the difference between a Microsoft account and a local account?
Windows 11 lets you choose between two main types of user accounts: a Microsoft account and a local account. Understanding their differences is key before making any decisions.
- Microsoft account: It is associated with an email address and password, the same ones used to access services such as Outlook, OneDrive, Skype, Office, or Xbox. This account allows you to synchronize settings, files and preferences between different devices., as well as offering direct access to all Microsoft services and applications.
- Local account: This type of account only exists on that specific device and does not require an internet connection. It is independent of the cloud and other online servicesEverything saved, configured, or installed with a local account is limited to that PC only, promoting privacy and complete control over the device.
Choosing one account or the other depends on your needs: if you value synchronization between computers and Microsoft services, a Microsoft account is ideal; if you prefer privacy and complete control, a local account is your choice.
Advantages of having multiple user accounts in Windows 11
Windows 11 offers the ability to add multiple user accounts to share the same device without compromising privacy or individual settings. Each user has their own environment, documents, applications, and access level.
For example, in a family setting, adults can have accounts with administrator privileges to install programs or modify settings , while children have standard accounts with parental controls enabled. This allows each member to have a personalized experience and keeps data secure between users.
It's also useful for separating your personal life from your work or school life: you can have one account for work, with access to professional email, productivity apps, and company documents , and another for your personal activities, leisure, or social media. This way, you can keep your files organized and avoid mixing confidential data.
How to change your Microsoft account to another one in Windows 11
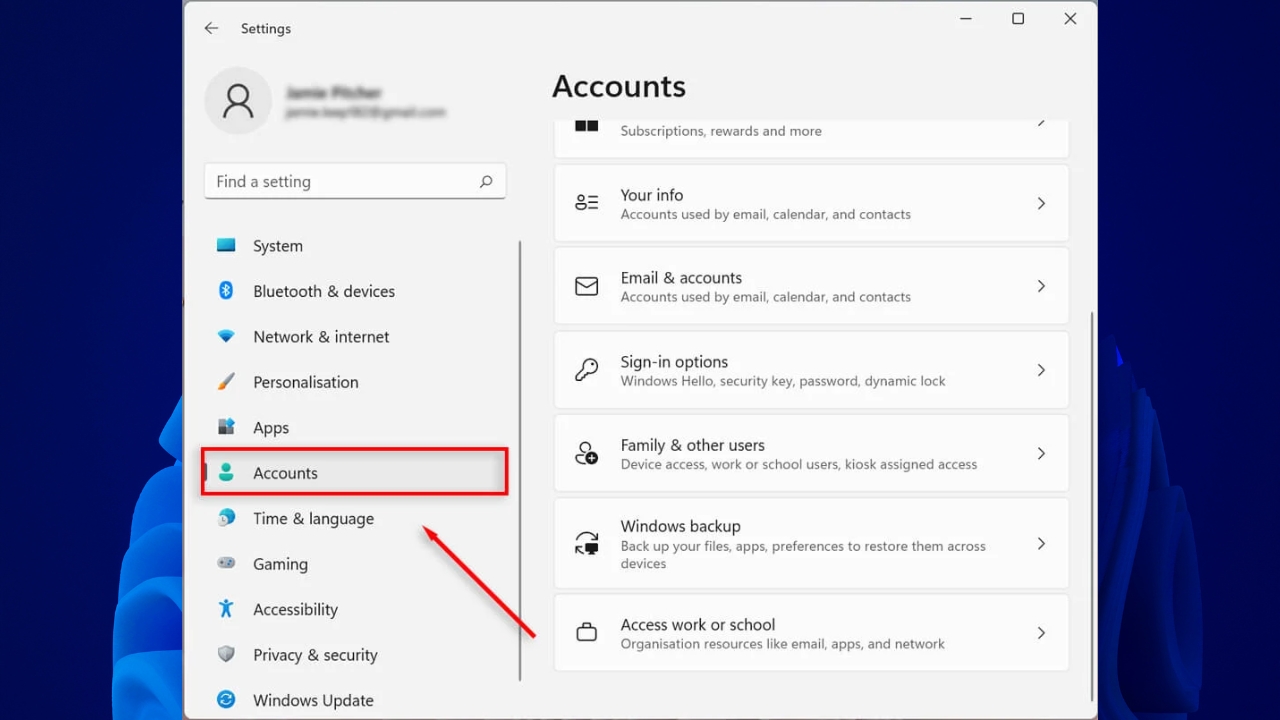
Changing your Microsoft account in Windows 11 involves unlinking your current account and signing in with a new one, or converting your current account to a local account and then linking the new one. This process might seem complicated, but if you follow the steps carefully, you won't have any problems.
Convert your current Microsoft account to a local account
- Open the application Configuration of Windows (you can do this by pressing Win + I).
- Go to Accounts > Your information.
- Click on Sign in with a local account insteadThis link will only appear if you currently use a Microsoft account.
- The system will ask you to enter the username and a new password for that local account. Choose a secure password and, if you like, leave a password reminder or hint.
- After completing the information, press Next and then choose Log out and finishThe computer will log out, and you'll need to log in again, now with the newly created local account.
Once your account is local, your PC will no longer be linked to Microsoft services, and your files will remain in your profile.
Associate a new Microsoft account
- Please log in again Settings > Accounts > Your information.
- Now click on Sign in with a Microsoft account instead.
- Enter the email address and password for the new Microsoft account you want to link.
- The system may ask you for the password for your current local account to confirm the operation.
- After entering your credentials, follow the instructions and, upon completion, your computer will be associated with your new Microsoft account.
- At this point, you can restart your computer to ensure all changes are saved and Microsoft services are synchronized correctly.
Using this method, you'll switch from a Microsoft account to a local one, and then you'll be able to quickly link the new Microsoft account.
Add a new Microsoft account without unlinking the old one
If you're looking to add another Microsoft account as an additional user, without replacing the main one, you can do that too. This can be useful if several people use the same computer or if you have different personal/work accounts.
- Opens Configuration and go to Accounts > Other user.
- Press on Add account.
- Enter the email and password for the Microsoft account you want to add.
- Define the account type: standard (limited) or administrator (with full access to settings and programs).
- Save your changes and log out or switch users to access the new associated account.
This way you can switch between multiple profiles and each user will have their environment, files, and settings protected.
How to change the user account type in Windows 11
Changing the account type is essential if you need to upgrade a standard user to an administrator or vice versa.
- Go to Settings > Accounts > Other users.
- Find the account you want to modify and select Change account type.
- Choose between Administrator o Standard user in the drop-down list.
- Confirm in Accept and the account type will change immediately.
This is especially useful when managing family accounts or when a user takes on new responsibilities on the team.
Sign in to Windows 11: Security options and tips
The login process ensures that only authorized users can access personal content and settings on the computer. Windows 11 offers several alternatives:
- Password: The classic option, which remains valid for all types of accounts.
- PIN CODE: A faster and easier to remember numeric code.
- Biometric data: If your device supports it, you can use fingerprint or facial recognition with Windows Hello for more convenient and secure authentication.
To log in normally:
- Turn on your device or wait for the login screen.
- Select the appropriate user account.
- Enter your password, PIN, or use the available biometric method.
- Balance Intro or click the arrow to access the desktop.
In case of forgetting, Windows 11 allows you to reset your password or PIN directly from the login screen by looking for the links I forgot my password or I forgot my PIN.
Managing family accounts and professional or educational accounts
Windows 11 includes advanced options for adding family members or accounts linked to work or school. This facilitates parental controls and integration with business or school services and resources.
For families, you can manage profiles from Settings > Accounts > Family . Here you can add members and apply restrictions for minors, as well as monitor their activity.
If you want to add a work or school account:
- Accede to Settings > Accounts > Work or school access.
- Choose Add a work or school account and click on Connect.
- Enter the information provided by your company or educational center.
- Complete the setup and you'll now be able to access your organization's shared resources.
This flexibility makes Windows 11 a versatile system for both home and office use.