- The BIOS controls critical CPU, memory, graphics, and power parameters that directly impact PC performance and stability.
- Settings such as Hyper-Threading, Turbo Mode, virtualization, prefetchers, and XMP profiles should be configured judiciously to balance performance and reliability.
- Integrated graphics options, fast boot, and HPET influence the user experience and should be reviewed according to the type of hardware and the actual use of the computer.
- The best strategy is to change a few parameters at a time, test thoroughly, and always keep a clear method for restoring the BIOS default values.
BIOS optimization is one of those topics that almost everyone has heard of, but very few people dare to touch for fear of breaking something. And that's understandable: you enter the blue BIOS screen, see a bunch of strange options for CPU, memory, power, and graphics, and think, "I'd better not touch anything." However, understanding what each setting does and how it affects performance can make the difference between a PC that runs erratically and a finely tuned machine that responds much better.
In this article, we'll break down, in clear and accessible language, what you can adjust in the BIOS to improve performance, power consumption, and stability , using examples very similar to those commonly seen in forums: options such as Hyper-Threading, Turbo Mode, virtualization, CPU prefetchers, HPET, integrated memory, XMP, integrated graphics settings, and more. You'll see both the practical aspects (what to adjust and what not to) and the theoretical ones (what's happening "behind the scenes"), so you won't be going in blind when you enter the BIOS.
What is the BIOS and why does it have such a big impact on performance?
The BIOS (Basic Input/Output System) is the basic program that runs as soon as the computer is turned on . Its job is to initialize the hardware, check that everything is working correctly, and hand control over to the operating system (Windows, Linux, etc.). It also acts as an intermediary between the operating system and key devices such as the hard drive ( NVMe, controllers, and caching ), the video adapter, the keyboard, the mouse, and the printer.
In terms of performance, the BIOS is important because it defines the behavior of the CPU, memory, and power management from the very first second. Settings like Turbo Mode, memory profiles, power-saving technologies, and timer management can make your PC faster, consume less power, or experience fewer lag spikes and stutters in games and applications.
For advanced users, engineers, or hardware enthusiasts, the BIOS is a very powerful tool: properly configured, it can reduce power consumption, improve system responsiveness, and extend hardware lifespan . Improperly configured, however, it can cause crashes, high temperatures, performance loss, or even boot problems.
It's important to understand that each motherboard and BIOS has slightly different option names, but the basics are the same: you'll almost always find menus for CPU, RAM, integrated graphics, storage, and power , although they may be arranged differently or have different labels.
Key CPU options in the BIOS and how they affect performance
The part of the BIOS that often intimidates people is the CPU section. This is where you'll find terms like Hyper-Threading, Turbo Mode, virtualization, prefetchers, enabled cores , and so on. Let's review the most common ones as you might find them on a relatively old or mid-range motherboard.
A very common option is Hyper-Threading (in Intel) or the equivalent SMT in AMD processors. This technology allows a physical core to behave like two logical cores, improving performance in programs that take advantage of multiple threads, such as video editing, compression, heavy multitasking, or well-optimized modern games.
It's often mentioned in forums that disabling Hyper-Threading can improve performance in games heavily reliant on a single core, such as some classic competitive titles like CS:GO. However, the reality is that most recent games benefit from multiple threads , and in many cases, disabling Hyper-Threading worsens the experience or only slightly reduces performance without providing any real benefit.
Generally speaking, the most sensible thing for most users is to keep Hyper-Threading enabled . Disabling it would only make sense if you've run specific tests with a particular game, measured FPS and stability, and actually see a clear improvement with it turned off (something that's rare these days on modern computers).
Another notable option is Limit CPUID Maximum . This feature was primarily used for compatibility with very old operating systems (such as some versions of Windows prior to XP) that couldn't handle certain CPU identifiers. Nowadays, with modern systems, it's almost always recommended to keep Limit CPUID Maximum disabled , as reputable guides generally advise: enabling it could only limit processor functionality without providing any advantages.
You'll also encounter Intel Virtualization Technology (VT-x, VT-d) or its AMD equivalent (SVM). This technology allows the processor to accelerate virtualization, that is, the use of virtual machines (VirtualBox, VMware, Hyper-V, WSL2, advanced emulators, etc.).
Many people disable it following guides that aim to squeeze every last FPS out of games, because in theory it can slightly reduce the attack surface and avoid certain overheads . However, in practice, the impact on game performance is practically nil, and if you ever want to use virtualization, complex emulators, or features like Android Studio with an accelerated emulator, you'll definitely need it.
Therefore, in most cases it is recommended to leave virtualization enabled , unless you have very specific security needs or have verified a specific conflict with a program or game, something that is no longer common in current systems.
Many BIOSes also display a list of cores such as CPU 0, CPU 1, CPU 2, CPU 3, etc. , sometimes with the option to manually disable some of them. Some users disable several cores (for example, CPU 3, CPU 6, CPU 7) thinking that this will force the CPU to focus on a few "stronger" cores. Generally, this doesn't make much sense: modern processors are designed to work with all their cores active , and the operating system itself manages the workload.
Reducing the number of cores can slightly lower power consumption or temperature in some cases, but it also cuts performance in multitasking and in applications that take advantage of multiple threads, so it's usually a bad idea unless you have a very specific reason (diagnosing a faulty core, for example).
Another key setting is Turbo Mode (or Intel Turbo Boost, Precision Boost in AMD, etc.). This mode allows the CPU to automatically increase its frequency above the base frequency when there is sufficient thermal and power headroom, providing better performance in demanding tasks without any user intervention.
On virtually all modern computers, it's worth keeping Turbo Mode enabled . It's a reliable way to boost performance when needed, and the processor itself protects against overheating by reducing the frequency if temperatures get too high. Only on systems with very limited cooling, or if you're looking to minimize power consumption and heat as much as possible, might you consider disabling it, accepting the performance loss.
Hardware Prefetcher, Adjacent Cache Line Prefetch, and other CPU fine-tuning
There are a number of options that often cause confusion, such as Hardware Prefetcher and Adjacent Cache Line Prefetch . These parameters control how the CPU anticipates reading data from memory and loads it into the cache before it's needed, attempting to predict access patterns.
The hardware prefetcher activates a mechanism by which the processor attempts to detect sequential or predictable memory accesses and brings them into the L2/L3 cache in advance. This, in most cases, improves performance because it reduces effective memory latency in typical tasks (office applications, web browsing, many games, etc.).
Adjacent Cache Line Prefetch , on the other hand, loads the adjacent cache line when the processor requests a line, assuming it will likely be used next. Again, the idea is to anticipate actual data usage to speed up access.
In some forums, you can find extreme opinions: some people claim that disabling these prefetchers improves performance in certain benchmarks or specific games, while others assert the opposite. The truth is that in the vast majority of situations, it's best to keep both enabled , as modern processors are very well optimized to work with them.
Disabling them usually only makes sense in very specific environments: for example, on servers with very particular workloads, for scientific performance testing, or for stability diagnostics. For a home user or gamer who wants to optimize their BIOS without complicating things, the most sensible thing to do is leave Hardware Prefetcher and Adjacent Cache Line Prefetch enabled.
Also keep in mind that tinkering with these settings without really knowing what you're doing can lead to strange behavior in some programs or even inconsistent performance depending on the load. If you're unfamiliar with these terms, it's best not to get too caught up in them and instead focus on settings that have a clear and easily measurable impact, such as Turbo Mode, XMP memory profiles, or the operating system's power plan.
RAM memory, XMP profiles, and what you usually see in modern BIOSes
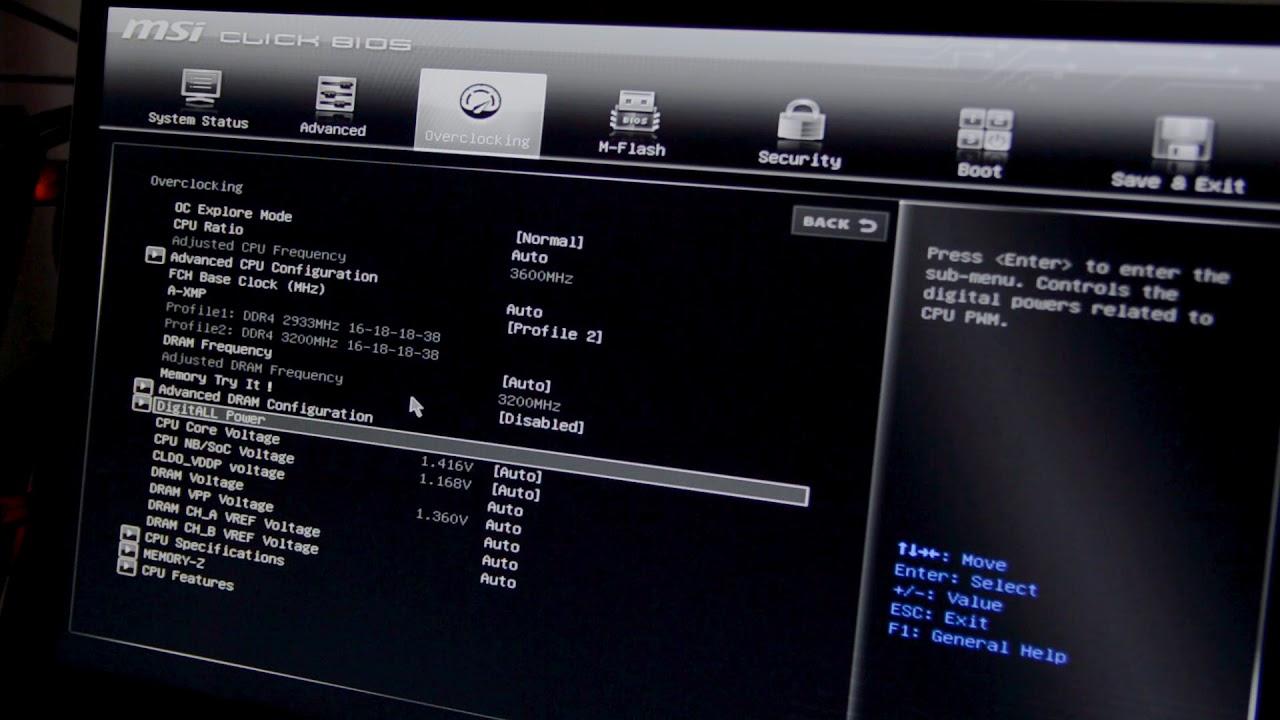
One of the things that causes the most confusion when entering the BIOS for the first time is the RAM configuration . In many videos and tutorials, you'll see people activate an option called XMP (eXtreme Memory Profile) or DOCP/EXPO on AMD motherboards, which basically applies a predefined profile so that the memory operates at the speed and latencies for which it was sold.
If you don't adjust anything, it's very likely your RAM is running at a frequency lower than the maximum supported . For example, modules that support 3000 or 3200 MHz might be running at 2133 or 2400 MHz by default. Enabling XMP in the BIOS allows the motherboard to read the memory profile and automatically adjust frequency, voltage, and timings, getting more out of your modules without having to manually overclock.
In some older or basic BIOS versions, you might not see the word XMP explicitly, but rather something like Memory Profile, Load Optimized Memory Settings , or similar options. The concept is the same: loading a pre-configured profile. For the average user who wants to get the most out of their computer without complications, enabling the XMP profile is often one of the changes with the most real impact on performance , especially on processors that rely heavily on RAM speed.
However, keep in mind that some very demanding memory kits may require a decent motherboard and a processor that supports them well. If enabling XMP causes the system to become unstable, restart, or fail to boot, it's recommended to return to the BIOS, lower the frequency by one notch or reset the settings to default , and try a less demanding profile, if available.
For users who, as in some real-world examples, barely see any advanced memory options in the BIOS, there's no need to worry: many more basic motherboards simply limit advanced options to avoid problems, but you can still check that the RAM is detected correctly, that it works in dual channel (if you have two modules), and that there are no errors in the memory tests.
Graphics settings in the BIOS: main display, internal graphics, and memory
Another section that often causes confusion is Graphics Settings . It's common to encounter options like Primary Display, Internal Graphics, IGD Memory, or DVMT/FIXED Memory, and be left wondering, "What are these for?"
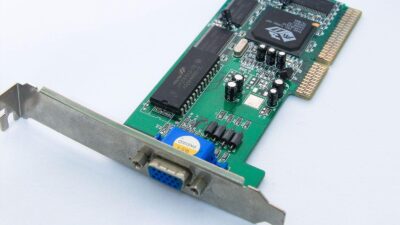
The first step is understanding what Primary Display or similar settings do (sometimes they appear as Initiate Graphics Adapter, Primary GPU, etc.). This option indicates which graphics device is used as the main display when the system starts: the GPU integrated into the processor/motherboard (IGD), the dedicated one in a PCIe slot (PEG), or, in some cases, an older card with another type of interface.
If you have a dedicated graphics card (such as a discrete NVIDIA or AMD card), the BIOS will usually detect it and use it as the primary device in Auto mode. In that case, you generally don't need to change anything, although it's sometimes recommended to manually set PEG/PCIe as the primary device to avoid potential conflicts or slightly longer boot times.
The Internal Graphics option controls whether the integrated GPU on the processor or motherboard is enabled. If you're using a dedicated graphics card and don't need the integrated video outputs, you can disable Internal Graphics to simplify setup and, in some cases, free up a little shared memory. In a typical scenario, you'll see Internal Graphics enabled when the user is only using the dedicated graphics card.
When you do use the integrated graphics, you'll see parameters like IGD Memory and DVMT/FIXED Memory , or similar values. These settings indicate how much system RAM is permanently reserved for the integrated GPU and how much can be dynamically allocated (DVMT: Dynamic Video Memory Technology).
If you only use your PC for light tasks (office applications, internet browsing, video playback), modest values like 32 MB of RAM and 128 MB of DVMT are usually sufficient, because the integrated GPU will request more memory as needed within the established limits. For more demanding uses (light gaming, basic editing), slightly increasing these values might be beneficial , always keeping in mind that this additional memory will come from the total system RAM.
For most users who don't want to complicate things, leaving the graphics settings on Auto and default values works perfectly. It only makes sense to fine-tune these parameters if you're running out of system memory or experiencing specific problems with screen detection at startup.
Power management in the BIOS: saving, system response, and hardware lifespan
Beyond the CPU and memory, the BIOS also controls a host of power parameters that influence how the computer responds when powered on, suspended, or idle. Properly adjusting these settings can result in a more efficient and responsive system.
A typical example is the fast boot option, sometimes called Fast Boot, Fast On, or similar . This setting reduces or skips some checks when the PC is turned on, causing the operating system to load faster. However, in certain configurations, it can cause problems with detecting USB peripherals, external drives, or even accessing the BIOS itself.
That's why some users disable Fast On or Fast Boot to improve startup stability, sacrificing a few seconds of boot time. If you frequently change hardware, connect and disconnect devices, or need to access the BIOS often, disabling Fast Boot can save you a lot of trouble.
Within power management, the BIOS also defines how the CPU's C-states behave, power saving on PCIe ports, sleep modes (S1, S3, S4), and other subtle settings. Generally, if you use your PC normally, leaving these options on Auto or at their default values is best, as manufacturers usually achieve a reasonable balance between power consumption and performance.
For more technical users or for systems that are always on (home servers, workload-intensive systems), it does make sense to fine-tune these parameters to reduce power consumption spikes, minimize heat, and extend component lifespan . However, this enters more advanced territory where it's advisable to thoroughly research the specific motherboard and processor.
HPET (High Precision Event Timer): what it is and how it affects the system
The High Precision Event Timer (HPET) is another setting found in both the BIOS and the operating system, and it has generated a lot of discussion in gaming and performance forums. Essentially, HPET is a high-precision timer that Windows and other systems can use to schedule events and measure times more accurately.
Some tutorials suggest disabling HPET in Windows but leaving it enabled in the BIOS , based on tests showing slight improvements in FPS or a perceived reduction in input lag in certain games. The idea is that if the system doesn't force the use of HPET as the sole timer, it can rely on other clocks (TSC, HPET, ACPI) more flexibly.
The typical configuration would be: HPET Enabled in BIOS , and in Windows, do not force its exclusive use (for example, do not activate it using commands that force the system to use only HPET). This allows the operating system to choose the most appropriate timer depending on the situation, without losing compatibility.
However, the actual impact of HPET on performance varies greatly depending on the hardware, operating system, and applications. On many modern systems, tweaking HPET makes barely any noticeable difference. Therefore, if you don't experience microstuttering, desynchronized audio, or other unusual behavior, you can leave HPET enabled in the BIOS and not obsess over it . If you're a performance buff and want to squeeze every last millisecond out of your system, then it might make sense to run benchmark tests, but always with caution.
General best practices when optimizing the BIOS
After reviewing all these specific options, it's helpful to summarize a series of general best practices to ensure that BIOS optimization doesn't become a source of problems.
The first thing to do, before touching anything, is to write down or take pictures of the default settings . That way, if any changes make your system unstable or prevent it from booting, you'll know exactly what you had set and can easily restore it without having to guess.
It's also highly recommended that you only change one or two options at a time and then test the system for a while. If you modify five or six parameters all at once (Hyper-Threading, Turbo, prefetchers, power, graphics, etc.), and then something goes wrong, it will be much harder to figure out which setting caused the problem.
Whenever you're unsure about a specific option, it's best to leave it on Auto, Default, or Enabled , especially if it involves protection mechanisms, thermal management, or compatibility. Manufacturers typically test these settings with the average user in mind, and they are usually quite safe.
Don't forget that every BIOS change should be accompanied by real-world testing : open your usual games and work programs, and see if there are more or fewer stutters, if the temperature rises too much, or if the system responds better or worse. Theory is all well and good, but ultimately what matters is how your PC feels in your daily use.
Finally, if your computer ever stops booting due to an incorrect setting, almost all modern motherboards include a method to reset the BIOS (or CMOS): a jumper, a button on the board, or at the very least, removing the battery for a while. Consult your motherboard manual to learn exactly how to do this and restore the factory settings.
Properly adjusting the BIOS isn't magic or witchcraft, but it does require a bit of patience and a cool head: by understanding each key option (Hyper-Threading, Limit CPUID Maximum, virtualization, prefetchers, Turbo Mode, XMP, integrated graphics, Fast Boot, HPET…) and applying changes with common sense, you can achieve a very good balance between performance, stability, power consumption and hardware lifespan without needing to be an engineer or spend hours tinkering.