- Define balanced fan curves based on temperature, prioritizing airflow and the noise you're willing to tolerate.
- Maintain a slight positive pressure in the case with more intake than exhaust and use fans appropriate for each position.
- Take advantage of modern BIOS and tools like Fan Control for gradual adjustment, avoiding sudden RPM changes.
- Monitor real CPU and GPU temperatures to validate your settings and maintain safe thermal margin at any time of year.
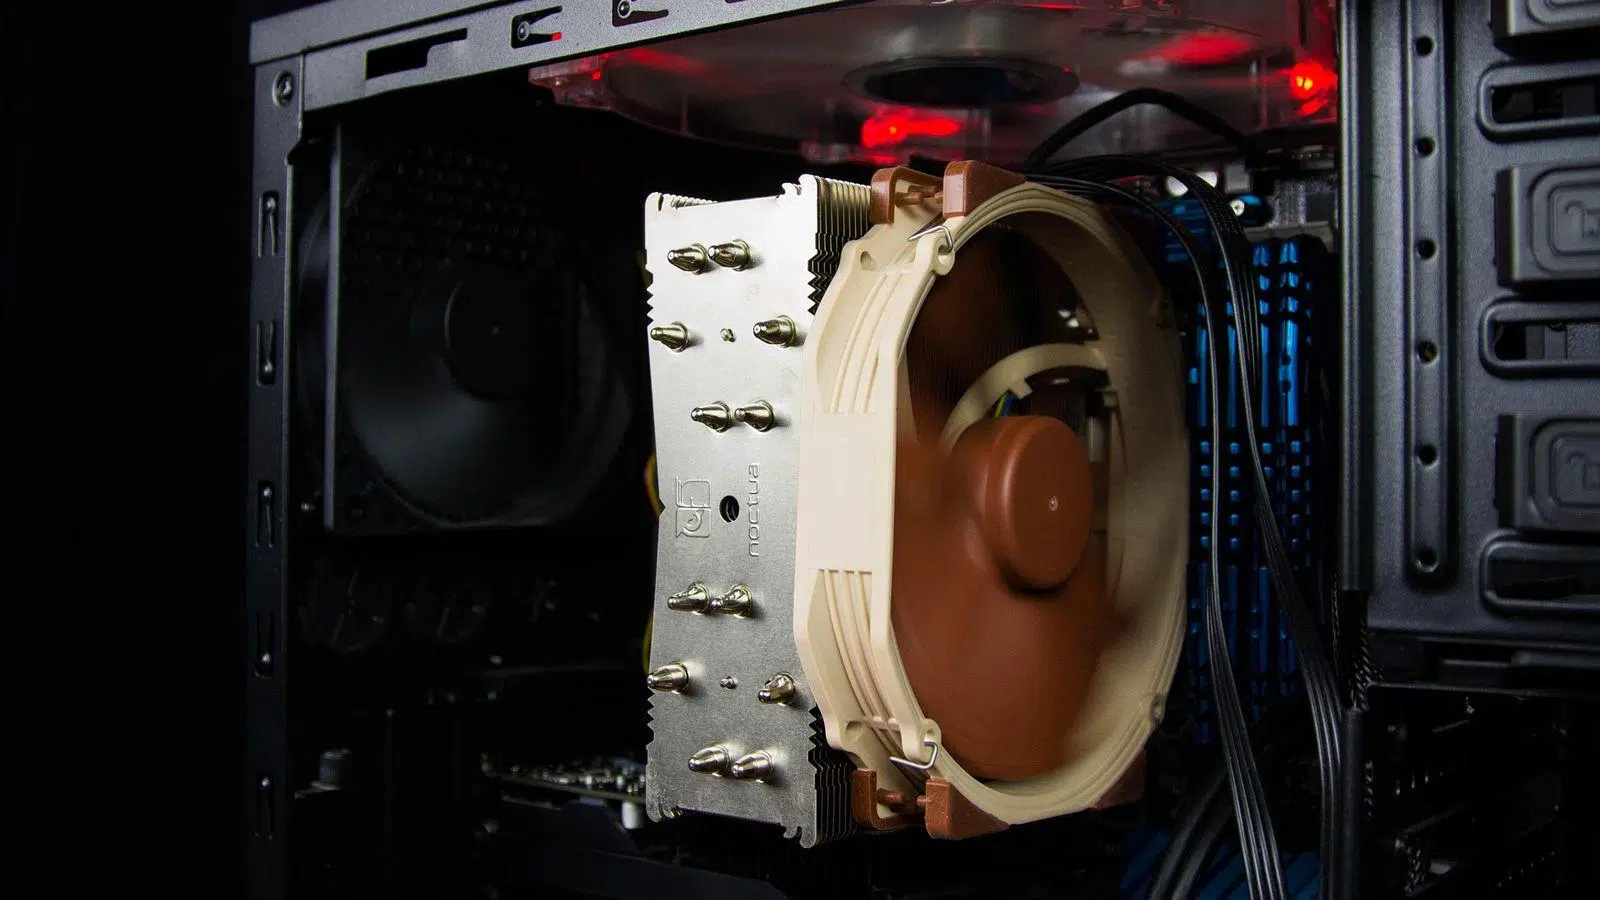
If you've ever stopped to listen to your PC tower roar when you're gaming or rendering and thought there had to be a better way, you've come to the right place. Properly configuring your PC fans makes all the difference between a cool, quiet machine and a whirring turbine every time you launch a game.
Throughout this guide, we'll calmly explore how to adjust the fan curve both from the BIOS/UEFI and with dedicated software, explain positive and negative pressure in the case, determine if you have adequate ventilation, and what to do when tools like Fan Control don't detect anything. Everything is explained in standard Spanish (Spain), with real-world examples and practical tips to keep your PC running smoothly, cool, and free of unusual noises.
What exactly is a fan curve and why should you care?
The concept of a fan curve sounds technical, but it's really just about deciding what speed (RPM) the fans should spin at based on the temperature your computer reaches. It's a temperature-RPM relationship that's plotted as a graph, usually with points you can adjust to make it more aggressive or quieter.
By configuring this curve, you can ensure that certain fans are completely stopped at low temperatures , that they gradually increase when the system starts working, or that they never reach 100% even if the processor or graphics card is hot, prioritizing silence over extreme cooling.
The ideal way to configure the fan curve depends heavily on your specific hardware: the type of fans, case, CPU cooler, graphics card, and, above all, how sensitive you are to system noise . Some fans produce a horrible whirring noise above a certain percentage, while others can reach quite high speeds and remain perfectly tolerable.
Before you start tweaking settings in the BIOS or a program, it's a good idea to be clear about what you want to achieve: maximum thermal performance , total silence on the desktop, an intermediate balance... and also what temperatures are reasonable for your CPU and GPU, because they will serve as a reference to avoid lowering the RPM too much.
Airflow in the box: inlet, outlet, and positive pressure
Before you start fussing with the fan curves, it's worth checking something even more basic: the physical configuration of the fans in your case. A perfect curve is useless if the air isn't flowing in or out properly because the case is a poorly assembled oven.
In any tower case, we have two types of fans: intake fans (which draw cool air in from the outside) and exhaust fans (which expel hot air). The goal is to achieve an orderly airflow that passes through the important components: it enters through the front or bottom, passes through the CPU and GPU, and exits through the rear or top.
Most experts recommend maintaining a slight positive pressure in the case , meaning that slightly more air enters than exits. This translates to having more intake fans than exhaust fans, or ensuring that the intake fans move slightly more air. Positive pressure reduces dust entering through unfiltered vents, as excess air tends to escape rather than enter.
A simple rule of thumb is to mount, for example, two or three intake fans at the front and one or two exhaust fans at the rear or top. However, some cases have a very restrictive front design, with almost closed panels or very dense filters, and even with many fans, airflow will be minimal; in these cases, it's best to carefully check if there's enough space for the fans to "breathe."
The type of fan you use also matters: high CFM (airflow) fans are designed to move a large volume of air without much resistance, making them ideal for the front and rear of the case. High static pressure fans work better against obstacles, such as very dense heatsinks or liquid cooling radiators , where they have more difficulty pushing air.
Actual build: example with an NZXT H9 Flow and Ryzen 7 5800X
A very typical case nowadays is that of a large tower like the NZXT H9 Flow with many fans, along with a powerful processor like a Ryzen 7 5800X and a high-end air cooler like the Be Quiet! Dark Rock Pro 5. In such a configuration, it is common to mount about ten 120 mm PWM fans distributed between the front, side, rear and top.
In this scenario, it's easy to fall into the trap of thinking only about "equalizing pressure" by adjusting the RPMs to compensate for the number of fans. For example, you might think that if you have fewer exhaust fans than intake fans, they should run at 1,5 times the speed to achieve similar pressure. But in practice, such precise calculations aren't necessary: what matters is that the air flows logically through the case and that the temperatures are correct under load.
If you have two different controllers (or two separate PWM channels on the motherboard), you can perfectly separate the intake and exhaust fan curves . A very common idea is to keep the intake fans at a slightly lower speed to reduce overall noise and let the exhaust fans, especially the rear one, react faster when the CPU or GPU heats up.
The key is to then verify in real-world use (gaming, video editing, benchmarks) that the CPU and GPU temperatures don't spike and that hot air doesn't get trapped at the top or in dead zones of the case. A quick test with a temperature monitor and a couple of adjustments is usually enough to fine-tune the system's performance.
Adjust the fan curve from the BIOS/UEFI
Once you've confirmed that the physical assembly of the case is correct, it's time to configure the fan curve in the BIOS . Almost all modern motherboards from ASUS, Gigabyte, MSI, ASRock, etc., include a specific section for this, sometimes with brand names like Q-Fan, Smart Fan 5, Fan-Tuning, etc.
To enter the BIOS/UEFI, you'll need to restart your PC and press a specific key (usually Delete or F2 , though this depends on the brand). Once inside, there's usually an advanced settings menu or a "Monitor" or "Hardware" section where the fan headers (CPU_FAN, CHA_FAN, SYS_FAN, etc.) are listed.
In the case of Gigabyte, for example, the feature is called Smart Fan 5 and allows you to view a temperature-RPM graph for the CPU and for each connected case fan. On some models, you can even choose which sensor to use for each connector: CPU temperature, chipset temperature, VRM temperature, or motherboard temperature.
Almost all BIOSes offer several predefined fan curve profiles : Silent, Normal, Performance, Full Speed, etc. The Silent profile typically keeps the fans at low RPMs until the temperature approaches a relatively high limit, resulting in very quiet desktop environments but potentially causing sudden noise spikes when the system heats up. The default profile is usually somewhat more progressive.
If you want fine control, the best option is to switch to Manual mode and adjust the points on the graph yourself . This way you can define, for example, that up to 40°C the fan speed is at 20%, at 60°C it rises to 50%, and from 80°C onwards it approaches 90-100%. The advantage is that you can adapt these settings to your perceived noise level: if, in your case, the fan speed becomes too loud above 70%, you can limit the curve a little earlier.
Many modern BIOSes also include fan calibration wizards. ASUS, for example, offers an automatic system that detects the minimum and maximum RPM range of each PWM fan, identifying the power percentage at which it starts spinning and its actual maximum speed. This allows for more precise curve adjustment and prevents abrupt frequency jumps.
Software-based fan control: Fan Control, Argus, SpeedFan and others
If you prefer to adjust the fans from within Windows, or if your BIOS is very limited, there are several third-party tools available. For many years, SpeedFan reigned supreme , allowing you to link fans to specific sensors, draw complex curves, and automate behavior so that, for example, the side fan would respond to the GPU temperature instead of the CPU temperature.
The problem is that SpeedFan has been abandoned for some time and often has many issues with modern hardware. One of the most popular alternatives currently is Fan Control , a powerful yet simple open-source and free program that automatically detects all compatible fans and sensors on your motherboard.
With Fan Control, you can create custom profiles for different times of the year or uses: a more aggressive summer profile , a quieter winter profile, and even advanced combinations where the speed depends on several sensors (CPU, GPU, internal ambient temperature, etc.). It also allows you to display the data panels you want on screen to see RPM and temperatures at a glance.
Another commercial option is Argus Monitor , which also offers very detailed fan control but has its drawbacks: every so often the settings are reset after updates and it requires a paid license to continue using it, which many users find cumbersome and expensive for what they need.
That's why many people choose to use only the BIOS settings if their motherboard is modern and has a good control system. This way, you avoid relying on background software, potential incompatibilities with newer versions of Windows, and conflicts with applications from manufacturers like Corsair iCUE, NZXT CAM, or similar programs.
Fan Control does not detect fans or sensors: typical solutions
Although Fan Control usually works very well, there are systems where the fans or temperature sensors don't appear or function incorrectly. This type of failure is usually due to permissions, BIOS settings, or conflicts with other programs.
The first step is to run Fan Control with administrator privileges , as the program may not be able to access the necessary drivers without them. Right-click on the executable and select "Run as administrator" to rule out this simple problem.
If it still doesn't detect anything, enter the BIOS/UEFI and check that the fan headers are set to PWM mode (or at least controllable mode) and not locked to fixed DC or disabled. The option to enable PWM control is usually found in the chipset menu or hardware monitor for each header.
Another point to check is your motherboard's BIOS version. Older BIOS versions may have compatibility issues with modern fans or certain internal controllers. Updating to the latest stable firmware version usually resolves many detection problems, both in the BIOS itself and in Windows programs.
If you've made a lot of changes to the BIOS or can't remember what you've changed, performing a CMOS reset and restoring the default settings can clear any confusing parameters that might be blocking PWM or sensors. However, remember to reconfigure important options like disk mode or the RAM's XMP profile.
Finally, check if you have any other fan control tools installed: manufacturer suites, older versions of SpeedFan, graphics card utilities, etc. Two programs trying to control the same fan controller can cause conflicts. In that case, uninstall or disable one of them and leave only Fan Control or the main utility you want to use.
Recommended temperatures and profiles according to load and time of year
Ambient temperature greatly influences how fans behave. In summer, with 30°C in the room, it's normal to have to increase the RPMs to prevent the CPU and GPU from overheating ; when outside temperatures drop, we can use gentler speed settings and enjoy a much quieter PC.
A good benchmark for idle or very light use (office applications, browsing) is to keep the CPU around 40-45°C , with the fans spinning at 20-30% of their capacity. At these levels, the computer is usually practically inaudible, especially if the background noise in the room isn't completely silent.
Under moderate load, such as light gaming, simple editing, or running multiple applications simultaneously, the CPU temperature can range between 45 and 65°C . Within this range, it makes sense for the fans to gradually increase their RPM to 50-60%, boosting internal airflow without making the case sound like an airplane.
When under sustained heavy load (demanding games, rendering, intensive tasks), it's normal for the CPU to reach 75°C or slightly above . At that point, to maintain a safe operating temperature, it's advisable to keep the fans running between 80% and 100%, depending on the situation. It's perfectly fine for the system to be louder during heavy work sessions if it ensures stability and healthy temperatures.
To ensure everything is working correctly, you can run benchmarks like Cinebench for 10 minutes while monitoring the temperature; the goal is to prevent the CPU from staying above 85°C for extended periods. A brief spike isn't a major concern, but if you're at that temperature for a long time, it's best to fine-tune the fan curve or check the thermal paste and airflow.
Fan control on modern motherboards: Fixed RPM vs. intelligent adjustment
Modern motherboards typically offer two main approaches to fan speed adjustment: a fixed RPM mode based on temperature and a "smart" mode that leverages the PWM signal for smooth transitions. Both are configured using similar graphs, but the final performance differs.
Fixed RPM mode is very straightforward: if you define that at 60°C you want the fan at 70%, as soon as the sensor detects that temperature, the motherboard sends that percentage of power and the fan jumps to that speed. It's easy to understand, but it causes abrupt noise changes that are very annoying if the temperature fluctuates around the same value.
Progressive PWM adjustment adds logic that delays and smooths speed changes . The motherboard can define a small hysteresis and rise and fall times, so the fan doesn't change frequency every two seconds, but reacts with some inertia, making the changes more gradual.
Manufacturers like ASUS even allow you to adjust these delays in tenths of a second , providing faster response times when the temperature rises (to protect the hardware) and slower response times when the system cools down. The result is a much smoother, more pleasant sound curve, without constant peaks and valleys.
In our test system with Be Quiet! Light Wings fans, for example, the motherboard's automatic fan assistant detected that these fans could remain off until approximately 20% of their power, and from there they would increase linearly. Taking advantage of this data, we configured a very flat fan curve at low temperatures, with the fans stopped or nearly so, and a more pronounced increase only when the processor reached significant values under load.
Choosing fans: airflow, static pressure, and noise
While this guide applies to any brand, it's helpful to understand how fan specifications affect the setup. Brands like be quiet! offer ranges with different sizes (120 and 140 mm) and two PWM motors: one with a "normal" frequency and another with a high frequency.
A standard 120mm PWM fan can reach around 1700 RPM , while the high-frequency version can go up to about 2500 RPM. In return, you get approximately 25% more airflow but also a noticeable increase in noise, which, although it stays around 31 dBA at its maximum, is clearly noticeable when the speed increases.
In 140mm formats, the story is similar, but with slightly lower numbers: they typically operate at around 1500 RPM in the standard version and close to 2200 RPM in the high-frequency version, with comparable airflow improvements and noise increases. The larger size allows for moving more air at lower revolutions, making them ideal for cabinet positions where you can mount 140mm fans.
Some kits include three identical fans and an ARGB hub to manage addressable lighting without relying on your motherboard having that type of connector. It's important to remember that the RGB cable is separate from the PWM power cable, so the lighting has nothing to do with the fan curve you set.
In our tests, replacing a veteran Shadow Wings 2 fan with a low-RPM Light Wings PWM fan on a Be Quiet! Shadow Rock 3 cooler, mounted on a Core i5-7400 with an ASUS Z170I Gaming Pro motherboard, we managed to lower the temperature by around 2°C under load and slightly reduce noise. It wasn't a radical change, but it demonstrated that a simple fan upgrade can rejuvenate an old system, both in performance and aesthetics.
Practical case study of curve fitting and real-world monitoring
When you're seriously tweaking fan curves, the most sensible approach is to start with the thermal specifications of your main components: CPU and GPU. The manufacturer typically indicates the maximum temperature before throttling occurs, meaning the point at which frequencies are reduced to protect themselves.
With that limit in mind, the ideal approach is to log your PC's actual usage for a few hours using tools like HWinfo or OCCT . These applications record minimum, maximum, and average readings for each sensor, including CPU, GPU, VRM, and chipset temperatures, as well as fan RPMs, giving you a clear picture of how your computer is performing.
For example, in a system with a 65W TDP processor and no overclocking, we saw that after several sessions of normal use, the maximum temperature did not exceed 53°C , with minimums of 36°C and averages of 38°C. For a CPU with a maximum operating temperature of 100°C, this leaves a huge margin, so we can be very relaxed with the fan curve without worry.
In that specific case, we configured a very flat curve at low temperatures, keeping the CPU and chassis fans at minimum during virtually all normal use, and only really increasing them from temperatures that we knew the system would never reach except in synthetic tests or exceptional cases.
If you're not using a dedicated graphics card, the case cooling requirements are even lower, because the integrated graphics generate significantly less heat. You can afford to keep the case fans running at 300-400 RPM almost all the time, knowing that if something unexpected causes a temperature spike, the fan curve is designed to react and increase the speed with a sufficient safety margin.
The key is not to obsess over always having the lowest possible temperature, but to find the balance between noise and temperature that suits your actual usage. A PC used for intense daily gaming is not the same as a light workstation or a media server that's always half asleep.
Additional settings: CPU, system power, and demanding applications
Fan behavior is also closely linked to how you manage CPU frequency and power consumption . On laptops and Surface-type devices, for example, this is adjusted through Windows power settings, which limit CPU power and, therefore, the amount of heat generated.
In Windows 10 and 11, if you select a " Recommended " power mode instead of "Best performance," the system tends to reduce peak power consumption, resulting in fans turning on less often and spinning at slower speeds. Selecting "Best performance" will unlock the full potential of your CPU, but will also generate more heat and increase fan noise.
It's also a good idea to check which applications are putting a strain on the CPU using Task Manager . By sorting by CPU usage, you can see at a glance which specific process is causing the fan to spin up. Sometimes it's a game or a resource-intensive editor, but other times it's background processes you don't even need, and closing them helps keep your computer running cooler and quieter.
In devices with small fans, such as some laptops, it's normal for the fan to sound higher-pitched and tend to turn on frequently. The important thing is to distinguish between a "normal" rapid-spinning noise and strange noises like rubbing, squeaking, or intermittent knocking; the latter indicate a mechanical problem and usually require technical inspection.
Finally, it's a good idea to keep your system up to date: chipset drivers, BIOS, firmware, and Windows updates. On devices like Surface, the brand's own app lets you check for pending firmware updates that improve thermal management and fan control, sometimes significantly reducing noise without you changing anything in the fan curve.
In short, with a little patience to understand how your system's temperatures fluctuate, by choosing quality fans, ensuring proper airflow within the case, and taking advantage of available BIOS and software tools, it's possible to create a PC that cools well without becoming a jet engine, resulting in greater comfort, stability, and extended component lifespan.
