- Measuring actual power consumption at rest and under load is key to evaluating the performance per watt of the homelab.
- Combining individual and global meters allows for isolating laboratory expenses and controlling the contracted power limit.
- Choosing modern, efficient hardware and planning the migration from legacy systems reduces noise, heat, and electricity costs.
- Integrating monitoring with systems like Home Assistant helps automate alerts and better visualize energy usage.
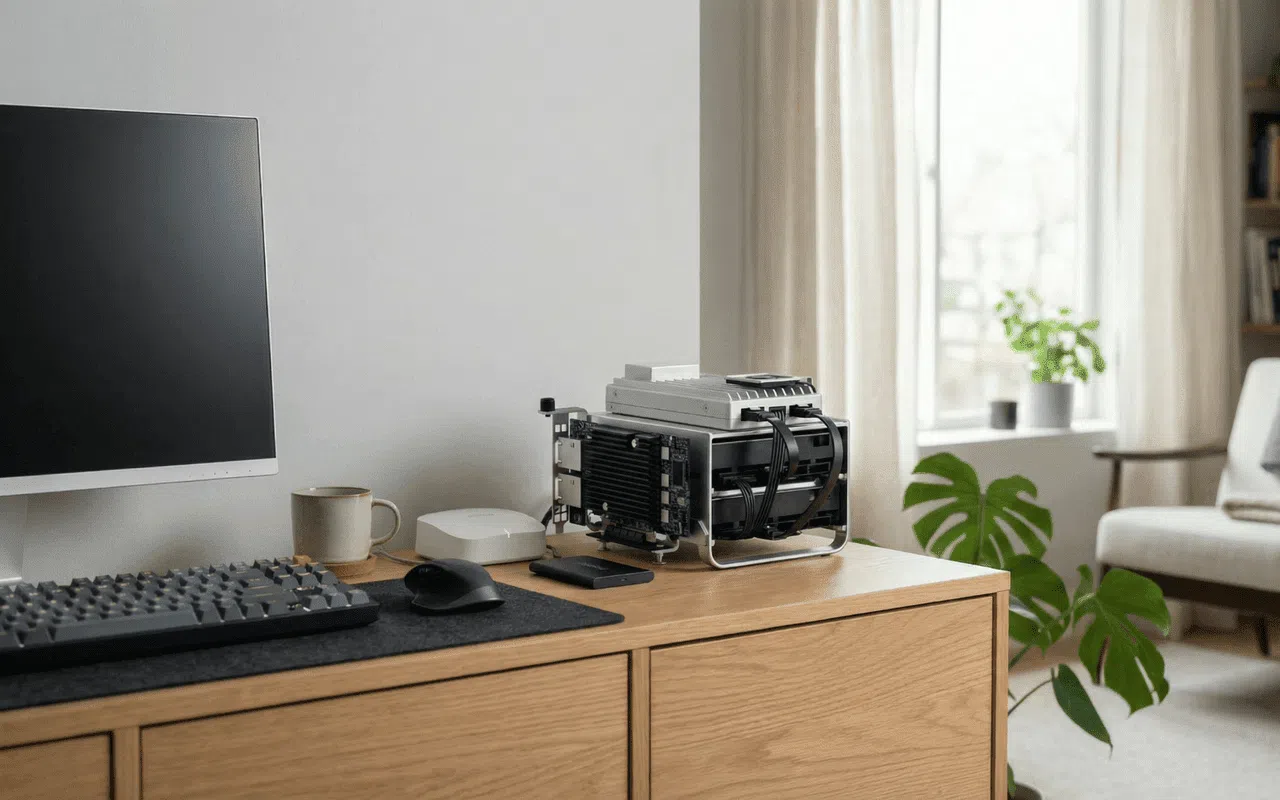
If you have a home lab set up with recycled parts , several servers, a NAS, and a good number of networking devices, it's quite likely you're not entirely sure how much electricity you're using each month to keep it running. And when you start adding up old towers, Cisco switches, routers, access points, and other tech gadgets, the consumption skyrockets without you even realizing it. In the end, that "free equipment" you repurposed from the office or your old PC can become a kind of radiator with noisy fans that heats up the room and inflates your bill.

If we add to all this another very real concern: besides money, there's the physical limit of your electrical installation. Many European homes have 230V and a contracted power that, if you exceed it even slightly, will trip the circuit breaker at the worst possible moment: oven + air conditioning + homelab mining logs and… darkness. That's why accurately measuring your energy consumption and planning what hardware you use in your home lab is no longer just for efficiency geeks; it's practically a household necessity if you want to avoid unpleasant surprises.
Why does a home lab with old hardware use so much energy?
Many people set up their first homelab with whatever they have on hand: old desktop towers, retired workstations , a server salvaged from work… At first, it seems like the perfect plan: zero purchase cost, plenty of CPU and RAM power, and everything ready to install Proxmox, containers, or VMs. The problem arises a few months later when you start noticing that the office is always hot, the fans never stop, and the electricity bill is no longer the same.
The fundamental mistake is thinking that "old things are free because they've already paid for themselves." Always-on hardware has a recurring cost : electricity. Even if a computer barely uses the CPU, if it consumes 80-120W all day while idle, that adds up. And if it's not just one, but three or four devices running 24/7, the impact is multiplied.
Furthermore, all that extra energy is transformed into heat. This heat forces fans to run faster, generates more noise, may require you to use more air conditioning, and generally makes your home lab less comfortable to have around. A single modern, efficient server can replace several old boxes, reducing both energy consumption and room temperature.
Another key point is that legacy hardware is often oversized for what you actually need it to do. Typical self-hosting services like DNS filtering, local backups, web panels, file synchronization, lightweight containers, or a small media library don't require workstation-level power budgets . A ten-year-old tower that spends most of its time at 5% CPU usage with constantly spinning hard drives is, from an energy perspective, a poor investment.
How to measure the performance per watt of your homelab
Before changing anything, it's a good idea to take measurements. The key isn't just knowing how many watts a machine consumes, but what useful performance you get per watt . For this, you can follow a very simple method using a plug-in power meter or a clamp meter:
1. Measure standby power consumption
Let the system boot up, wait a few minutes for it to stabilize, and then connect a plug-in energy meter between the power outlet and the device. Note the idle power consumption. This figure is very important because many homelab services spend a significant amount of time without any heavy load.
2. Measure under actual usage load
Next, run the tasks you actually use on a daily basis: file synchronization, backups, indexing your media library, running containers, typical virtual machines, etc. In that scenario, note down the performance again. This way you know how much your regular usage costs you , not just the theoretical peak.
3. Measure at full load (if it makes sense)
In some cases, you'll want to know how the system performs under heavy load (for example, if you're doing video transcoding or intensive computing workloads). Run a reasonable stress test and observe the peak power consumption, temperatures, and whether the fan noise increases significantly. This will indicate the system's thermal and electrical limits.
4. Record useful performance
Don't just focus on watts. Note how many services the system can handle without slowing down, how long backups take, how responsive VMs or containers are when they're all running, and so on. This way, you can compare machines based on actual workload capacity , not just specifications.
5. Compare by overall efficiency, not by GHz
When considering several options (for example, an older tower versus a modern x86 motherboard or a microserver), look at how many resources they offer for the same workload and how much power they consume. The best system isn't always the fastest , but rather the one that does what you need while using fewer watts consistently.
It's important to clarify something that causes a lot of confusion: the processor's TDP (or the base power declared by the manufacturer) is an approximate thermal indicator , not the actual power consumption of the entire system. The final figure at the power outlet is influenced by the memory, hard drives, network card, controllers, PCIe expansion cards, etc. That's why it's so important to measure power at the outlet and not rely solely on the technical specifications.
Measuring whole household consumption vs. just the homelab
When you start to get a little obsessed with these topics, a very common question arises: am I interested in recording all the consumption of the home from the panel or focusing on what the homelab and some key device consume?
In reality, the two strategies complement each other:
- Global measurementYou monitor the output from the meter or the main line of the electrical panel. This way you know your total consumption, power peaks, and what margin you have left compared to your contracted power.
- Measurement by circuits or devicesIt allows you to isolate what part of the expense corresponds to the homelab, air conditioning, the kitchen, etc. It's the way to really attack the "energy hogs".
If your main goal is to make your lab more efficient, the minimum requirement is to install an individual power meter in the rack or on the power strips where you connect servers, NAS devices, and switches. If you also want to monitor your contracted power and prevent circuit breakers from tripping, then it's worth taking measurements at the electrical panel, either with a clamp meter or an intermediate meter.
Types of electricity consumption meters: individual and global
The market offers everything from very simple and inexpensive solutions to systems capable of analyzing harmonics and power quality. To give you a better overview, we can talk about two main types of meters that will be perfect for your home lab and for your home in general.
Individual meters: perfect for home labs and specific devices
Individual energy meters are those plug-in devices with a display that you place between the outlet and the appliance you want to monitor. They don't need an external receiver; you simply plug them in and they start recording energy. For less than €15-20, you can find models that show you instantaneous wattage, accumulated kWh, and estimated cost if you enter the price per kWh.
They are ideal if you want to know exactly how much they consume:
- Your main homelab server (or each Proxmox node if you have several).
- The NAS with all its disks.
- The managed switch or the router that is always on.
- An old tower that you suspect is spending too much.
The only drawback is that many of these devices don't keep advanced historical data or create graphs on their own. They take a single reading or a cumulative reading and little else, so you have to write down the data if you want to compare equipment or do more detailed calculations.
Global meters: monitoring of the electrical panel
Then there are the global meters, designed to monitor the entire installation or specific circuits from the electrical panel. They usually consist of:
- Un modular sensor or counter which is installed on DIN rail (next to circuit breakers and differential switches).
- In some cases, a transmitter that takes the data from the sensor.
- A receiver or interface (sometimes integrated) that displays information or exports it via USB, Modbus, M-Bus, infrared, etc.
This type of solution allows you to:
- Watch the global housing consumption risk management.
- Account for consumption by line: air conditioning, hot water, homelab, etc.
- Calculate the daily, weekly, or monthly cost based on your rate.
- View peak power levels and check if you are approaching your contracted limit.
The less pleasant part is that you have to open the electrical panel and handle the wiring. If you don't have electrical experience, it's best to call a professional or someone you trust who knows what they're doing. Working inside the panel is not a game , and a mistake can be costly.
Advanced solutions: certified smart meters and NFC measurement
When you need something more serious than a plug-in meter, equipment such as MID-certified modular meters comes into play, used for homes as well as tourist apartments, parking lots, campsites or facilities where it is important to bill or distribute costs accurately.
A representative example is a smart meter from the Finder 7M range (or other equivalents), which offers:
- MID certification and error of only ~1%, valid for reliable measurements.
- Capacity for currents up to 40 A (about 9.200 W at 230V).
- Operation at temperatures up to 70ºC.
- Bidirectional measurement: ideal for also control photovoltaic production.
What's interesting about these modern meters is how you interact with them. Some models allow you to read and configure data simply by bringing your mobile phone close, thanks to NFC connectivity and an official app (for example, Toolbox in the case of Finder). This way, the owner can:
Furthermore, they usually include a wide range of interfaces for integration into more advanced home automation or monitoring systems:
- Front touch button and integrated screen for local consultation.
- Dual S0 pulse outputs.
- Infrared port.
- Modbus RS485 interface.
- M-Bus interface for more industrial or community environments.
Another key advantage for facilities where theft is common is that these meters cannot be tampered with without leaving a trace . They have tamper-evident covers, tamper-proof mechanisms, and an internal battery that retains data even during power outages. This is a significant benefit for property owners, communities with shared energy consumption, or even communal garages.
Many of these devices also perform power quality analysis functions : detecting harmonics, imbalances, and other issues that might explain random circuit breaker trips without an obvious insulation fault. While not strictly necessary for a simple home lab, it can save hours of testing if you experience unusual power outages.
Monitor whole house consumption with the energy supplier and Datadis
In Spain, some energy suppliers have begun offering near real-time access to official meter data through their own apps. This is the case with apps like I-DE (Iberdrola) and similar ones, which allow users to see:
- Hourly and daily meter readings.
- Peak power levels achieved.
- Historical data by month and time slot.
- Some data on the renewable origin of the energy consumed.
This is very useful for understanding what's happening when, for example, you switch from a ceramic hob to an induction hob and the circuit breakers start tripping in the summer with the air conditioning on full blast. A poorly handled power change can literally leave you with only 0,4 kW of contracted power (a real case), meaning you can only run the refrigerator without the whole system tripping.
Beyond your company's app, Spanish distributors offer the Datadis portal, where, with your CUPS code and prior registration (activation takes some time), you can view the data collected directly by your meter. In the world of home labs and home automation, Datadis is interesting because it can be integrated with Home Assistant using plugins like homeassistant-edata (available via HACS), which allow you to:
- Download the meter's consumption history.
- Display daily, monthly, and peak graphs.
- Combine that data with the Home Assistant Energy panel.
The drawback is that Datadis doesn't provide real-time data: the information is updated several times a day , sometimes with delays or occasional outages. It's useful for seeing trends, estimating your bill, and analyzing usage times, but it doesn't send instant alerts when you're about to exceed your contracted power limit.
Measure real-time consumption with clamps and Shelly EM-type devices
If you want to know exactly what energy is being consumed in your home or homelab at any given moment, then you need something like the Shelly EM or other clamp meters . They work simply:
- A clamp (current transformer) is placed around the conductor through which all the energy entering your home or a specific circuit passes.
- The EM module reads the current passing through that clamp and calculates power and energy.
- The data is sent via WiFi or similar to an app or your home automation server (Home Assistant, for example).
If you want to learn more about sensors and measurement solutions, you can read about smart sensors used in home automation and monitoring.
With this you can:
- Monitor the overall consumption of the house in real time.
- See how the power increases when you turn on the oven, the air conditioner, the homelab, etc.
- Create automatic alerts if you get close to your contracted power.
- Design energy panels that are much more detailed and useful than those in the energy supplier's app.
While the official app for these devices is usually sufficient for viewing data and graphs, the real leap in quality comes when you integrate them with Home Assistant or another platform. There you can combine:
- Total consumption (main clamp).
- Homelab consumption (dedicated clamp or meter plugs).
- Information on rates, time periods and dynamic pricing.
In this way, your home automation server can alert you if you are about to exceed the limit, if the homelab has been consuming more than usual for no reason, or if there is a strange spike when no one is home.
How to calculate the total power consumption of a rack-mounted homelab
A very common scenario when scaling up your lab is moving from a couple of home towers to a rack with dedicated servers . For example, consider something like:
- 3 Dell R320 servers for Proxmox, each with a 550W power supply.
- 1 Synology RS1619xs+ for backups, also with a 550W power supply.
- 1 Cisco switch with 350W power supply.
The typical question is: do I just add up the wattage of all the power supplies and that's it? I mean, 3 x 550 + 550 + 350 = 2.550 W? The answer is that this sum only indicates the maximum nominal power that the power supplies could deliver , not what the rack will actually consume.
In practice, a server is rarely under 100% sustained load. Furthermore, power supplies are sized with a safety margin. To give a better approximation:
- Consult technical specifications and forums to see typical real-world consumption figures for each model (standby, medium load, and high load).
- Multiply those values by the number of units of each type.
- Add a safety margin (for example, 30%) for peaks and future growth.
If, for example, each Dell R320 draws around 80-120W at idle and 200-250W under reasonable load, you can estimate that the three together will draw around 600-700W under normal use. The Synology might draw 60-120W depending on the number of disks and activity, and the Cisco switch perhaps 30-60W if it's not fully loaded. All together, you could be looking at around 700-1.000W of actual power consumption , far from the 2.550W total for the individual power supplies.
For your home installation you need to consider three things:
- Hired potency (kW) with the electric company: marks when the meter's limiter will trip.
- Floor circuit capacity (circuit breakers, cable sections, etc.).
- Simultaneous consumption by other large appliances (ovens, ceramic hobs/induction hobs, air conditioning, electric water heaters…).
Ideally, you should measure the rack once it's installed with a reliable meter and also analyze your home's energy consumption using a comprehensive system. This will help you decide whether you need to increase your contracted power or if managing usage times and avoiding peak demand periods (for example, scheduling nighttime backups when you're not using the stove or air conditioning as much) is sufficient.
Choosing efficient hardware for a 24/7 homelab
Once you know the power consumption of your current setup, it's time to consider which hardware makes the most sense. There's no single solution, but there are a number of criteria that tend to yield very good results.
Starting point: What do you want your homelab to do?
Setting up a lightweight server for:
- Files and backups.
- Home automation (Home Assistant, Node-RED, etc.).
- A couple of web services, simple containers, small databases.
…that an environment designed for:
- Transcode real-time video for multiple clients.
- Dense virtualization with many demanding VMs.
- Development laboratories or heavy testing.
For the first group of uses, a compact, low-power x86 platform with sufficient RAM and ample storage will likely suffice. You don't need a 2U monster with dual Xeon processors to handle DNS, backups, synchronization, and four containers.
Example of an efficient platform: ZimaBoard 2 and similar
An illustrative example is the type of device ZimaBoard 2 represents : an x86 motherboard with an Intel N150 processor, passive cooling, dual 2.5GbE ports, two SATA 3.0 ports, and a PCIe 3.0 slot for expansion. This type of machine fits very well as:
- 24/7 home server for light services.
- Simple NAS with multiple SATA bays.
- Home automation center.
The beauty of it is that they offer just the right amount of power, modern features , low idle power consumption, complete silence (no fans), and room for expansion via PCIe cards or additional hard drives. They are a very serious alternative to continuing to run several old tower PCs.
Hardware checklist for an efficient home lab
When choosing a platform, you can use this list as a guide:
- Low-power CPU designed for continuous useFamilies with good performance per watt and support for energy saving states.
- Silent cooling: preferably passive or with large fans and quiet profiles, especially if the homelab is in a bedroom, living room or office.
- Balanced RAMEnough for your services plus a reasonable margin for growth, but without filling it "just because" if you're not going to take advantage of it.
- Good native storage support: enough SATA ports for your drives, plus some NVMe option for the system and containers.
- Modern network2.5GbE is a very interesting sweet spot for backups and access from multiple clients.
Storage choice: SSD, HDD, or a mix of both
Storage also influences power consumption and the perceived speed of the system. In a typical homelab:
- The SSD They work great for operating systems, containers, VMs, lightweight databases, and anything that benefits from low latency.
- The HDD They remain unbeatable in cost per TB for backups, multimedia, photos and "cold" data.
SSDs typically consume less power at idle and respond faster , but HDDs can offer high capacity with acceptable overall power consumption if managed properly (spindown, task scheduling, etc.). In practice, a mixed combination is most common.
- SSD for system, caches, and critical services.
- HDD for mass storage, snapshots and backups.
Migrating from legacy systems without dying in the attempt
When you decide to retire old systems, another challenge arises: all those scripts you set up years ago, half-forgotten services, scheduled tasks that no one documented… A well-thought-out consolidation plan saves you from unpleasant surprises and, incidentally, reduces your resource consumption.
You can follow a fairly effective sequence:
- Take inventory of everything running on your current machines: shares, open ports, containers, VMs, cron jobs, mounted disks, etc.
- Classify the services into critical, useful and dispensableAnything that no longer makes sense, delete it instead of dragging it to the new platform.
- Migrate lightweight services first (DNS, control panels, synchronization, small web apps…).
- For each step, have a reversal path: backup, snapshot or image that allows you to go back.
- For a few days, keep the old and new systems running in parallel and observe logs and actual behavior.
- When you are sure, turn off the legacy machine and leave it out of commission unless a serious problem arises.
Virtualization is also your ally: you can package legacy environments in a VM and run it on a modern, efficient host while the rest of your services are moved to containers or modern VMs. This facilitates a phased transition, rather than a sudden, major change. To optimize this process, check out guides on server virtualization.
Other factors that influence homelab consumption
Beyond CPU and disks, there are several elements that you should keep in mind if you want to reduce power consumption and improve stability.
Power supply efficiency
A low-quality power supply can waste a significant amount of energy as heat, especially under low loads , which is where many home labs operate. Choosing a PSU with good efficiency (ideally with a decent 80 Plus certification) and wattage tailored to your actual usage helps you:
- Reduce total consumption.
- Lower the internal temperature of the equipment.
- Improve long-term reliability.
Should I turn off the homelab when it's not in use?
It depends on your needs. If your homelab is only used sporadically (for occasional tests, weekend projects, etc.), scheduling automatic shutdowns and startups can save you a significant amount of energy.
On the other hand, if the server is responsible for nightly backups, remote access, home automation, cameras, etc., it is more practical to play with sleep states, frequency scaling, and services that are activated on demand than with complete shutdowns.
BIOS and firmware settings to save energy
Many motherboards allow for considerable fine-tuning of the CPU and peripheral behavior:
- C-states and processor power-saving options.
- CPU package power limits (PL1/PL2).
- ASPM and savings options on PCIe buses.
- More relaxed fan curves.
The idea is to start by enabling conservative settings, measuring stability, temperatures, and performance under your usual homelab loads, and then fine-tuning. Sometimes, simply tweaking two or three BIOS settings is enough to lower idle power by several watts without noticing a difference in real-world use.
RAM and ECC memory
Each memory module adds a small amount of extra power consumption. It's not the most noticeable factor compared to the CPU or hard drives, but adding extra sticks "just in case" still has an impact. The practical recommendation is to install the RAM you actually need plus a reasonable margin, without filling all the slots unless you have a clear plan for using them.
In always-on homelabs, especially those serving as storage or virtualization servers, it makes sense to consider ECC memory. It doesn't directly reduce power consumption, but it improves reliability by detecting and correcting certain silent memory errors that can cause problems over time.
First steps towards a more efficient homelab
Making the leap to a more energy-efficient homelab doesn't require a complete overhaul. A good way to start is by measuring the energy consumption of just one machine this week : plug a meter into its power outlet, note its idle and typical load consumption, review which services it runs, and ask yourself if that machine still deserves its place in the rack or under the desk.
From there, you can repeat the process with the rest of your equipment, compare results, and plan a gradual upgrade to more modern and efficient hardware. In many homes, a single, well-sized compact server can advantageously replace several older towers, with less noise, less heat, and significantly lower electricity consumption.
The combination of individual meters, global meters, Home Assistant integration, and a sensible hardware selection allows you to move from a "hands-on" home lab to a home infrastructure that you know in detail and control at all times. The result is a cleaner, quieter, and more sustainable lab, and a less painful bill, without giving up on tinkering with your tech projects.
Table of Contents
- 1 Why does a home lab with old hardware use so much energy?
- 2 How to measure the performance per watt of your homelab
- 3 Measuring whole household consumption vs. just the homelab
- 4 Types of electricity consumption meters: individual and global
- 5 Advanced solutions: certified smart meters and NFC measurement
- 6 Monitor whole house consumption with the energy supplier and Datadis
- 7 Measure real-time consumption with clamps and Shelly EM-type devices
- 8 How to calculate the total power consumption of a rack-mounted homelab
- 9 Choosing efficient hardware for a 24/7 homelab
- 10 Storage choice: SSD, HDD, or a mix of both
- 11 Migrating from legacy systems without dying in the attempt
- 12 Other factors that influence homelab consumption
- 13 First steps towards a more efficient homelab
