- The voltage/frequency curve defines what voltage the CPU or GPU needs to be stable at each frequency and is dynamically managed according to load, temperature, and power limits.
- On GPUs, it is safer and more effective to adjust full ranges of the V/F curve than to undervolt a single point, combining it with power limits to control consumption and heat.
- In modern CPUs, the V/F curve is fine-tuned with microcode, subsystems such as Intel ME and PPM, and in some models it can be adjusted point by point to limit only the high part of the voltage.
- A good balance between V/F curve and fan curves allows for reduced temperatures and noise without losing appreciable performance or compromising system stability.
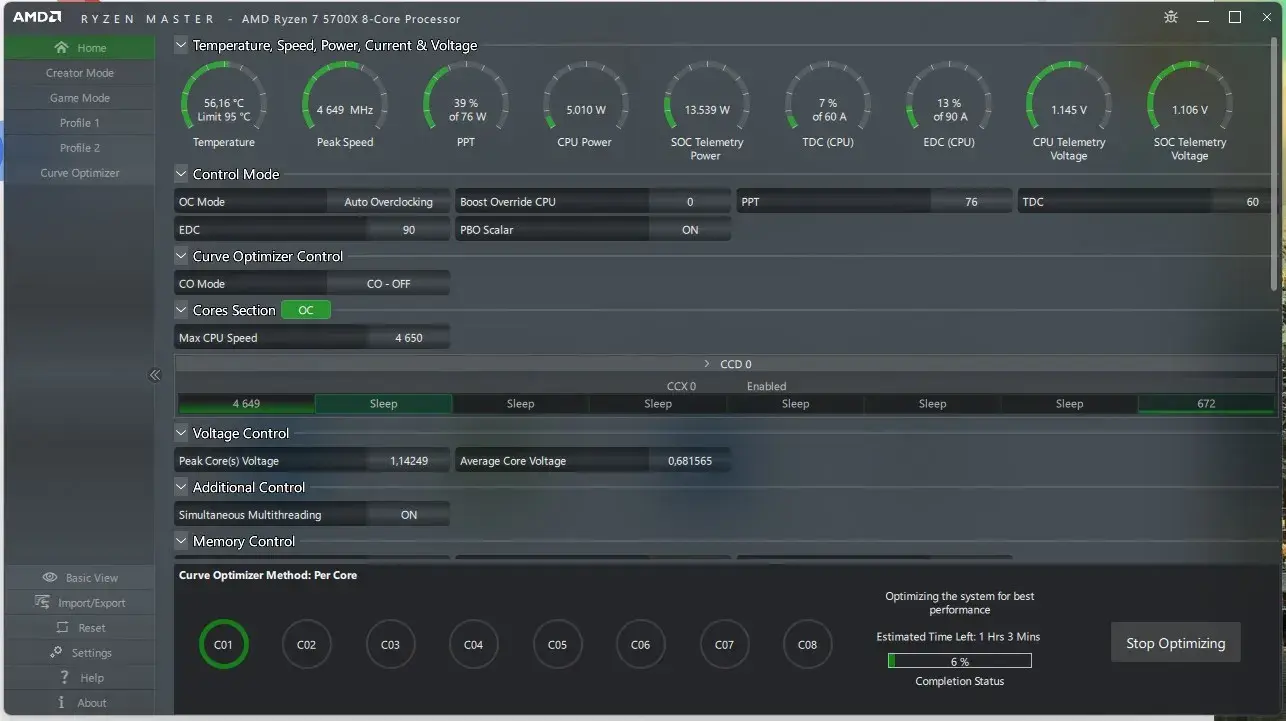
The relationship between voltage, frequency, and temperature in a CPU or GPU has become a key topic for anyone wanting to get the most out of their PC without damaging the hardware or worrying about noise or power consumption. What used to be a simple matter of "just increase the multiplier a bit" now requires a thorough understanding of the famous voltage/frequency curve (V/F curve) and how it's managed by tools like MSI Afterburner, the BIOS/UEFI, or third-party utilities.
If you've heard about undervolting, overclocking, V/F curves, power limits, or per-core fine-tuning and it all sounds like gibberish, don't worry: the basic idea is simple, but the details matter a lot. In this article, we'll put it all together: how the voltage-frequency curve works in GPUs and CPUs, what the hardware actually does when you lower the voltage, why some undervolting methods are a bad idea, what Intel is changing with Arrow Lake and Core Ultra 200S, and how you can tweak the V/F curve of your CPU or GPU without breaking the system's automatic behavior.
What exactly is the voltage-frequency (V/F) curve?

When we talk about the V/F curve, we're referring to the relationship between the voltage supplied to the chip and the frequency at which it can operate stably . In practical terms, each point on the curve says something like: "at X volts, this chip is stable at Y MHz/GHz." This relationship exists in both modern GPUs and CPUs.
On a GPU, tools like MSI Afterburner display this curve as points of frequency versus voltage . Although visually it may seem the reverse, the logic is: for each possible voltage, there is an associated frequency that the manufacturer has validated to be stable on most chips.
In a modern CPU (Intel or AMD), things are more sophisticated: there are different V/F curves per core , per load type, and per power state . The firmware, microcode, and subsystems like Intel ME or PPM (Platform Power Management) are responsible for deciding which point of the curve to use at any given time based on the load, temperature, power limit, and other factors.
The key point is that the chip doesn't choose a frequency at random and then request a voltage "to see if it works ." Rather, it has an internal table (or several) that indicates what voltage is needed to maintain stability at each possible frequency, and the power controller moves along that curve in real time.
How the V/F curve works on GPUs with MSI Afterburner
On GPUs, the voltage-frequency curve is usually more visible thanks to overclocking utilities like MSI Afterburner . Many people get confused by the graph because it's plotted with frequency on the vertical axis and voltage on the horizontal, but essentially you're seeing the function F(voltage) = stable frequency.
The GPU adjusts its frequency based on load, temperatures, and power limits. For each performance level it aims to achieve, the GPU controller consults the manufacturer's predefined V/F curve and applies the corresponding voltage. If you increase the load (for example, playing a demanding game), the GPU attempts to reach a higher point on the curve: higher frequency and, therefore, higher voltage.
When you overclock or undervolt with MSI Afterburner, what you're actually changing is the position of certain points on that curve . You can:
- Apply a global offset of frequency (for example, +100 MHz across the entire curve).
- Modify specific points (blocking a voltage and setting a specific frequency, the typical "single-point" undervolt).
- Adjust a voltage range to change how the GPU scales between light and heavy loads.
It's important to understand that the GPU, even with your modified curve, still dynamically decides which point on the curve to go to based on the load and thermal/power limits . You're not forcing it to always run at 1,0V; you're only changing what frequency it will have when it passes through 1,0V, 0,9V, etc.
Typical problems when applying the curve in MSI Afterburner
A fairly common case is that of someone who performs a stable undervolt/overclock (for example, setting 885 mV at a certain frequency), sees that it works perfectly … but upon restarting the PC, the GPU returns to operating above that voltage, even though the settings appear to be loaded in the Afterburner interface.
In this situation, what usually happens is that the configuration loads visually, but it isn't actually applied to the GPU until you click "Apply" or reselect the saved profile. Even checking "Apply at Windows startup" can cause problems.
- Initial conflicts with other programs that also try to control the GPU.
- Beta versions of Afterburner that don't get along very well with new GPUs (like an RTX 5070 Ti or similar).
- Loading order: The GPU driver may take some time to initialize, and Afterburner may take a while. Apply the curve too earlyso the adjustment doesn't really lock in place.
Options like “ Unlock voltage control ” or “ Unlock voltage monitoring ” are necessary, but they don't guarantee that the profile will be applied after startup. If you need to close and reopen Afterburner, or manually click on the profile and then “Apply,” it means the program isn't forcing the V/F curve on the GPU at the correct time during startup.
In these cases, in addition to testing with stable versions (instead of betas) and cleaning up old configurations, sometimes you have to assume that the automatic application at startup is not 100% reliable for that specific combination of GPU + drivers + system , and it is advisable to apply the curve manually or use a delay in the Afterburner startup.
GPU undervolting: why touching just one point on the curve is a bad idea
Many people start with the typical single-point undervolting method : you choose a voltage (for example, 0,9V), raise or maintain a high frequency at that point, and leave the rest of the curve virtually untouched. This can work well in some games, but it has several underlying problems.
The first is that the GPU doesn't always operate at that exact voltage point . Depending on the load, temperature, and power limits, it can jump to other points on the curve (below or above), and if those points aren't properly adjusted, you can experience instabilities , power consumption spikes, or sudden drops in frequency.
A more advanced approach to undervolting involves adjusting the entire range of the V/F curve , rather than locking into a single voltage. The idea is to work with the curve as a whole:
- Define a relatively high and stable reference voltageFor example, 1,0 V on an RTX 3080 Ti.
- Add a reasonable frequency offset (e.g., +105 MHz) from that point downwards, down to 800 mV.
- Check the stability at 1,0 V; if it is stable there, it will normally be stable at lower voltages, with the same shifted curve.
This approach, which we could call aggressive curve optimization , has several advantages:
- You maintain control over the upper limit of consumption and temperature.because you clearly define the maximum voltage you want the GPU to reach.
- You get improved performance in light workloads and undemanding gamesbecause the GPU can still increase frequency within a lower and more efficient voltage range.
- You prevent the GPU from reaching power limitations. it suddenly plummets towards the standard curvebecause your offset affects the entire range you've adjusted.
It is true that you give up on pushing the MHz to the limit at very low voltages (if you wanted to do so you would have to adjust each point, which is extremely slow), but in return you achieve a much more consistent GPU behavior under all types of loads and very controlled consumption (for example, going from 450 W to about 320 W in a top-of-the-range graphics card, without hardly losing any real performance).
How voltage and frequency interact in modern CPUs
In CPUs, the voltage-frequency relationship is similar in concept, but the control logic is more complex. A very common question is: if I apply a global undervolt to the CPU , does the chip continue trying to reach its maximum frequency even if the voltage isn't sufficient, or does it reduce the frequency based on the available voltage?
In modern architectures (both Intel and AMD), the reality is that the power management system always takes into account the validated V/F curve for each chip . In other words, it won't blithely "demand" 5,5 GHz with a voltage it knows isn't sufficient. Instead:
- There is a internal table of true/false points per core (or per group of cores), often factory adjusted according to the quality of the silicon.
- The firmware and boost algorithms They seek the highest point on the curve that does not violate limits on temperature, power, and stability.
- If you introduce a voltage offset (undervolt), you shift that curve downwards, so that Some high frequencies may become unstable. and the system compensates for this by reducing the frequency or the effective boost.
Therefore, when you lower the voltage too much and instabilities appear, it's not that the chip is "insisting" on running at maximum power without thinking; what's happening is that your offset has taken the CPU out of the region where its V/F curve was safe . The power controller tries to adjust frequency and voltage to stay within limits, but if the margin is insufficient, errors, crashes , or failures under certain loads (AVX, for example) will occur .
That's why it makes sense to use tools like Curve Optimizer in Ryzen or fine-tuning V/F per core in Intel, where you can apply different offsets to different points on the curve, instead of a global offset that affects both idle and maximum boost equally.
Intel changes to the V/F curve of Arrow Lake-S and Core Ultra 200S
In the Arrow Lake-S generation, with the Intel Core Ultra 200S desktop processors , Intel is significantly refining the voltage/frequency curve behavior through new microcode. Leading overclockers have predicted that "major changes are coming to V/F behavior with the new uCode," and what lies behind it goes far beyond simply increasing or decreasing the MHz.
The V/F curve of these processors benefits from mechanisms such as DLVR (Digital Linear Voltage Regulator) and a "bypass" mode that, in certain states, allows energy to pass more directly from the main regulator to the cores, reducing losses and improving efficiency.
With microcode 0x112, Intel disabled DLVR Bypass mode, altering power behavior under light loads and at idle. DLVR is partially disabled when the load is low, allowing power to flow through a simpler path. This bypass improves efficiency by shortening the path and reducing internal conversions, thus changing the effective voltage/frequency curve (requiring slightly less voltage for the same frequency under certain conditions).
The planned new microcode aims, among other things, to make the V/F curve more linear and predictable for advanced users who overclock or undervolt. In addition, Intel is refining dynamic power management.
- Specific V/F curves for each core, with separate settings for P-Cores and E-Cores clusters.
- Specific adaptation for AVX instructions or heavy loadswhich usually require more voltage at the same frequency.
- Integration with Intel Management Engine (ME) and PPM (Platform Power Management), which uses real-time data from the processor to decide how to distribute power, set TAU, lengthen or shorten boosts, etc.
All of this makes classic overclocking strategies (raising the multiplier, setting a global voltage, and that's it) less effective or even counterproductive. Now it's necessary to understand how the ME package, the microcode, and the PPM interact with the per-core curves, because the behavior can vary depending on the microcode version and the motherboard firmware.
Impact of these changes on performance, power consumption, and overclocking
With the new microcode, Intel is aiming for a different balance between sustained performance and power consumption . Everything indicates that, as AMD did in previous generations, they are willing to use slightly more energy to maintain higher frequencies for longer periods under certain workloads.
In practice, this can translate to:
- Boosts and Turbos that last longer before falling due to thermal or power limits (more generous or more aggressive TAU).
- Slightly higher peak frequencies In some specific scenarios, in exchange for more voltage and, therefore, more occasional consumption.
- Un Ringbus or internal fabric at higher frequencies for a longer time, reducing latency, especially towards the E-Cores.
The goal is for the Core Ultra 200S to offer more stable and higher performance under medium and high loads , even if it means prioritizing lower power consumption over maximum power consumption. The Power Management Processor (PPM), working in conjunction with the microcode, can readjust voltages and frequencies almost in real time to better utilize thermal margins.
For those who overclock or fine-tune their undervolting, this means that the "factory" V/F curves are no longer static and can change with a simple BIOS or microcode update, altering the stability of previously valid settings. Therefore, it's always advisable to review the configuration after a major update.
Manually adjust the voltage/frequency curve of a CPU (example: i5-14600KF)
A very common question is whether it is possible to explicitly define a V/F curve in the BIOS, such as "0,7 GHz = 0,5 V; 3 GHz = 0,9 V; 5 GHz = 1,2 V" , especially in mini ITX configurations where temperatures are more critical and you want to limit the maximum voltage without significantly affecting idle behavior.
On an Intel Core i5-14600KF processor mounted on a motherboard like the Asus ROG B760I , there isn't usually a direct option to input curve "points" in that graphical format. What the BIOS/UEFI typically offers is:
- Core voltage control: automatic mode, offset, adaptive, override.
- Frequency control: multipliers per core or per group of cores, turbo limits, etc.
- In some advanced BIOSes, V/F curves per frequency stage, where you can apply specific offsets to certain points (e.g. V/F Point 6, 7, 8…).
If your goal is, for example, to limit the maximum voltage to 1,2V when the CPU is heavily boosting , but you don't want to reduce the idle voltage too much, there are several strategies:
- Use Adaptive Voltage with a maximum value (ceiling) close to 1,2 V and let the system handle the rest.
- Adjust PL1/PL2 and TAU so that the CPU doesn't have room to increase its power consumption and therefore doesn't need as much voltage.
- On plates that allow it, touch the Individual V/F Points to lower only the high sections of the curve, keeping the low frequency voltages almost intact.
In any case, since the i5-14600KF is a chip with aggressive boost, you should always check stability under heavy and mixed loads (games, benchmarks, AVX, multitasking) , because there may be frequency and voltage combinations that only appear under certain load patterns and fail if the voltage margin is extremely tight.
Relationship between V/F curve and fan curves: controlling temperature and noise
Although the V/F curve and the CPU fan curve are different things, in practice they go hand in hand: what you do with the former directly influences the heat generated by the processor or GPU , and the latter determines how quickly your cooling system responds.
Most motherboards come with fairly generic default fan profiles that don't always take into account your specific CPU cooler, case, airflow, or ambient temperature. This can cause fans to go haywire, spiking and dropping in RPM, unnecessary noise under light loads, or conversely, insufficient cooling under stress.
By customizing the CPU fan curve in BIOS/UEFI (ASUS Q-Fan, Gigabyte Smart Fan, MSI Fan Control, etc.) or with software like Fan Control, SpeedFan, or Argus Monitor, you create a clear relationship between CPU temperature and fan speed (RPM) . When properly adjusted, this curve allows you to combine good thermal performance with a reasonable noise level.
The most common fan control technologies are:
- PWM (pulse width modulation): more precise control, ideal for fine curves and fan stop modes.
- DC (voltage control): less granular, but sufficient for many basic systems or 3-pin fans.
Furthermore, modern motherboards allow you to choose the temperature source that controls each fan: CPU package temperature, VRM temperature, case temperature, GPU temperature, etc. For the CPU itself, it makes the most sense to use the core or package temperature sensor , while for case fans, it might be better to link the fan curve to the internal ambient temperature or the GPU temperature.
Creating a good fan curve involves calibrating the minimum and maximum RPMs , defining thresholds (for example, maintaining a smooth curve up to 60°C and becoming more aggressive above 70°C), and avoiding steep slopes that generate constant speed fluctuations. It's also crucial to respect a minimum duty cycle (20-30%) to prevent fans from stalling if they can't handle the "0 RPM" mode well.
By combining a reasonable V/F curve in the CPU and GPU with a well-thought-out fan curve , you can have a system that stays cool under load, with moderate power consumption and without the annoying turbine effect every time you open a game or render.
Ultimately, understanding and adjusting the voltage/frequency curve on the CPU and GPU , along with fan curves and power limits, gives you very fine-tuned control over your PC's performance: you can decide whether you prefer to squeeze every last FPS out of it at any cost, or if you're more interested in a cool, quiet system with years of life ahead. The key is not to just rely on the typical one-point undervolt or brute-force overclock, but to work with the entire curve and take advantage of the tools that BIOS, microcode, and management software offer today to achieve a much smarter balance.