- Properly planning the compatibility between motherboard, CPU, RAM, case, GPU, and power supply prevents serious problems during assembly.
- The phased assembly (CPU, RAM and M.2 on the motherboard, then case, power supply, drives and GPU) simplifies the process and reduces errors.
- Proper cable management and ventilation improve temperatures, stability, and hardware lifespan.
- Configuring the BIOS, installing appropriate drivers, and choosing good peripherals rounds out the performance and the final experience.
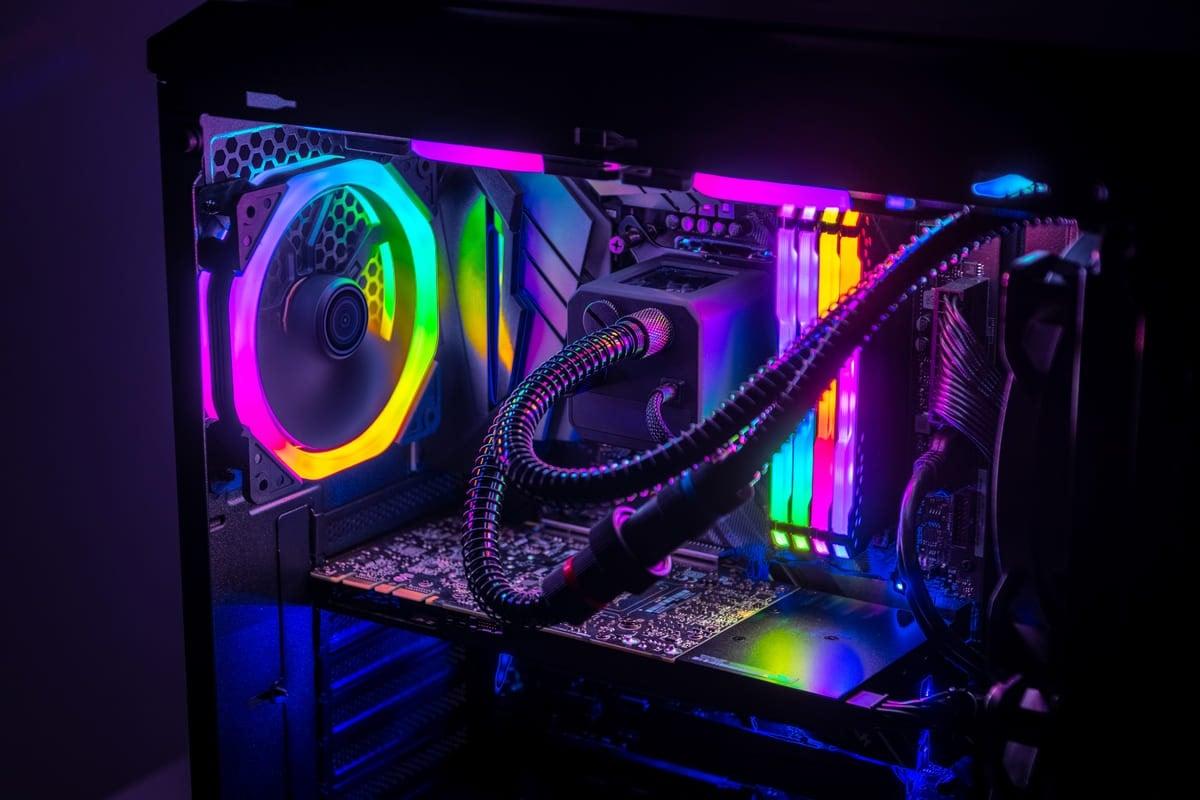
Building your own PC is no longer just for techies in white coats. These days, with a good guide, a little patience, and the right tools , anyone can assemble a computer from scratch and get it running smoothly for gaming, work, or video editing. Besides saving money, you'll have a machine perfectly tailored to your needs and know exactly what's inside.
Throughout this comprehensive guide, you'll see, step by step, how to prepare your system, choose components without compatibility issues, install the CPU, RAM, graphics card, storage , and power supply , wire everything correctly, boot your computer for the first time, access the BIOS, install the operating system, and make the final adjustments. We'll also cover vertical graphics card mounting, cooling tips, common errors, and a review of gaming peripherals to complete your setup.
Before we begin: Is it better to build a PC or buy a pre-made one?
The big initial question is whether it's better to buy a pre-built PC or take the plunge and assemble the computer piece by piece . A brand-name computer can be convenient: it arrives at your door, you plug it in, and you're good to go. The problem is that as soon as you want something powerful for gaming or heavy workloads, the price skyrockets, and you often end up paying more for the assembly and the brand than for the hardware itself.
If you decide to build it yourself, you'll usually get better performance per euro invested , you choose each component exactly, you can upgrade easily , and you're not tied to fixed configurations. The downside: if something goes wrong, the responsibility for diagnosing it falls on you; there's no 24/7 support from the PC manufacturer (though there is support for each individual component, which will have its own warranty).
This shouldn't scare you, but it should make you aware that there is some risk: improper handling , an incompatible component, or a poorly connected cable can cause problems. The good news is that, by following a detailed guide and taking the time to read the manuals, assembling a PC is more like building with LEGOs than performing surgery.
If you take your time and do your homework before buying, building your own PC can be a very entertaining and educational experience, and it also allows you to tinker with and improve the equipment over time without having to replace the whole thing.
Basic tools and preparation of the work area
Before opening any boxes, it's a good idea to prepare your workspace. Ideally, you'll want a large, well-lit table, away from drinks, with enough space to place all the components without them falling over. Forget about building your PC in bed or on a static-charged carpet.
As for tools, you'll be fine with very little, but there's a recommended minimum to work comfortably and avoid surprises from static electricity or tiny screws lying around:
- Medium-sized Phillips (star) screwdriver for most case, motherboard, and power supply screws.
- A short or thin Phillips screwdriver for hard-to-reach areas, especially near the heatsink or in small cases.
- Antistatic wrist strap or, failing that, Discharge electricity by touching a grounded metal object. (for example, a radiator) every so often.
- Tweezers or similar for handling small screws and tiny front panel connectors.
- Cable ties or Velcro straps, which will help you with cable management and airflow.
- Paper towels or wipes and isopropyl alcohol for clean the surface of the CPU before applying the thermal paste or if you want to replace the one that comes standard.
A useful tip: use the motherboard's own cardboard box as a work surface while installing the CPU, RAM, heatsink, and M.2 SSD. This prevents scratching the motherboard on the table and provides a safe, insulating surface.
Choosing compatible components: the foundation of any good assembly
Before paying anything, double-check that everything you're buying is compatible. A poor choice of motherboard, socket, or case size can ruin your plan. Let's look at the key compatibility points you absolutely must check before clicking the buy button.
The motherboard is the cornerstone of your computer. It determines which processor you can use, how much RAM it supports, what type of storage you can install, and what size case you need . Always check:
- Form factor (ATX, microATX, ITX) compatible with the chosen case.
- Socket and chipset supported by the CPU you want to install.
- Number and type of RAM slots (DDR4 or DDR5) and their maximum frequency.
- Slots PCIe x16 for the GPU and, if you're interested, space for other cards.
- Enough M.2 connectors and SATA ports for your drives.
For the CPU, the most important thing is that it fits the motherboard socket and that the chipset is compatible. Beyond that, consider the overall balance: there's no point in pairing a top-of-the-line CPU with a weak GPU if your goal is gaming, because the graphics card will be the bottleneck.
When choosing RAM, consider three things: the technology (DDR4 or DDR5), the total capacity supported by the motherboard, and the supported frequency. Currently, 16 GB is the minimum for a modern computer geared towards gaming or light work, increasing to 32 GB if you plan to edit video, stream, or use many demanding applications simultaneously.
For storage, the ideal setup is a combination of an NVMe M.2 SSD for the operating system and main programs, and, if you need a lot of space, an additional SATA HDD or SSD for data. Make sure your motherboard has compatible M.2 slots (PCIe 3.0, 4.0, etc.) and drive bays in your case for 2,5" or 3,5" drives.
The graphics card is the heart of a gaming PC. Make sure it fits in the case (length and thickness, as many occupy 2,5 or 3 slots), that the motherboard has a free and well-placed PCIe x16 slot , and that the power supply has enough PCIe connectors (8-pin, 6+2, or 12VHPWR in the case of the latest NVIDIA cards).
The power supply, for its part, must have sufficient wattage for all components, a certain level of efficiency (at least 80 PLUS certification), and be compatible with the case. Also, check that it includes all the necessary power cables (24-pin, EPS for CPU, PCIe for GPU, SATA for hard drives, etc.).
Finally, check that the case supports the motherboard size, GPU length, CPU cooler height, and radiator size if you're using an AIO liquid cooler . It's also important that it offers good airflow and enough front USB ports to connect to the motherboard.
Pre-assembly on the motherboard: CPU, RAM, M.2 and heatsink
Once you have all the components ready and checked, the first major task is preparing the motherboard with the most delicate elements: processor, memory, M.2 storage, and the cooling system . Doing this outside the box is much more convenient and reduces risks.
We'll start with the CPU. Carefully open the motherboard socket by lifting the metal lever. In the case of Intel, the pins are on the socket, so be extremely careful not to scratch or bend them. In AMD (depending on the generation), the pins are usually on the processor itself, making the CPU the most fragile part. In both cases, align the small mark (triangle) on the CPU with the corresponding mark on the socket and place the processor in it without forcing it . Once it's in place, lower the lever until it's secure.
Next, move on to the RAM. Locate the slots next to the CPU socket and open the tabs on the slots you'll be using. If you're installing two modules, they're almost always placed in banks 2 and 4 (starting from the CPU) to enable dual channel , but double-check your manual. Align the notch on the module with the notch in the slot, insert it straight, and press firmly until you hear the tabs click into place.
If you have an M.2 SSD for your system, now is the perfect time to install it. Remove the screw at the end of the M.2 slot, insert the drive at about a 45-degree angle, gently push it in, and lower it into the bracket. Then, screw the SSD in to secure it . Some motherboards have a small heatsink for this area, which should also be installed according to the instructions.
Now it's time for the thermal paste and the CPU heatsink. If you're using the paste that comes pre-applied to the heatsink, simply leave the protective film on until you're ready to install it. If you prefer a higher-quality thermal paste, first clean the CPU's metal surface (IHS) with alcohol and a paper towel, let it dry, and then apply a small amount of paste: a pea-sized amount in the center is usually enough, although other methods (X, lines, etc.) also work.
Mounting the CPU cooler depends on the model: some use a backplate behind the motherboard, others use clamps directly onto the socket. In any case, follow the manual step by step, tighten the screws alternating corners to distribute the pressure, and, very importantly, connect the cooler's fan to the CPU_FAN header on the motherboard. Try to direct the airflow from the cooler towards the rear case fan to expel the heat.
Prepare the case, the power supply, and cable management
With the motherboard now "pre-mounted," we move on to the case. The first step is to remove the side panels and locate the motherboard mounting points, the power supply position, and the drive bays. If your motherboard has a separate I/O shield , attach it now from inside the case; if it's integrated, you can skip this step.
Before screwing anything in, identify the metal standoffs that are screwed into the chassis and on which the motherboard will rest. They must align with the holes on the motherboard; if any are in the wrong position, remove them to avoid unwanted short circuits . Only install the standoffs that correspond to the size of your motherboard.
The power supply is usually mounted at the bottom rear of the case, although some cases place it at the top. Make sure the power supply fan is facing an area with air intake (either the bottom grille with a filter or towards the inside of the case, depending on the design). Secure the power supply with the four screws provided and do not force it into awkward positions.
Now's a good time to route the main cables through the back of the case: the 24-pin ATX connector for the motherboard, the 8-pin (or 4+4) EPS connector for the CPU, the PCIe cables for the graphics card, and the SATA cables for the hard drives. If you leave them protruding from the openings near their connectors, it will be much easier to connect them later without struggling with the GPU taking up half the chassis.
Think about airflow too: the less tangled the cables, the better. Use cable grommets, cable ties, and Velcro to bundle them together. Good cable management not only looks better when you look out the window, it also helps keep temperatures under control.
Install the motherboard, hard drives, and graphics card.
Now it's time to put the motherboard in the case. Hold it by the edges, carefully position it, aligning the rear ports with the I/O panel's metal plate, and once it clicks into place, rest it on the metal standoffs. Next, screw the motherboard in with the provided screws, being careful not to overtighten them; a firm but not overtightened fit is sufficient.
Once the motherboard is secured, you can install any non-M.2 storage drives. 2,5" SSDs typically go in dedicated trays or are mounted to the back of the chassis, while 3,5" HDDs fit into drawers or movable frames. Position the drive, tighten screws if necessary, and then connect a SATA data cable to the motherboard and a SATA power cable from the power supply.
Now it's time for the GPU, especially important in a gaming PC. Locate the main PCIe x16 slot (usually the one closest to the CPU), open the small plastic latch at the end, and remove the metal brackets on the back that correspond to the number of slots the card occupies. Insert the graphics card straight into the slot until the latch clicks into place , and screw the card into the case using the holes left by removing the brackets.
For heavy, high-end graphics cards, it's advisable to use some type of support or bracket to prevent the card from sagging and putting too much leverage on the PCIe slot. Some models already include an anti-sag brace or support in the case itself.
Regarding GPU orientation, many modern cases allow for vertical mounting using a PCIe riser cable and a side bracket. This allows the fan section to be visible through the glass, which is very eye-catching if the graphics card has lighting and a striking design. However, it's important to consider whether airflow is too restricted and if the distance from the glass allows the card to breathe without overheating . If the case is narrow and the graphics card is very thick, it's best to stick with the classic horizontal mounting.
Power connections and box wiring
With all the large hardware in place, it's time to go cable by cable until everything is connected. We'll start with the motherboard's main power supply: locate the 24-pin ATX connector on the right edge of the board and plug in the power supply cable until you hear the characteristic click of the plastic lock. It's a large connector, and sometimes you have to press firmly.
Next is the CPU EPS connector, usually located at the top of the motherboard near the CPU socket. It may be an 8-pin connector or split into 4+4 pins; connect the cable labeled CPU/EPS from the power supply and make sure the locking mechanism engages. Don't confuse it with the graphics card's PCIe connectors, as their pin configuration is different and forcing it could cause damage.
The GPU requires its own dedicated power supply. Depending on the model, you'll have anything from one or two 8-pin connectors (6+2) to the modern 12-pin 12VHPWR connectors found on the latest NVIDIA cards. Connect the PCIe cables from the power supply to the card, pressing them firmly until they are secure. Avoid excessively bending the cables at the connector , especially the 12VHPWR connectors, to prevent weakening them.
Don't forget the drives: each SATA SSD or HDD needs a SATA power cable from the power supply and a separate data cable to the motherboard. These connectors are L-shaped to prevent them from being plugged in backward, so align the tab carefully before pushing them in.
The next set of cables is for the front panel of the case: power button, reset button, status LEDs, and, in many cases, the small internal speaker. These are usually thin cables labeled PWR SW, RESET SW, HDD LED, PLED , etc. There's usually a dedicated pin block (F_PANEL or similar) along the bottom edge of the motherboard; consult your motherboard manual for the exact pinout and connect each connector correctly. If you reverse the polarity of the LEDs, they simply won't light up, but you won't break anything.
In addition, connect the front audio cable (HD_AUDIO) to the corresponding connector, usually in the bottom left corner of the motherboard, and the front USB cables (USB 2.0, USB 3.x) to their respective headers. These often have notches or missing pins to prevent you from connecting them backward.
Fans, airflow, and initial startup
If your case comes with pre-installed fans, locate their cables and connect them to the motherboard's fan headers (SYS_FAN, CHA_FAN, etc.) or to an intermediate hub if the case includes one. Try to ensure a logical ventilation layout: front fans drawing in cool air, a rear fan exhausting hot air, and top fans, if present, also assisting with exhaust. This creates a consistent airflow that keeps temperatures under control.
Also check the CPU cooler or liquid cooling fans: the pump usually connects to a connector labeled PUMP or AIO_PUMP, while the radiator fans plug into a chassis fan header or a small controller. Again, the key is to read the manual and make sure nothing is left unconnected.
Before the first power-on, visually inspect the interior: no cables dangling from the fans, no loose screws inside the case , all large connectors securely seated, and the GPU properly secured. Close the rear panel if you've already tidied up the cabling, but leave the glass side panel open so you can observe the system's behavior during the first boot.
Connect the power cable to the power supply, the monitor to the GPU (DisplayPort or HDMI 2.1 is best if your graphics card and monitor support it), the keyboard and mouse, and turn on the power supply switch. Press the power button on the front of the case and cross your fingers. If everything goes well, you'll see lights, fans spinning, and a signal on the monitor.
If your PC doesn't start or shuts down after a few seconds, first check the motherboard's diagnostic LEDs (if present) or listen for beeps from the small internal speaker. Common first-time startup errors include improperly seated RAM modules, insufficient power to the CPU or GPU, or loose front panel cables.
Configure the BIOS, install the system, and optimize
Once the machine powers on and reaches the POST screen, the next step is to enter the BIOS/UEFI (usually by repeatedly pressing DEL or F2 during startup). There you can confirm that the motherboard correctly detects the CPU, the total amount of RAM, and the storage drives. If anything is missing , stop and check the connections before proceeding.
In the BIOS, it's advisable to adjust some basic things: check that the SATA port mode is set to AHCI (if you're using SATA SSDs), activate the XMP or EXPO memory profile so that it works at its actual frequency, and select the SSD where you're going to install the system as the main boot drive once you have the installer ready.
To install the operating system, create an installation USB drive (for example, using the official Microsoft tool if you're installing Windows), connect it, boot your PC from it, and follow the wizard to select your language, destination disk, and partitions. Choose your NVMe SSD as the primary disk if you have one, for ultra-fast boot and loading times.
After the initial installation and the first login to the desktop, it's time to install the drivers: start with the motherboard chipset (from the manufacturer's website), then the graphics card (NVIDIA, AMD or Intel), and finish with network, audio drivers and any motherboard management software you consider useful.
With everything installed, you can move on to performance and stability testing: synthetic benchmark tools, CPU and GPU stress tests, and temperature monitoring with programs like HWInfo or similar. If you see reasonable temperatures and the system runs smoothly, your PC is ready for everyday use and gaming.
Peripherals and monitor: completing the gaming setup
Your computer doesn't end with the tower. To truly get the most out of it, you'll need a good monitor and compatible peripherals . Many users only spend their budget on the case and then fall short on the screen, even though that's what you're looking at all the time.
If you've installed a powerful GPU, ideally you'd use a 1440p (2560 x 1440) monitor, or even an ultrawide 3440 x 1440 display, with an IPS, high-quality VA, or OLED/QD-OLED panel if you want the best contrast. Make sure it has at least a 144Hz refresh rate , a response time of 1ms or less, and technologies like AMD FreeSync Premium or NVIDIA G-SYNC to prevent screen tearing.
As for the keyboard, you can opt for an inexpensive membrane model, but if you can afford it, a mechanical keyboard is far superior: better typing feel, greater durability, and, overall, a better experience for both gaming and typing . Linear switches (red or equivalent) are usually very good for gaming; for a mix of work and play, tactile switches are a good choice.
The mouse should fit your grip (palm, claw, fingertip) and the size of your hand. Don't get hung up on astronomical DPI; any modern gaming mouse with a good optical sensor and a decent mousepad will offer more than enough precision. That said, consider whether you want a wireless connection (more convenience, but a bit more expensive) or if a traditional cable is sufficient.
Finally, the headphones: you can use Hi-Fi headphones with good soundstage or gaming headphones with a built-in microphone. The important thing is that they're comfortable for long sessions, have balanced sound, and, if you're playing online, that the microphone is clear so you can be heard well in chat . The rest (RGB lights, aggressive designs) is just a matter of personal taste.
After the entire process, from purchasing components to the first stable boot, you're left with a machine you know inside and out, one you can upgrade whenever you want, and that you've built yourself piece by piece. Beyond the savings and performance, what's truly valuable is that from now on you'll have a much better understanding of how your PC works , what to fix when something goes wrong, and how to get the most out of it for your actual needs.

Table of Contents
- 1 Before we begin: Is it better to build a PC or buy a pre-made one?
- 2 Basic tools and preparation of the work area
- 3 Choosing compatible components: the foundation of any good assembly
- 4 Pre-assembly on the motherboard: CPU, RAM, M.2 and heatsink
- 5 Prepare the case, the power supply, and cable management
- 6 Install the motherboard, hard drives, and graphics card.
- 7 Power connections and box wiring
- 8 Fans, airflow, and initial startup
- 9 Configure the BIOS, install the system, and optimize
- 10 Peripherals and monitor: completing the gaming setup