- Cloning Windows to a Samsung SSD allows you to keep the system, programs, and data intact, drastically improving performance.
- Samsung Data Migration is the official free tool, but it only works when the target SSD is Samsung and may cause space errors or crashes.
- Third-party tools such as AOMEI Partition Assistant or EaseUS Disk Copy extend compatibility and resolve many of the shortcomings of Samsung's utility.
- Preparing the SSD, checking capacities, and making a backup beforehand is key to a smooth migration without data loss.
Upgrading from a mechanical hard drive to a Samsung SSD is one of the best ways to speed up a Windows PC without having to replace your entire computer . The problem arises when you think about formatting, reinstalling the entire system, and reconfiguring your programs—a real hassle. Luckily, you can clone Windows and your data to the new Samsung SSD and boot up as if nothing had happened, only much faster.
Throughout this guide, you'll see, step by step and in great detail, how to clone Windows to a Samsung SSD (SATA or M.2 NVMe) using both official Samsung tools and third-party alternatives when things get complicated ( 99% hard drive failure, space errors, incompatibilities , etc.). We'll also review the necessary preparations, the limitations of each program, and some tips to avoid data loss.
Why cloning Windows to a Samsung SSD is worthwhile
The main reason for making this migration is that an SSD, especially Samsung SATA and M.2 NVMe drives , offers a huge performance improvement over a traditional hard drive: minimal boot times, near-instant program loading, and greater fluidity in games, video editing, and daily work.
When you clone the system instead of reinstalling it from scratch, you get a 1:1 copy of your current Windows installation : operating system, boot sector, settings, applications, licenses, documents, and user preferences are transferred exactly as they are to the new SSD, without having to redo anything or lose fine-tuned settings that have taken you hours to configure.
This approach is especially interesting if you use a high-end Samsung M.2 NVMe SSD (such as the 970, 980, 990, etc.), which is very popular among gamers, content creators, and demanding users who need high IOPS, low latency, and bandwidth far superior to SATA SSDs.
In addition, Samsung includes its own tools such as Samsung Data Migration and Samsung Magician to facilitate the cloning process and drive maintenance, something not all brands offer for free.
What you should prepare before cloning Windows to a Samsung SSD
Before you start cloning, it's worth taking a few minutes to prepare the process to ensure it goes as smoothly and safely as possible . Skipping these steps is one of the most common causes of errors, crashes, or incomplete cloning.
The first thing to check is capacity. For the cloning process to run smoothly, the Samsung SSD should have equal or greater usable capacity than the space used on your current drive . If the SSD is smaller, you'll have to free up space or exclude less important partitions and data, which complicates the process and could jeopardize it.
It's also crucial to connect the SSD correctly to your computer. You can install it inside your desktop or laptop (in a SATA port or M.2 slot, depending on the model) or connect it externally using a USB-to-SATA adapter or an NVMe-to-USB adapter. Many users choose to connect it via USB for cloning and then later install it internally as the primary drive. For practical guides on how to do this on laptops, see Installing an SSD in a Laptop.
If it's a brand new drive, Windows won't use it directly until you initialize it in Disk Management . From Disk Management, you can choose the partitioning scheme (MBR or GPT) depending on what's on the original disk and the boot type (Legacy BIOS or UEFI). Keeping the same style minimizes boot problems later. If you need to convert the scheme without losing data, see how to convert MBR to GPT.
Finally, it's important to remember that cloning the source disk to the destination SSD will permanently erase everything on the SSD . If you've already saved files on the SSD, make a backup beforehand on another disk or in the cloud, because they will be lost during the cloning process. A good comparison to help you decide where to store the backup is cloud backup vs. external hard drive backup.
Samsung Data Migration: the official tool for cloning your Samsung SSD
Samsung offers a free program called Samsung Data Migration (SDM) designed precisely for this scenario: to move all your data and Windows from an existing disk (HDD or SSD) to a new Samsung SSD (SATA or some compatible M.2 NVMe models).
This software is designed so that the average user can clone the system disk without too much trouble , and it is compatible with several generations of Samsung SSDs, such as the 840, 850, 860 EVO/PRO series, and later ones supported in their latest versions, including Windows 10 and current versions of Windows.
In addition to copying the entire disk, Samsung Data Migration often allows cloning from a larger drive to a smaller Samsung SSD , provided the occupied space fits on the new SSD. However, if the source drive is too full, errors such as "not enough space" will appear, and it will be necessary to free up or exclude data.
It's important to note that this utility is specifically designed for Windows system drives and for Samsung SSDs as the destination drive. It's not suitable for cloning drives without Windows installed, nor for cloning to drives from other brands, which is a significant limitation when choosing this tool.
How to clone Windows to a Samsung SSD using Samsung Data Migration
Using Samsung Data Migration is quite straightforward. Once you have your Samsung SSD connected and recognized by Windows, you can migrate your system in just a few clicks , provided no unexpected errors occur during the process.
The first step is to download the latest version of Samsung Data Migration from the official Samsung Semiconductor website and install it on your Windows computer. After installation, run the program and wait for it to automatically scan the connected drives.
The tool will usually automatically detect the current system disk as the source drive (where Windows is installed) and select the newly connected Samsung SSD as the destination drive. You will then see a diagram of both disks with their partitions and the status of each.
By default, the program selects only the partition where Windows is installed (usually C:) for cloning. If your main drive has other data partitions that you also want to copy to the Samsung SSD, you'll need to select them manually in the source disk panel, with a maximum of multiple volumes including the system drive.
Before starting, the software displays a warning indicating that the entire contents of the destination SSD will be erased and that open files on the source disk will not be copied. It is important to close applications, documents, and any processes that are using files from the drive being cloned to prevent errors or data corruption.
Once you've reviewed everything, simply press the Start cloning button and let Samsung Data Migration copy your system and data to the SSD . Do not disconnect the drive or turn off your computer during the process. When finished, you'll see a message confirming that the data from the source disk has been successfully copied to the Samsung SSD, and you can then close the program.
After cloning, the usual procedure is to shut down the computer, remove the old hard drive (or change the boot order in the BIOS/UEFI), and boot from the new Samsung SSD . If everything went well, you'll see your familiar Windows operating system, with your programs and files, but running much faster.
Common errors with Samsung Data Migration and its limitations
Although it's a fairly convenient tool, not all users are able to clone their disk on the first try with Samsung Data Migration. It's relatively common to encounter error messages such as "not enough space" or to get stuck at a specific percentage of the process (for example, freezing at 0% or 99%).
One common reason is that the destination SSD has less capacity than the data you're trying to copy . Even if the SSD's nominal size seems sufficient, the space actually used on the source drive might exceed the capacity of the destination drive once hidden partitions, over-provisioning, and other factors are taken into account. In these cases, you need to reduce space usage or exclude partitions.
Another important limitation is that Samsung Data Migration only works when the destination disk is a Samsung SSD . You won't be able to clone to a drive from another brand with this tool, nor is it suitable for more complex scenarios where you want to clone data disks without Windows or perform advanced partitioning operations.
It's also not designed to clone disks that don't have an active Windows installation . If you want to duplicate a pure data disk, or make copies between drives with many special volumes, the tool might not even let you continue or it might fail halfway through the process.
In some cases, users with Samsung NVMe drives have reported that cloning gets stuck near the end , forcing them to repeat the process several times without success. In these situations, and also when the tool doesn't even start correctly, the best course of action is to use a more flexible third-party cloning utility.
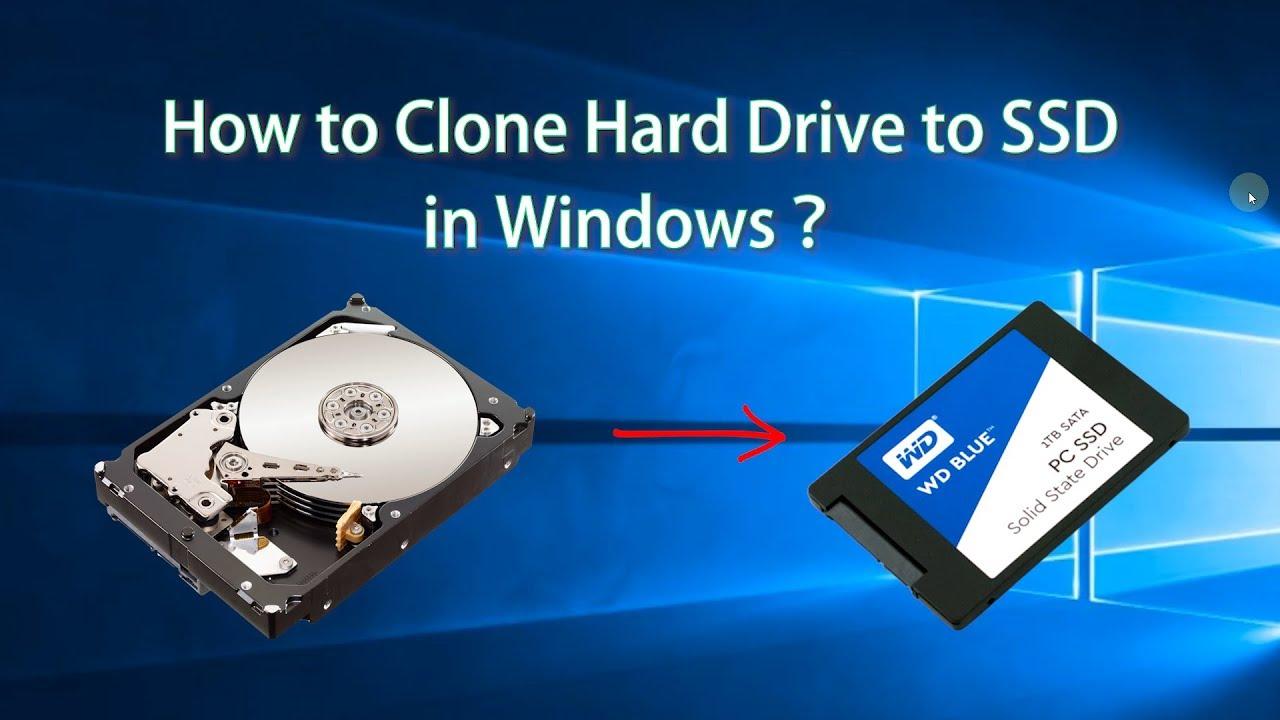
Alternatives to Samsung Data Migration: AOMEI Partition Assistant
A very powerful option when Samsung Data Migration has problems is to use AOMEI Partition Assistant Professional , a complete partition and disk manager that includes several cloning and system migration functions in Windows 11 as well as Windows 10, 8 and 7.
The great advantage of this tool is that it is not limited to SSDs from a single brand: it works with drives from Samsung, Kingston, SanDisk, Seagate, Western Digital, Intel and virtually any HDD or SSD that Windows recognizes, making it very versatile.
Within AOMEI, you have several different copy wizards: the full disk clone wizard (ideal if you want to move the entire system or data disk to another drive), the "Migrate OS to SSD" function (which copies only Windows and its related partitions to another disk), and the wizard for cloning specific partitions.
With these features, you can migrate your boot drive to a Samsung SSD or clone secondary data drives, regardless of whether the destination and source drives are the same brand. It also includes specific options for optimizing SSD performance during the copy process, such as partition alignment.
To try it out without commitment, there is a demo version of AOMEI Partition Assistant Pro that allows you to familiarize yourself with the workflow before deciding whether it's worth using it in an advanced way or purchasing a license.
Migrate Windows to a Samsung SSD with AOMEI Partition Assistant
If you choose to use AOMEI Partition Assistant to clone your hard drive to the new Samsung SSD, the general procedure is fairly straightforward. The first step, obviously, is to physically connect the Samsung SSD to your PC , either internally or via an adapter.
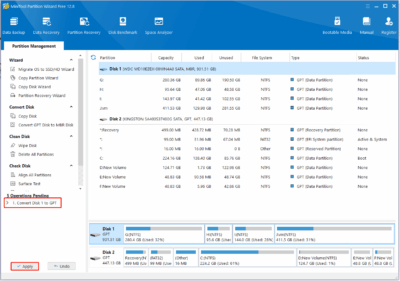
Once AOMEI is installed and running, you'll see your list of disks in the main window. To clone the entire disk, simply click on the "Clone" option and then "Clone Disk ." If you only want to move the operating system, you can also directly select the function specifically designed to migrate the OS to an SSD.
The program will ask you what type of cloning you want to perform. If your goal is to transfer data from a large disk to a smaller one (provided the used space fits), it's recommended to select the "quick disk clone" mode , which copies only the sectors in use and speeds up the process.
In the next step, you must choose the source disk you want to clone . AOMEI allows you to clone both boot disks and data disks to a new SSD, so you can select the one that interests you based on your specific needs and then continue.
Next, select the Samsung SSD (or any other compatible SSD) as the destination disk . It's important to check the "optimize performance for SSD" box so the tool can properly align the partitions and get the most out of the drive during and after cloning.
Before applying the changes, AOMEI lets you edit the size and layout of the partitions on the destination disk, which is useful if you want to manually adjust how much space each volume occupies. Alternatively, you can leave the editing until after the cloning process is complete and repartition the SSD later.
If you are cloning the system disk, the program displays a note with instructions on how to boot the PC from the new SSD once the copy is complete, usually by changing the boot priority in the BIOS/UEFI or temporarily disconnecting the old disk.
Once everything is configured, simply click "Apply" to execute all queued operations. AOMEI Partition Assistant will then automatically perform the cloning process . When finished, you can close the program and verify that the SSD boots correctly with your Windows installation.
Clone to a Samsung M.2 NVMe SSD with EaseUS Disk Copy
Another name frequently mentioned when Samsung Data Migration fails, especially when upgrading to a Samsung M.2 NVMe SSD , is EaseUS Disk Copy. It's a disk cloning program specialized in Windows environments, with good compatibility for both HDDs and SSDs from various manufacturers.
EaseUS Disk Copy is especially useful if you've encountered problems like Samsung Data Migration getting stuck at 0% or 99% when cloning to an NVMe SSD. In these cases, using this third-party tool usually resolves the issue and allows the system migration to proceed.
Its interface is designed to be simple, so even users without much experience can clone their system disk in just a few steps . Among other convenient features, you don't always need to initialize the new SSD before cloning it: the program itself detects the new drive and can manage the partition structure.
Before starting the cloning process, it's a good idea to have some basic items on hand: a screwdriver to open the computer if necessary , suitable adapters or cables (USB-SATA, adapter for M.2 NVMe, etc.), and make sure that the destination SSD has a capacity equal to or greater than the space used on the old disk.
It's also advisable to check the partitioning style (MBR or GPT) of your current hard drive and the new SSD. If they don't match, you might want to initialize the new SSD with the same style to avoid boot problems, or simply let the tool adjust the layout during the process.
Basic steps to migrate your system with EaseUS Disk Copy
When you start EaseUS Disk Copy with the new SSD connected, the program detects the additional drive and usually displays a message asking if you want to migrate the operating system to that new disk . If you accept, it automatically selects the partitions related to Windows and prepares the cloning environment.
In the next step, you can adjust the partition layout on the destination SSD . Here you have options such as "automatically adjust disk" (which recalculates sizes to optimize space), "copy as source" (maintain the same proportions as the old disk), or "edit layout" manually if you want to customize the sizes to your liking.
It is important to select the option that indicates the destination is an SSD , which allows the program to apply certain specific optimizations, such as 4K alignment and other adjustments that improve the performance and lifespan of the drive.
When you confirm the settings, EaseUS Disk Copy warns you that the data on the destination disk will be lost. If you accept, the system cloning process begins, and you must wait for it to reach 100% without interruption . During this time, it's best to avoid intensive use of the computer to minimize risks.
Once finished, you can shut down your computer, remove the old hard drive if you're replacing it, or at least enter the BIOS/UEFI and set the Samsung SSD as the first boot device . If the cloning process was successful, your Windows will boot up exactly as it was, but loading from the new NVMe or SATA SSD.
Additional preparations and tips for a safe migration
Beyond choosing the right tool, there are some tips that can help make cloning Windows to a Samsung SSD safer and less prone to errors . A highly recommended step is to close all possible programs, especially antivirus software, game clients, download managers, or any app that constantly writes to the disk.
It's also a good idea to defragment the source mechanical hard drive before cloning (only if it's an HDD, never an SSD), as a less fragmented system can make a faster and cleaner copy. Solid-state drives should not be defragmented due to wear and tear.
If you plan to completely replace your old hard drive, it's a good idea to decide what you'll do with it after cloning. Once you've verified that the Samsung SSD boots and functions correctly , you can format the old drive and use it as secondary storage, or disconnect it if you don't need it.
If you're cloning to a Samsung M.2 NVMe SSD , check that your motherboard supports booting from NVMe and that your firmware (BIOS/UEFI) is up to date, and verify that your SSD is in good condition . Some older motherboards require updates or specific settings to boot from these drives.
Finally, remember that whether you use Samsung Data Migration, AOMEI Partition Assistant, or EaseUS Disk Copy, it's highly recommended to have a separate backup of your important files before starting any cloning process. This way, if something goes wrong during the process, you won't find yourself in a situation where you've lost valuable data beyond recovery.
You have a very complete range of options to clone Windows to the new Samsung SSD, whether SATA or M.2 NVMe: you can take advantage of the brand's own free software when everything is running smoothly, or resort to third-party solutions such as AOMEI Partition Assistant and EaseUS Disk Copy when space errors, locks or compatibility limitations appear, thus achieving a fast, safe migration with your system exactly the same, but running at the speed it deserves.