- Dirt buildup in PC ports causes connection failures, overheating, and physical damage to the connectors.
- The key tools are microfiber cloth, compressed air, isopropyl alcohol and fine bristle brushes, always avoiding metal objects and generic liquids.
- Careful handling of cables, avoiding pulling or forced connections, along with dust plugs and regular checks, significantly extends the life of the ports.
- Combining regular physical cleaning with updated drivers helps maintain stable and safe operation of all equipment connections.
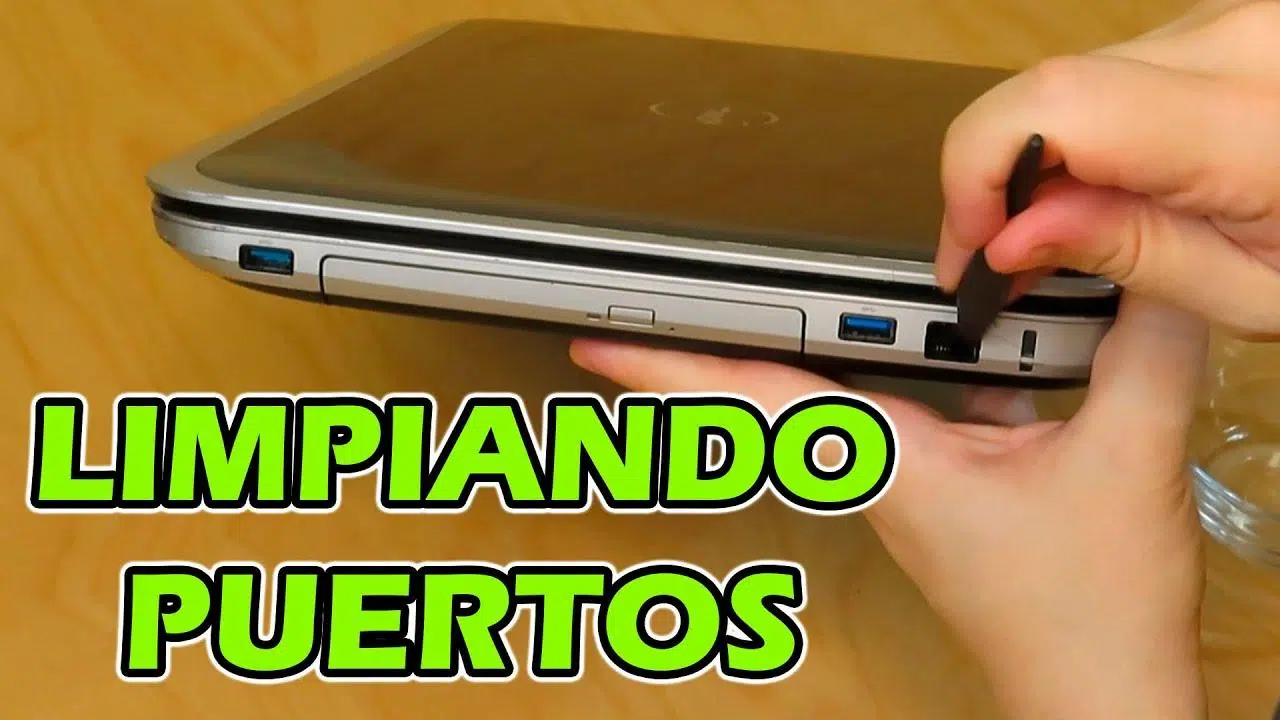
If you've just bought a refurbished computer or have been using the same laptop for a while, its connectors are likely full of lint, dust, and even food scraps. Even if the ports still seem to be working normally, the accumulated dirt can eventually cause problems : charging issues, random disconnections, overheating, or, in the worst-case scenario, physical damage to the connector.
The good news is that keeping these tiny holes clean isn't complicated or expensive. With a few basic tools, some patience, and knowing what NOT to do, you can make your PC's ports look brand new without having to open your computer or be an electronics expert. Let's look at it step by step, in great detail, so you don't miss a thing.
Why is it so important to clean your PC ports?
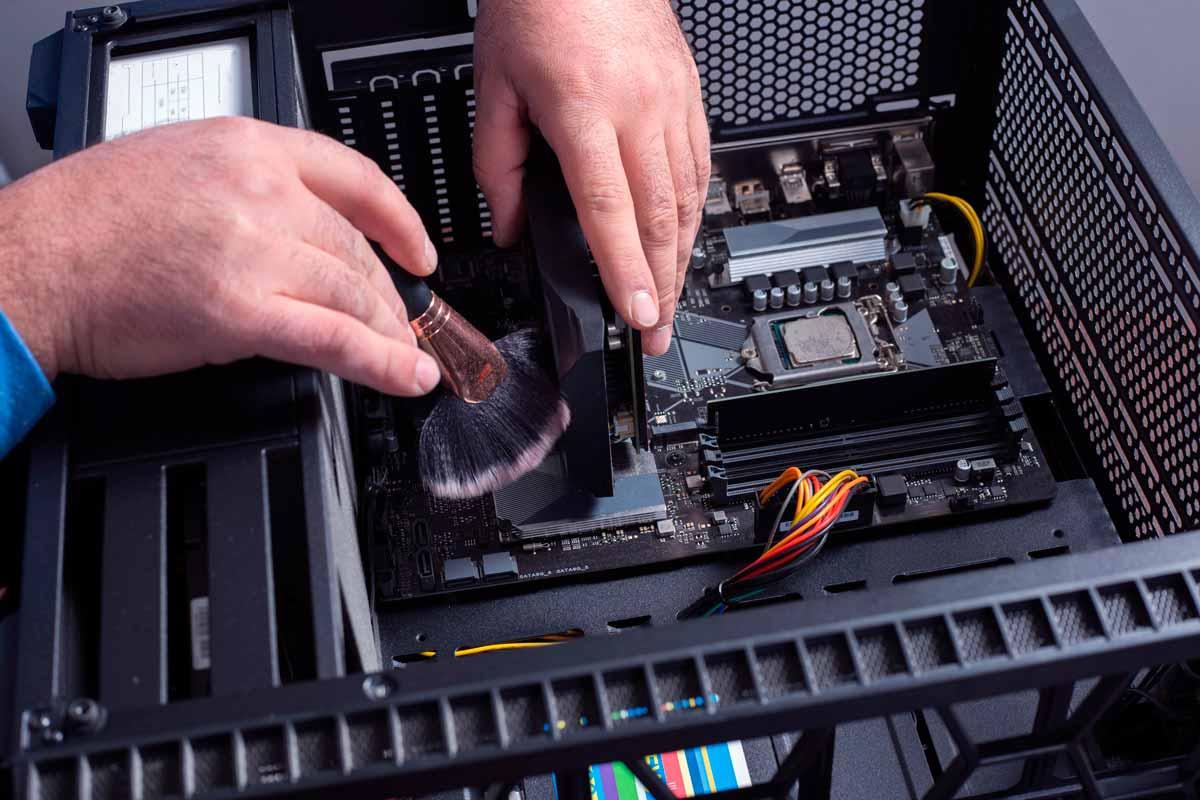
The sides and back of the computer are full of tiny slots where you plug in cables every day. Absolutely everything gets in through these gaps: dust from the air, grit, clothing fibers, lint from backpacks, and even crumbs if you eat next to your laptop . At first, you hardly notice it, but over time, a blockage forms, causing a lot of headaches.
When too much dirt accumulates, the connectors lose good contact and intermittent failures begin : the USB that disconnects by itself, the network cable that makes poor contact, the HDMI that stops sending an image if you move the cable a little, or the charging port that forces you to "place" the charger in a specific position.
Furthermore, this dust doesn't just stay at the port: it can seep inside and contribute to the device overheating , especially if it mixes with dirt from the fans. In small devices like phones or tablets, a port full of debris is one of the most common causes of charging problems and overheating.
Another key point is that modern connectors, especially USB-C and other high-density ports, are quite delicate . Inside those tiny openings is a row of very fine pins and contacts that can easily bend or scratch if you use the wrong tools or force them while cleaning.
Therefore, it's advisable to maintain a relatively frequent routine for all the ports on your PC (and mobile phone), even if they appear to be working fine. A couple of minutes of cleaning now and then can save you from much more expensive repairs in the long run.
Types of ports you can find on your PC or laptop
Before you start cleaning like crazy, it's a good idea to know what each connector is and what its function is, because not all ports are the same or can withstand the same level of rough handling . On a typical laptop or desktop computer, you might find:
USB ports (A, B, and C) : These are the most common ports. They include the classic rectangular USB-A, the reversible USB-C found on many modern laptops, and, on some devices and peripherals , USB-B connectors. They are compatible with almost everything: flash drives, external hard drives, mice, keyboards, mobile phones, hubs, etc.
3,5 mm audio ports : the typical jacks for headphones, microphone, or a combination of both. They are usually located on the side of the laptop or on the front/back of the tower. Dirt in these ports often results in noise, crackling, or dropped sounds.
HDMI, DisplayPort, and VGA : these are video outputs. HDMI and DisplayPort are used to connect high-resolution monitors, televisions, and projectors, usually also with audio. VGA is older and only transmits analog video, but it is still present in some devices. These connectors have relatively sensitive pins and a recess where dust tends to accumulate.
RJ-45 (Ethernet) network port : It looks like a large telephone jack. It allows you to connect your PC directly to the router or a wired network. Inside, it has small metal tabs that make contact with the cable; excessive dirt or moisture can cause them to rust or bend.
PS/2 and COM (serial) ports : more common in older or professional-grade equipment. PS/2 was used for mice and keyboards; the COM serial port is used for older printers, modems, or point-of-sale systems. Although you see them less and less, it's still a good idea to keep them clean if you use them.
According to the manufacturer, some brands have simplified connectivity as much as possible and have focused almost entirely on USB-C and Thunderbolt , which allow data, video, and power transmission through a single connector. This has the advantage of reducing the number of slots… but it makes the few ports that remain even more critical and delicate.
Recommended tools and products for cleaning PC ports
To perform a thorough cleaning and minimize risks, it's worth having a few basic tools on hand, which will also be useful for many other PC maintenance tasks. You don't need a professional arsenal, but you do need to choose wisely what you use and what you don't . If you're going to open it up, consult laptop hardware tutorials.
Clean microfiber cloth : This is the same type of cloth you use for glasses or screens. It needs to be very clean, soft, and lint-free. Microfiber is ideal for removing dust from the surface without scratching or leaving residue. It's best to avoid cotton balls, which shed fibers that can get trapped inside the port.
Compressed air : whether in the form of a can specifically designed for electronics or using a suction bulb that expels air when squeezed, it's one of your best allies for removing dust from inside devices without touching the contacts. It allows you to dislodge loose dirt from deep areas that you can't reach with a cloth. However, you must use it carefully to avoid damaging anything.
Isopropyl alcohol : This is the standard for cleaning electronic components because it evaporates very quickly and leaves no conductive residue . It softens stuck-on dirt and disinfects the area. It can be used in liquid form with cotton swabs or cloths, or in a spray specifically designed for electrical contacts.
Soft-bristled brushes : a small anti-static brush, a soft paintbrush, or even a clean, old toothbrush can work very well. The bristles allow you to gently scrape away solid dirt stuck to walls and contacts without resorting to metal tools.
Cotton swabs or similar : while not ideal if they shed fibers, they can be useful if you flatten the tip and lightly dampen them with isopropyl alcohol . Special electronic swabs with non-shedding tips are even better.
Contact cleaner sprays : "3-in-1" or similar contact cleaner sprays are specifically designed to clean and improve electrical contact without leaving an oily film. They are an alternative to isopropyl alcohol when you want something ready to use and quick-drying.
"Cyber Clean" type cleaning erasers : These are moldable rubber or pastes that trap dirt when pressed against a surface. Many people use them to clean keyboards, ventilation slots, or crevices where a cloth can't reach . They can also be used around ports, taking care not to leave any pieces inside.
What you should NEVER use when cleaning ports
Cleaning ports isn't complicated, but it's easy to mess things up with the wrong tools. There are a number of things you should completely avoid if you don't want to end up damaging the connector.
First and foremost: no sharp metal objects . Do not use needles, pins, small screwdrivers, knives, paper clips, or anything like that to scratch the inside. The pins in ports like USB or HDMI are very delicate; even a small scratch or a slight bend in a contact can cause the port to malfunction or become unusable.
It's also a good idea to avoid improvising with wooden sticks or similar objects unless you handle them very carefully . They can splinter and leave pieces inside, or exert too much pressure on a specific area and deform the contacts.
Another major enemy is the use of unsuitable liquids. You shouldn't apply water (not even distilled water), glass cleaner, multi-purpose sprays, gels, or generic household products to the ports. Many contain substances that conduct electricity or leave residues that attract more dirt later.
As for cloths, be careful with lint-producing rags, paper napkins, or low-quality cotton . The last thing you want is to fill the port with microscopic fibers. If you have nothing else, at least double-check that no residue comes off when you wipe it.
Last but not least, don't blow into the port with your mouth . It's a very common gesture, but besides not being particularly effective, it introduces moisture and small droplets of saliva, which can oxidize the contacts over time. Small particles from your mouth can also get in and worsen the situation.
Essential preliminary steps before starting to clean
Before you bring any tool near your computer, there are a few basic safety precautions you absolutely must take. These steps are quick and greatly reduce the chances of causing a short circuit or accidental damage.
First, completely shut down your computer . Don't leave it in sleep mode or with the screen off: shut it down from the operating system and wait a few seconds. On a desktop computer, also unplug the power cord. This ensures that no power is flowing through the ports while you're working on them.
Next, disconnect all cables and plugged-in devices : USB drives, external hard drives, monitors, headphones, network cable, etc. Working with empty ports will give you better access and prevent you from accidentally pulling something out while cleaning.
If possible, work in a well-lit area . A direct light or even your phone's flashlight will be very helpful for seeing inside each connector and checking if the dirt has actually been removed. It's not essential, but it greatly helps to avoid working blindly.
Finally, if you're going to use spray products or isopropyl alcohol, do so in a well-ventilated area . They don't smell awful, but it's always best not to breathe the fumes in close proximity for extended periods, especially if you're cleaning several ports in a row.
How to thoroughly clean PC ports step by step
With the device powered off, cables disconnected, and tools ready, you can get started. The general process is applicable to almost any port: USB, HDMI, audio jack, Ethernet, etc. , simply adjusting the technique according to the connector type.
Start with the easiest part: use the microfiber cloth to thoroughly clean the area around the ports . Wipe the cloth along the sides and back of the laptop or desktop, removing visible dust and surface grime. This prevents dirt from falling from the casing into the connectors when you work on the inside later.
Once the exterior is more or less clean, take the can of compressed air or the suction bulb . Place the nozzle a safe distance from the port (no need to put it inside) and apply short, controlled bursts. Several small puffs are better than a continuous stream near the contacts.
Always keep the compressed air can upright. Tilting it too much can cause some of the liquid contents to spill out and wet the inside of the port , which is definitely not desirable. The goal is for only dry air to be released, not the liquid propellant.
After a couple of bursts of air, wipe the area again with the microfiber cloth , because many dust particles will have been blown out and will stick to the edge of the connector or the casing. This will prevent them from getting back in when you continue handling it.
If you see any remaining dirt, use a brush. Gently run the bristles around the inside of the port, without pressing too hard , to remove any lint or debris that may be stuck. This is especially useful for USB and audio ports.
For stubborn dirt, you can use isopropyl alcohol. Lightly dampen a clean part of a cloth or the tip of a cotton swab (don't let it drip) and wipe around the edge of the port and, carefully, the accessible inside. The goal is to soften the dirt so it's easier to remove with a brush or compressed air.
If you're using cotton swabs, a helpful trick is to flatten the head with tweezers or your fingers so it fits better into narrow slots like USB-C ports. Make sure it doesn't fray while you're cleaning. If you see it leaving fibers, replace it with a new one or go back to using a cloth.
Once you've checked with a light and the contacts appear cleaner and shinier, let the device sit for a few minutes to allow the alcohol to evaporate completely . Usually, 5-10 minutes is more than enough. Don't rush to turn it on if there's still a strong smell of alcohol in the area.
If using a contact cleaner spray, the procedure is similar: apply a small amount following the manufacturer's instructions , let it sit, and wipe off any excess if necessary. These products are designed to evaporate quickly and leave no greasy residue.
Specific cleaning according to the type of port
Although the general process is the same, each type of connector has its own specific characteristics. Adjusting your cleaning method to each port will help you avoid problems and be more effective.
USB ports (A and C) : These are the ones that cause the most trouble. USB-A ports have a larger slot, so more dirt gets in, but they're also easier to clean. USB-C ports have a very small space and the pins are more exposed. It's especially important not to insert hard tools or pierce them with anything . Compressed air, a fine brush, and, if necessary, a cotton swab with alcohol will be your best friends.
HDMI, DisplayPort, and VGA ports : these tend to get dusty due to their small openings. Use compressed air from a distance and a soft brush for the internal walls. Avoid touching the pins directly with anything that could bend them . On VGA, the external holes can also accumulate a lot of dirt, but they usually clean well with compressed air and a little rubbing alcohol around the edge.
Audio connectors (3,5 mm jack) : Because they are deep and narrow, air blowers and some specific headphone cleaning tools work very well . A very fine or specially adapted cotton swab, lightly moistened with alcohol, can also help, as long as you don't force it.
RJ-45 (Ethernet) port : Inside are metal tabs that make contact with the cable. It's best to use compressed air and, at most, a very soft brush . Don't try to insert anything rigid inside because you could bend these tabs and the port will no longer recognize the cables correctly.
Older ports like PS/2 or COM : these are somewhat more robust, but equally susceptible to dirt. Compressed air, a cloth around the ports, and, if necessary, a light wipe with alcohol on the accessible parts are usually sufficient. There's no need to overdo it unless you see a lot of accumulated grime.
Things you should never do when cleaning or using ports
Beyond the products to avoid, there are usage habits you should eliminate to extend the life of your connectors. Many port failures are caused more by daily misuse than by dirt itself.
A common mistake is pulling on the cable instead of holding the connector when unplugging . If you yank a USB cable every time you pull it out, you're stressing the internal structure of the port and could end up loosening solder joints or deforming the connector. Get into the habit of always holding the rigid part of the cable.
For external hard drives, USB flash drives, and other storage devices, always use the "safely remove" option in your operating system . While this might seem like a data protection measure, it also reduces the likelihood of damage to the port or device from sudden power outages.
Another bad idea is forcing a connector that doesn't go in smoothly . If you feel resistance when plugging in a cable, don't force it in any further; you might be trying to insert it backward (especially with USB-A) or there might be something stuck inside. Forcing it in these conditions is a surefire way to bend pins or damage the port opening.
You should also avoid jerking or twisting cables when they are connected . With HDMI, DisplayPort, or USB-C ports, strong lateral movements can pry and damage both the cable connector and the port itself on the motherboard.
Finally, make sure the cables aren't under constant tension or hanging by their own weight from the port . This continuous pulling will eventually damage the internal solder, and over time, intermittent connections may appear or the port may simply stop working.
How to protect and extend the life of PC ports
Once your ports are clean, the next step is to keep them that way for as long as possible. A little preventative maintenance will greatly extend the life of your connectors and save you from having to clean them so often.
Something as simple as being careful about where and how you carry your laptop makes a big difference. If you carry it in a backpack full of lint, sand, or crumbs, it's normal for the sides to end up covered in dirt. Keeping the case or bag clean, and preventing the laptop from being loose with other items, helps a lot.
When you're not using certain ports for a while, it's a good idea to cover them . There are specific dust plugs for USB-A, USB-C, HDMI, audio jacks, etc., that are easy to put on and take off and prevent dirt from getting in. This is the same thing many TV and monitor manufacturers do by putting plastic caps on new connectors.
Some people choose to put a small piece of adhesive tape over the unused port . It works, but over time the adhesive can leave residue on the casing and lose effectiveness, so it's not as clean as a dedicated plug. If you use this DIY solution, be sure to change the tape occasionally and use one that doesn't leave any sticky residue.
The type of cables you use also makes a big difference. Poor quality or very cheap cables can pull, fit poorly, or deform with use , and all of that affects the port. Investing in decent, certified cables with robust connectors is a small investment that protects both your devices and the ports themselves.
For USB hubs with many devices plugged in (hard drives, webcams, microphones, etc.), consider using a hub with external power . This prevents overloading the PC's port by trying to power too many devices at once, reducing electrical stress on the connector and motherboard.
Periodic inspection and general maintenance of the equipment
Just as you occasionally check the cleanliness of your keyboard or screen, it's a good idea to periodically inspect the condition of your ports . There's no need to be obsessive, but it's worth taking advantage of maintenance moments to give them a quick check.
Every so often, for example once every few months, check around the connectors for visible dust, debris, or signs of wear . Take a couple of minutes to blow them out with compressed air, wipe them down, and make sure there's nothing unusual.
If during this inspection you notice that any port is damaged, loose, very dirty, or no longer properly recognizing devices, it's worth taking action before the problem worsens . Sometimes a good cleaning solves the problem; if not, it might be time to have a technician check the connector or, in the case of desktop computers, consider replacing the card where that port is located.
Beyond the physical aspects, it's also a good idea to keep your port and device drivers up to date . While drivers won't fix a broken or dusty port, they can resolve compatibility issues or disconnections that might lead you to believe the port is faulty when it's actually a software problem.
With this combination of regular physical cleaning and up-to-date drivers, your ports will be in optimal condition for longer , minimizing both recognition errors and unexpected connection drops.
Taking care of the ports on your PC, laptop, or mobile device isn't rocket science, but it does require following a few guidelines and respecting certain limits. Using the right tools (microfiber cloths, compressed air, isopropyl alcohol, and fine brushes), avoiding sharp objects and unsuitable liquids, unplugging carefully, and protecting the connectors when not in use are small steps that, when combined, make all the difference between a device that works flawlessly year after year and one plagued by loose connections, charging problems, and ports prematurely rendered useless.

Table of Contents
- 1 Why is it so important to clean your PC ports?
- 2 Types of ports you can find on your PC or laptop
- 3 Recommended tools and products for cleaning PC ports
- 4 What you should NEVER use when cleaning ports
- 5 Essential preliminary steps before starting to clean
- 6 How to thoroughly clean PC ports step by step
- 7 Specific cleaning according to the type of port
- 8 Things you should never do when cleaning or using ports
- 9 How to protect and extend the life of PC ports
- 10 Periodic inspection and general maintenance of the equipment