- Cloning a hard drive to an SSD creates an exact copy of the system, programs, and data without reinstalling Windows.
- It is essential to choose the right source disk, destination disk, and cloning tool (Partition Assistant, Acronis, Clonezilla, etc.).
- You can clone from a smaller disk to a larger one, then manage the unallocated space from Disk Management.
- After cloning, it is advisable to configure the SSD as the boot disk and reuse the old HDD as an external or backup drive.
If your computer is sluggish, the hard drive is usually the prime suspect. Replacing an old mechanical HDD with a modern SSD is one of the most effective upgrades you can make your computer run smoothly again. The good news is that you can clone your hard drive to an SSD and keep Windows, programs, and files exactly as they are , without reinstalling anything.
In this comprehensive guide, you'll learn how to clone a hard drive to an SSD step-by-step in Windows, which tools to use, what you need to prepare beforehand, and what common mistakes to avoid. You'll see methods using simple cloning programs from Windows, as well as more powerful options like Clonezilla, so you can choose the system that best suits your experience level.
What does cloning a hard drive mean and why do it?
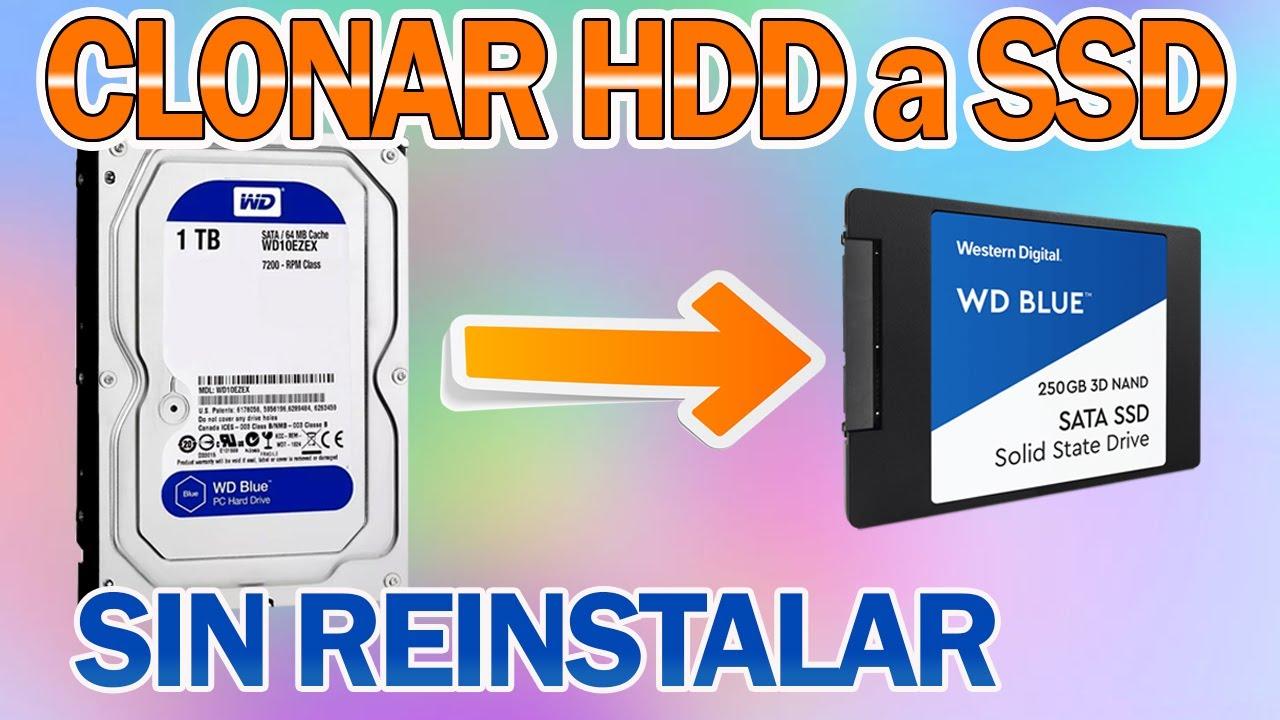
When we talk about cloning a hard drive, we mean making an exact, sector-by-sector copy of all the contents of the source drive to a destination drive. It's not just copying files: the operating system, boot manager, partitions, installed programs, and their settings are also replicated.
This lets you switch from a slow HDD to a fast SSD without reinstalling Windows , downloading applications again, or dealing with licenses and configurations. After cloning, the computer boots from the SSD, and you see the exact same desktop, icons, and programs you had before, only everything loads much faster.
Another advantage is that, once cloned, you can reuse the old hard drive as an external drive . Simply place it in a USB enclosure and you'll have it as a backup drive, for backups, or as additional storage.
On many laptops, the typical situation is clear: the HDD is at 100% usage in Task Manager, and Windows is sluggish . Cloning to an SSD using a simple USB-SATA adapter and then physically replacing the internal HDD with the SSD usually solves the performance problem completely.
What you need to clone a hard drive to an SSD
Before starting the cloning process, it's important to have all the necessary hardware and software on hand to transfer your data from the old hard drive to the SSD . Depending on the method you choose, the requirements vary slightly, but the basics are very similar.
First, you need the source disk , which is the drive where you have Windows installed, along with your programs, games, documents, photos, music, etc. This is the disk you'll be copying. It's usually a mechanical HDD (although it could also be an older SSD) identified on many computers as Disk 0 with the partition C :.
Secondly, you'll need the destination drive, that is, your new SSD . This must be empty and have at least the same capacity as the amount of data on the original drive. Ideally, the SSD should be the same size as, or larger than, the total capacity of the HDD to avoid partitioning issues.
If you're cloning from a laptop or want to use an external drive, you'll need an additional connection . This could be a USB-to-SATA adapter, a docking station, or an external enclosure to house the HDD or SSD while you perform the cloning process.
In addition, many SSD kits include a complete cloning package with a USB enclosure, cable, and software (for example, [example of SSD kit name]). In these cases, simply mount the HDD in the enclosure, connect it to your computer via USB, install the software, and follow the cloning wizard.
Finally, for certain methods like Clonezilla, you'll need a USB flash drive of at least 2 GB , formatted in exFAT or NTFS, which you'll use as the boot drive. It's also highly recommended to have a recent backup of your data on hand in case something goes wrong during the process.
Method 1: Clone the hard drive to SSD from Windows using Partition Assistant
One of the most convenient methods for Windows users is to use AOMEI Partition Assistant or a similar tool that allows you to schedule cloning directly from the system . The advantage of this option is that you can configure everything from the desktop, and the program takes care of restarting the computer and creating the copy outside of Windows.
The first step is to download the free version of Partition Assistant from its official website . Once there, you'll find a download button (usually labeled "Download Freeware") that will take you to the download page. The free version has limited features compared to the paid version, but it does include the disk cloning option, which is what we're interested in.
Once the download is complete, double-click the .exe file to begin installation. During the process, a window may appear inviting you to purchase the Pro version with more features; if you don't want to pay, simply click the corresponding button to skip the offer and continue with the free edition.
Next, simply accept the steps in the installation wizard (path, shortcuts, etc.) and click "Install now." On Windows, it's very straightforward, and while the program can also be used on systems like macOS or GNU/Linux, the installation procedure differs depending on the system.
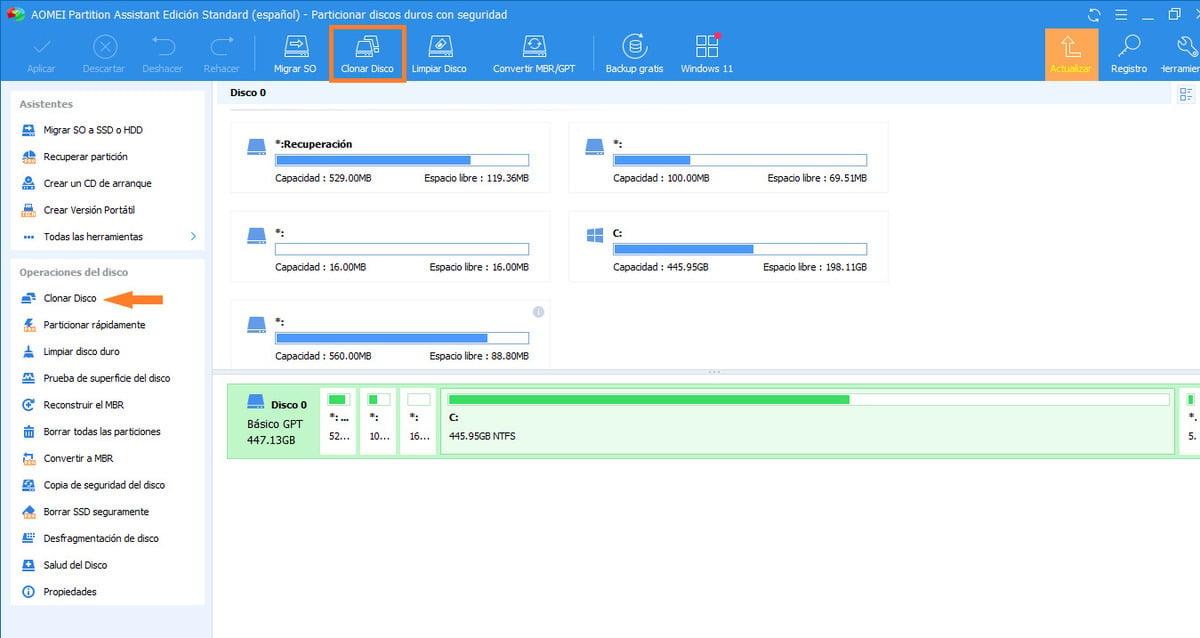
Once installed, open Partition Assistant. You'll see all the drives connected to your computer represented with their partitions and assigned drive letters. This is where you'll choose the disk you want to copy to your SSD and the empty destination disk where all the content will be replicated.
Configure cloning with Partition Assistant
Within the interface, locate the source disk containing your Windows installation . This will usually be Disk 0 with the C: partition, but double-check to avoid confusion if you have multiple disks connected. Select it and go to the "Copy" tab or menu at the top of the program.
In that menu, select the "Disk clone" option . This function creates an exact copy of the entire drive, including the operating system and partitions, so that the computer can boot from the new SSD without problems.
The program will display a dialog box with several copy modes. The usual option is to select "Quickly clone disk ," which copies only the used sectors of the drive, without wasting time on the empty space. You don't need to copy the unused sectors of the HDD, so this mode is faster and perfectly sufficient in most situations.
After choosing the cloning type, the wizard will ask you to confirm the source disk . Make sure it's the one containing your C: drive and your current Windows installation. Once verified, click "Next" to continue with the setup.
In the next step, you'll need to select the destination drive, which will be the new SSD . It's very important to make sure you don't have any important data on that SSD, because all its contents will be overwritten. This screen usually also includes a checkbox to optimize performance for SSDs; select this option if you're migrating from a traditional HDD to a solid-state drive.
Next, the program lets you adjust the size of the partitions on the destination disk . You can choose to make an exact copy of the original partitions or resize them to make better use of the space. If you don't want to complicate things, choose to keep the partitions as they are and continue with the wizard until you reach the final summary screen.
Once everything is ready, you'll return to the application's main window, where you'll see the pending operations. To execute them, click the "Apply" button , usually located in the upper left corner of the interface. The computer will restart to perform the copy outside of Windows, and the cloning program will automatically take control.
During the cloning process, it's important not to turn off your computer or disconnect any drives . When it's finished, the system will restart, and if you've changed the boot order or replaced the physical drive, Windows should boot from the cloned SSD with everything in place.
Method 2: Cloning with the software included in many SSDs (Acronis and cloning kits)
Many SSD brands include a cloning kit in the box for users who want a hassle-free experience . This kit typically consists of an external USB enclosure for the HDD or SSD, a USB cable, and dedicated cloning software, such as Acronis True Image HD.
In this scenario, the usual procedure is to install the SSD inside the computer (preferably a laptop or desktop) and place the old HDD inside the external enclosure. Connect the enclosure to a USB port on the computer using the provided cable and wait for Windows to recognize the drive.
Before starting the process, check that the SSD has enough capacity to hold all the data on your HDD . If, for example, your old hard drive is 500 GB full and your SSD is only 256 GB, you won't be able to clone everything automatically.
The next step is to insert the CD or download the cloning software that came with the SSD. If you have a CD/DVD drive, insert the disc and restart your computer to launch the program. In many cases, you'll see the Acronis True Image HD screen immediately upon restarting.
Once inside the Acronis environment, the wizard will guide you. You'll usually need to select the "Disk Clone" option on the main screen. From there, the program will display a message like "Welcome to the Disk Clone Wizard!" indicating that the wizard will take care of the rest.
At one point, you'll be asked if you want to perform an automatic or manual cloning. For most users, the automatic mode is the best option , as it's the simplest and safest way to clone all the content without needing to modify the partition layout.
Later, Acronis will display the Hard Disk Drives Structure so you can confirm which is the source disk and which will be the destination disk. Carefully double-check that you have selected each one correctly, especially if there are multiple drives installed.
Before starting, the software will display a summary of the actions it will perform . Review the information, click "Proceed" or the equivalent button, and the cloning process will begin. Depending on the size of the data and the speed of the drives, this may take anywhere from a few minutes to several hours.
When the program finishes copying, you should see a message like "Disk Cloning was successful!" . Accept the message, exit the program, and let your computer restart. It's important to remove the CD from the drive and disconnect the USB enclosure so the computer doesn't try to boot from them.
If everything went well, the system will boot directly from the newly cloned SSD . From that point on, you can reuse the HDD that remains in the USB enclosure as an external drive for backups or additional storage.
Method 3: Cloning a hard drive to an SSD with Clonezilla (booting from USB)
For users who want a powerful, free, and highly flexible solution, one of the best options is Clonezilla, an open-source disk cloning tool . In this case, it doesn't run from Windows, but rather boots from a bootable USB drive with its own operating system, thus avoiding problems with locked files.
To use Clonezilla, you'll need to download the official image from its website and create a bootable USB drive. You can do this manually with Rufus or use Tuxboot, a small utility that automates both the Clonezilla download and the creation of the bootable USB drive.
If you prefer simplicity, Tuxboot is a good alternative because it downloads the latest stable version of Clonezilla and prepares your USB drive almost effortlessly . It's available for Windows and Linux, takes up very little space, and you'll have your drive ready in just a few minutes.
The typical procedure with Tuxboot involves running it (it does not require installation), selecting the online distribution option at the top and choosing "clonezilla_live_stable" with the "current" channel , which are usually already configured by default.
At the bottom, select "USB Drive" as the destination type and choose the drive letter corresponding to the USB drive you previously connected. Be careful to select the correct USB drive to avoid accidentally deleting another drive. Once you confirm, Tuxboot will download Clonezilla, copy the files to the USB drive, and prepare it to boot.
Why you can't clone the disk from within Windows itself (in most cases)
Many people wonder why it's necessary to boot from a USB drive to clone an operating system disk , instead of doing it directly from Windows. The reason is that when Windows is in use, most of its system files are either open or locked, so they can't be copied or modified freely.
If all you do is copy the Windows folder and program files to another drive , you don't get a bootable installation; you only duplicate files without the full set of settings, services, and metadata needed for the system to function.
When you boot your computer from a USB drive using Clonezilla, the disk you want to clone becomes inactive from the perspective of the running operating system . This allows you to copy all sectors, including critical components like the boot manager and partition table, ensuring that the destination disk will be fully functional when you turn on the computer.
There are commercial applications that simulate a Windows-like interface for cloning, but in reality, they also boot into a different environment than the system you're using , often from a pre-installed environment. These are usually paid applications designed for users who prefer to avoid less user-friendly utilities like Clonezilla.
Even so, if you follow the steps carefully, Clonezilla is surprisingly effective and reliable for cloning operating system disks . It's not as visually appealing as some other programs, but it works very well even with a variety of hardware and doesn't require paid licenses.
How to clone a disk step by step with Clonezilla
Once you have the Clonezilla USB drive ready, connect both the source hard drive and the destination SSD to your computer. Then, restart your computer and enter your motherboard's temporary boot menu , which is usually accessed by pressing keys like F10 or F12 during startup.
In the boot menu, select the USB flash drive as the boot device . This will bring up the Clonezilla home screen with several options. Choose the first one, "Clonezilla live," and wait for the system to load into memory.
Once it's loaded, you'll see a menu to select your language. Choose your preferred language and press Enter. Next, another screen will appear related to the keyboard layout . In most cases, you don't need to change anything: simply press Enter to continue with the default settings.
Next, Clonezilla will display a menu where you should select "Start Clonezilla ." This will take you to the main wizard. The next step will ask you what type of operation you want to perform. You should select the "device to device" cloning option, since what we want is to copy an entire disk to another.
Next, you can choose between beginner and expert modes . If you prefer to keep things simple, beginner mode applies recommended values without requiring you to adjust too many options. However, expert mode lets you see more advanced parameters, although in practice, unless you know what you're doing, it's best to leave most of the settings as they are.
The wizard will first ask you to specify the source disk , which is the HDD or SSD where Windows and your data are currently located. Pay attention to the capacity and model to avoid mistakes. Next, you'll need to select the destination disk, which is the new SSD where you want the backup to be saved.
Next, a menu with advanced cloning options will appear . The safest and most common approach is to leave the default values as they are, or at most enable the verbose output option (-v) if you want to see more detailed information during the process.
Clonezilla will also ask if you want to verify the copy when cloning is complete . If you accept, the process will take longer, but you'll have an extra check that the data has been copied correctly. This is recommended in critical situations, though not strictly required.
In one of the key steps, the program will show you options related to the partition table . The most prudent course of action to avoid problems is usually to replicate the same table from the source disk to the destination, ensuring that the partitions maintain the same basic structure.
Before starting, Clonezilla will display a summary of everything it's going to do, clearly stating that the data on the destination disk will be lost . To confirm, you must type "y" (for yes) and press ENTER when prompted. This step is a safety measure to prevent fatal errors.
Finally, it will ask if you also want to clone the boot manager from the source disk to the new disk. Again, you'll need to answer with "y" and press ENTER. After this, the cloning process will begin. You'll see the progress and various status messages on the screen until it's finished.
When finished, Clonezilla may offer you the option to check the cloning results again . It's a good idea to accept and let it review the contents, especially if the original disk had bad sectors or if the process took a long time.
In any case, it's a good idea to keep the original disk for a few days after cloning, in case you discover that you're missing a file or encounter a problem. This way, you can recover specific data without complications.
Do the HDD and SSD have to be the same size?
One of the most common questions is whether the old hard drive and the new SSD need to have exactly the same capacity . The short answer is no, but there are important nuances to understand before starting.
Most cloning tools, including Clonezilla, allow you to copy the contents of a smaller disk to a larger one without any problems . For example, you can clone a 1 TB HDD to a 2 TB or 4 TB SSD; the process will work, and you'll have extra space available on the new drive.
What you typically can't do is directly clone a 2 TB drive to a 1 TB drive if the amount of data or the number of partitions exceeds the size of the destination drive. In that case, the application will display an error or force you to first reduce the size of the partitions to fit on the smaller SSD.
When cloning from a smaller disk to a larger one, Windows often continues to show only the original size until you adjust the partitions . For example, if you copy a 1 TB HDD to a 2 TB SSD, after the process you'll see that the SSD appears to have 1 TB of capacity, and the rest is listed as "unallocated space."
That unallocated space isn't lost; it's simply not part of any active partition . To utilize it, you have two main options: create a new partition with that space or extend an existing partition to occupy the entire disk.
To manage it, open Windows Disk Management by right-clicking the Start button and selecting "Disk Management". There you will see the cloned disk with its partitions and, to the right, the unallocated space represented in black.
If you want a separate drive, you can right-click on the unallocated space and choose "Create new simple volume" . Windows will create a new partition and assign it a drive letter, so you'll have another drive visible in File Explorer.
If you prefer to consolidate all the space into a single drive, select the partition you want to extend (for example, C:) and choose the "Extend Volume" option . The wizard will then allow you to add the unallocated space, so the partition will occupy the entire disk.
How long does it take to clone a hard drive to an SSD?
The time required to clone a hard drive to an SSD depends on several factors, but the main one is the actual amount of data to be copied and the speed of the drives involved . Cloning 80 GB is not the same as cloning 900 GB, nor is it the same between two modern SSDs as between two older mechanical hard drives.
If you're cloning from one HDD to another, the process is usually slower because both reading and writing speeds are limited by the mechanical speed of the platters. In these cases, a large volume of data can take a considerable amount of time to complete.
When cloning from an HDD to an SSD, the time is usually reduced because writing to an SSD is much faster. The bottleneck will still largely be the read speed of the original HDD, but you'll still notice an improvement in time compared to copying to another HDD.
Cloning from one SSD to another is usually the fastest scenario , provided the data volume is similar. Transfer speeds can be very high, especially if the drives are connected via modern interfaces like NVMe or high-quality SATA.
Regardless of the type of drive, the wisest course of action is to take your time and let the process complete uninterrupted . Forcing a shutdown, moving cables, or tampering with settings while cloning increases the risk of errors and losing important data, which could force you to start the entire process over.
Final steps after cloning and additional uses
Once the cloning process is complete and the tool clearly indicates it, the next step is to turn off the computer and physically replace the old hard drive with the new SSD if the new one will occupy that internal space. This is very common in laptops and many desktop computers.
When replacing drives, it's recommended to connect the SSD to the same SATA port or slot as the old drive . This increases the likelihood that the BIOS will detect it without making any additional changes and boot directly from the new drive.
When you restart your PC, enter the BIOS or UEFI settings if necessary and verify that the SSD appears as the first boot option . If everything is working correctly, the system should load Windows from the SSD, displaying the same environment as before but responding much faster.
This same procedure is also very useful if you have several PCs with similar hardware and want to replicate the same configuration . You can prepare one computer with all the necessary programs and settings, clone its hard drive, and place the cloned drive in another cloned computer, thus achieving identical working environments in a short amount of time.
Remember that Clonezilla and the other programs we've mentioned aren't the only tools available. There are other alternatives such as Macrium Reflect, Acronis (in its various editions), Idrive, and different utilities specific to each manufacturer . The important thing is to make sure that the application you choose explicitly includes a full disk cloning function.
If you don't want to deal with cloning and partitioning, there's always the simpler (though less refined) option: connect both drives to the same PC and manually copy the data as if they were USB drives , or even upload the content to the cloud and download it later. However, these methods won't allow you to create a bootable operating system clone, only to move files.
With all of the above, you now have a good range of options for migrating your system from an HDD to an SSD without losing anything , from simple, guided solutions to more advanced tools like Clonezilla. By combining minimal preparation, a couple of checks, and some patience during the copying process, it's perfectly possible to migrate your computer to an SSD and extend its lifespan with significantly improved performance.
